
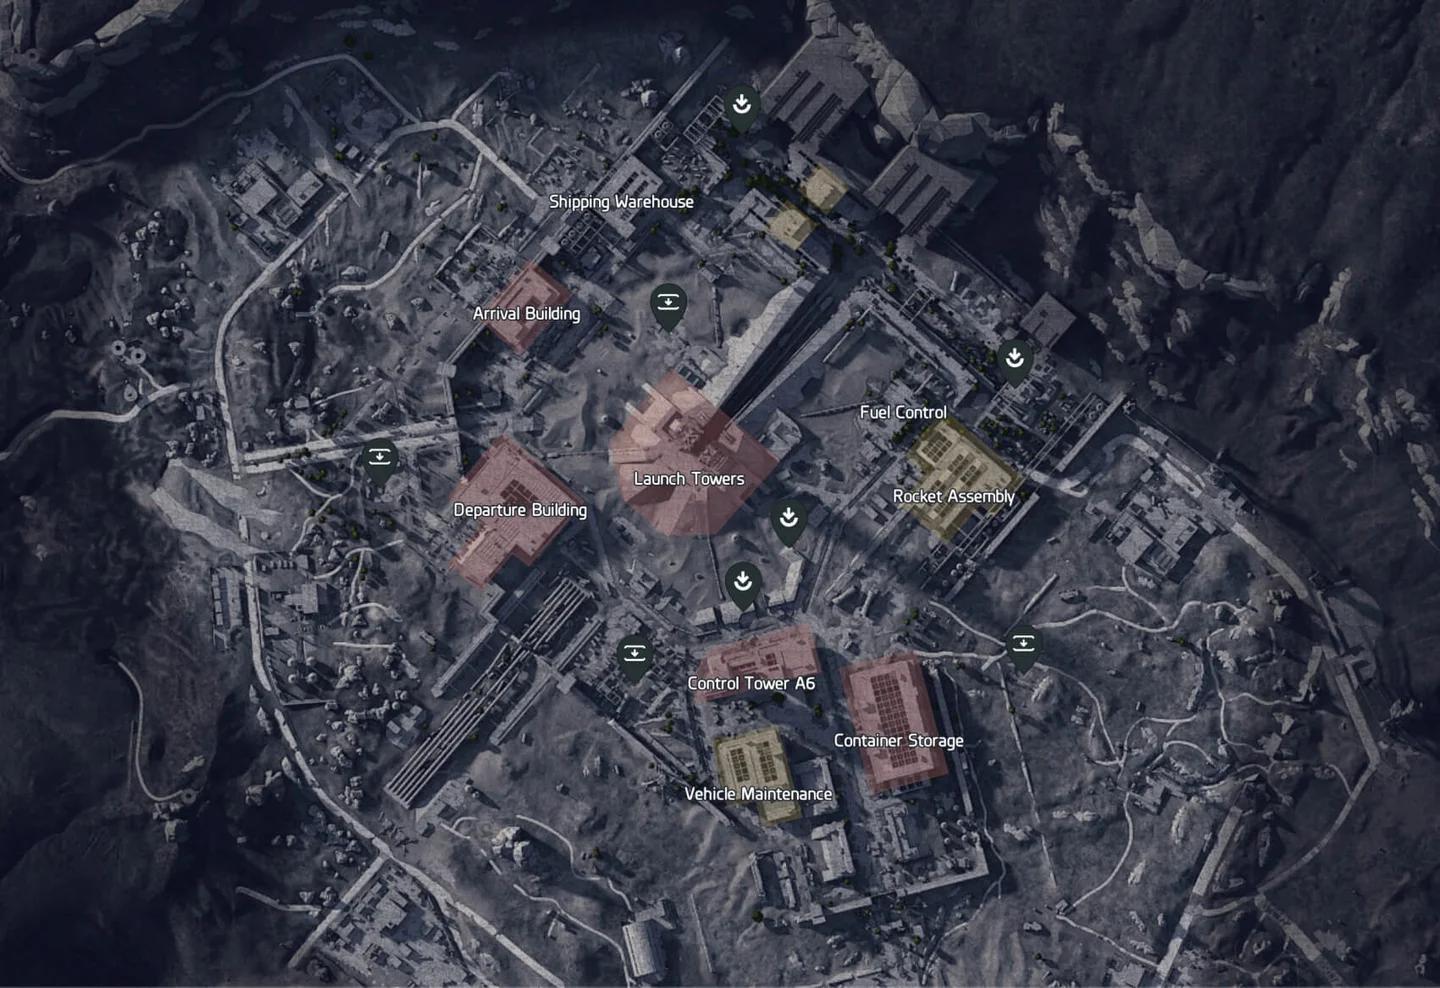
To find a Bastion in ARC Raiders, search the clearing between Control Tower A6, Container Storage, and Vehicle Maintenance in the Spaceport map. You can also locate these armored machines by checking the Checkpoint in Blue Gate or the lower level of the Loading Bay in Stella Montis.
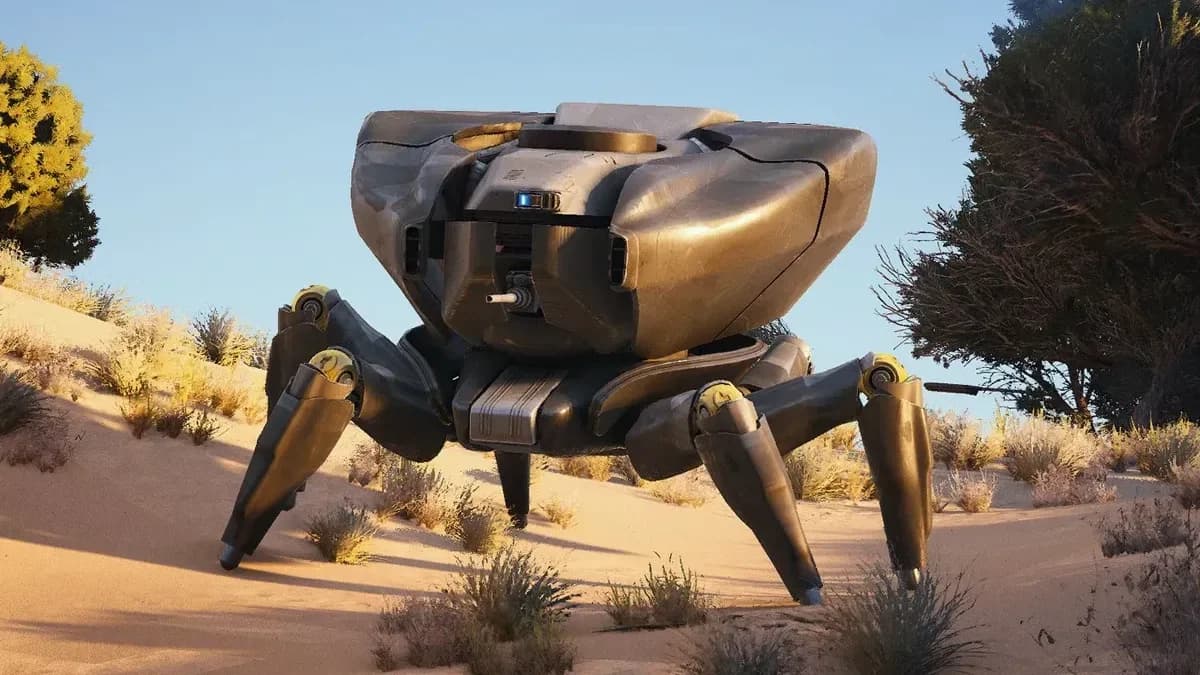
Spaceport is the recommended starting map because it combines several patrol areas with useful cover. Bastions are heavily armored, six-legged ground ARC armed with miniguns, so finding one in an exposed field can leave you with a difficult fight. Buried City and Dam Battlegrounds offer more search options, but you should choose your approach around nearby protection, not just the shortest path to the machine.
Bastion locations to search
These five maps offer different hunting conditions. Use the comparison to pick your destination, then check the patrol areas below.
| Map | Reason to choose it | Main drawback |
|---|---|---|
| Spaceport | Several search areas and useful firing positions | You may need to check more than one patrol zone |
| Blue Gate | A focused search around the central gate complex | The patrol can move between outdoor and underground areas |
| Buried City | Buildings provide places to break line of sight | Some approaches expose you to other Raiders |
| Stella Montis | A specific lower-level area to investigate | A prolonged fight creates an opportunity for PvP ambushes |
| Dam Battlegrounds | A backup option during suitable conditions | Limited cover around its search areas |


Spaceport: start near Control Tower A6
Begin in the clearing between Control Tower A6, Container Storage, and Vehicle Maintenance. The surrounding structures give you several ways to approach the patrol without committing to a fight in the open.
Spaceport’s main search areas
If that clearing is empty, check these other patrol areas:
- The large field southwest of Rocket Assembly.
- The field around the Launch Towers.
- The forested pathway northeast of Rocket Assembly.
- The northwest section of The Trench, below the North and South Trench Towers.
Around the Launch Towers, extend your search toward the space between the Arrival and Departure Buildings to the east. Treat these as areas to investigate, not exact points where a Bastion must be standing.
Choose your next stop based on your starting position. Crossing the entire map to follow a fixed route is less useful than checking a nearby patrol area from cover. The Trench is another option when you want a less busy approach, while the Control Tower A6 area remains the stronger starting choice for a dedicated hunt.
Blue Gate: Checkpoint and the Outer Gates
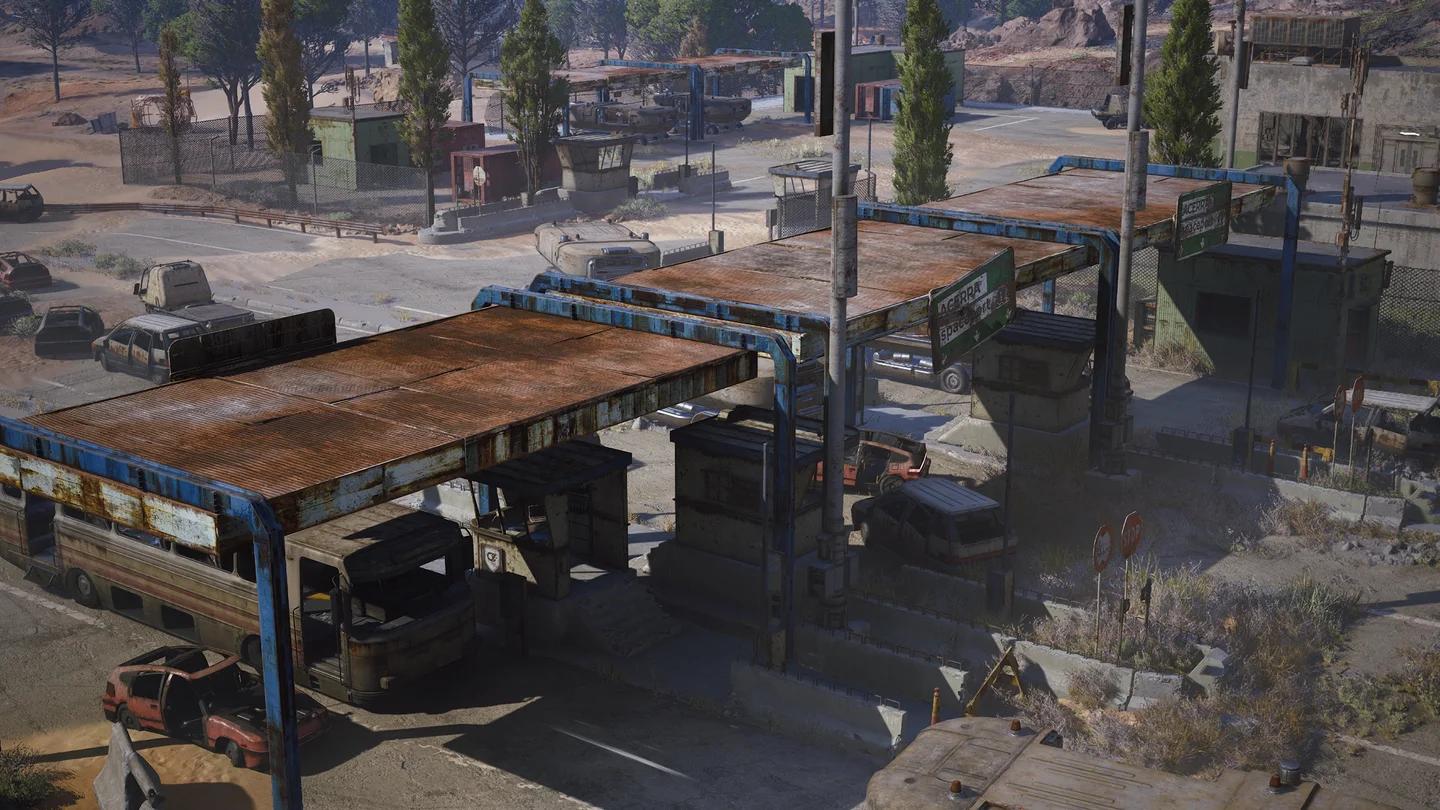
Search the car park just south of the Outer Gates, near Checkpoint in the center of Blue Gate. The Bastion can patrol beneath the gates and move into or out of the underground area.
Checkpoint and the Outer Gates
An empty car park is not enough to rule out the patrol. Check the entrance and nearby interior before leaving, keeping a clear retreat available as you move between levels.
Trapper’s Glade and the area near Ruined Homestead, southeast of Broken Earth, are additional possible patrol locations. Use those as backup checks if you are already nearby; Checkpoint is the more focused place to begin.
Buried City: Plaza Rosa and Marano Park
Look in the clearing between Santa Maria Houses and Plaza Rosa. The wider Main Street area near Red Tower is also worth checking as you follow the patrol through this part of the city.
Your other main search area is Marano Park in the north, particularly around the outskirts of its trees. Both areas have nearby windows and buildings that can help you avoid the minigun.
Prefer the Plaza Rosa clearing when you have a choice. Marano Park allows other Raiders to watch the fight from more directions, making it harder to focus on the Bastion without exposing yourself to another threat.
Stella Montis: the lower Loading Bay
Head to the northern portion of the Loading Bay’s lower level. Search the floor below, not just the upper walkways, because that is the Bastion’s patrol area.
This is a straightforward location to investigate, but it is a poor default farming choice if your priority is avoiding PvP. Other Raiders can attack while your attention and ammunition are committed to the Bastion.
Check nearby approaches before engaging. If you cannot find a protected firing position and a route away from the fight, leave the machine alone instead of forcing the encounter.
Dam Battlegrounds: Red Lakes and Hydroponics
Search around Red Lakes Balcony and the wider lake area, or the northern portion of the Hydroponics Dome Complex.
Red Lakes is the better fighting option of the two. The upper level between Testing Annex and Control Tower provides a position you can use to avoid minigun fire.
The surrounding open ground makes a direct approach risky. Locate your cover before moving close enough to start the fight, and do not assume that reaching the patrol area gives you a usable firing position.
How to track a Bastion patrol
Bastions move around their patrol zones. If you reach a named landmark and do not immediately see one, search the surrounding area before moving to another location.
Use this sequence to check without rushing into an exposed fight:
- Scan from cover. Look across the nearby clearing, street, or lower floor before crossing it.
- Listen for mechanical movement. A Bastion makes a distinct mechanized sound as it walks.
- Follow combat sounds carefully. Its whirling minigun noise can reveal a fight beyond your immediate view, but another Raider may already be there.
Finding an active battle does not mean you should join it immediately. Identify where the Bastion is facing and where the other players are positioned before revealing yourself.
What to bring for a Bastion hunt
Heavy Ammo weapons are practical choices against a Bastion. The Anvil, Ferro, and Bettina are suitable options, while the Hullcracker provides a Special weapon alternative against its thick armor.
For an Anvil run, bring at least 100 Heavy Ammo as a starting supply. That is preparation advice, not a guaranteed ammunition cost for the kill. Your weak-point accuracy and any other fights affect how much you need.
| Equipment | What it contributes | Planning note |
|---|---|---|
| Anvil, Ferro, or Bettina | Heavy Ammo fire against weak points | Carry enough ammunition for a sustained fight |
| Hullcracker | An option against heavy armor | Bring it only if you accept the risk of losing it |
| Wolfpack grenades | Another way to damage the Bastion | Multiple Wolfpacks are needed to take one down |
| Blaze Grenades | Fire damage over time | Use them to supplement your weapon damage |
Avoid building the entire attempt around a few ordinary grenades. The Bastion can absorb substantial damage, and running out of effective ammunition leaves you with little reason to stay near it.
Use cover and target the yellow weak points
Set up your firing position before you shoot. The Bastion’s warning sound precedes its minigun barrage, and standing in the open through that burst can quickly strip your shield and health.
Use the following attack cycle:
- Stay behind cover while the minigun fires.
- Use the short pause after the volley to take your shots.
- Aim for the yellow leg joints or the yellow port beneath the rear armor.
- Return to cover before the next barrage.
Destroying one of those weak-point sections briefly stuns the Bastion. Keep your shots concentrated on a vulnerable section instead of scattering them across its armored body.
With teammates, divide your positions so one player holds its attention while another gets an angle on the rear. Maintain cover on both sides; a flank is only useful if the player taking it can survive the next attack.
What to loot after defeating a Bastion
Check both the main wreck and smaller debris for a Bastion Cell. The cell can appear in either debris type, so searching only the largest piece can leave part of your loot unchecked.
If you are hunting for the quest, Settled in Full in ARC Raiders requires defeating a Bastion and delivering its cell to Tian Wen for 30 Raider Tokens. Keep that objective in mind before deciding what to carry out.
Other possible debris loot includes ARC Alloy, ARC Powercells, ARC Motion Cores, and Mechanical Components. The main wreck can also contain ARC Circuitry, an Advanced ARC Powercell, Medium Gun Parts, and Medium Ammo.
Check the surrounding approaches again before looting, especially if the fight attracted other Raiders. Once you have the cell you came for, prioritize getting it out over starting another lengthy fight.