
Make Gold Bars in Crimson Desert through Witchcraft or a Blacksmith, using one of three material combinations. The two Witch recipes require a learned alchemy formula and an NPC with the right crafting service. The Blacksmith offers a separate ore conversion.
Choose your method before gathering materials. Golden Apples keep the Gold Ore requirement low, while the alternative Witch recipe uses Brimstone, Mercury, and Silver Ore. The Blacksmith needs only one material, but consumes considerably more ore. Your existing inventory is more useful than a recipe’s reputation as the fastest option.
Gold Bar recipes and material costs
Each combination below produces one regular Gold Bar. Check the required ingredients and crafting service together, because the Witch and Blacksmith recipes appear in different menus.
| Method | Materials per Gold Bar | When to choose it |
|---|---|---|
| Witch, Golden Apple recipe | 3 Gold Ore + 1 Golden Apple | You already have the fruit and want to conserve ore |
| Witch, mineral recipe | 3 Brimstone + 3 Mercury + 10 Silver Ore | You have spare alchemy materials and want to avoid apple hunting |
| Blacksmith conversion | 100 Gold Ore | You have a large mining reserve and lack the Witch ingredients |
The table compares material requirements, not gathering time. A Golden Apple can become the main obstacle despite the first recipe’s small ore cost. Mercury can create the same problem for the second recipe.
Before committing your supplies, check your next equipment upgrade. Gold Ore also supports jewelry refinement, while Brimstone and Mercury have other crafting uses. Converting everything into bars can leave you short of an upgrade material.


Find and learn the Gold Bar formula
The Alchemy Formula: Gold Bar has two pickup locations: a hidden Witch’s Hideout south of Pailune and the Spire of Insight in Demeniss. Both provide the same formula, so you only need one copy.
Pailune Witch’s Hideout route
The hideout avoids the Spire’s object-placement puzzles. If you have already liberated Pailune and unlocked the city’s Abyss Nexus, use that fast-travel point as your starting location.
- Follow the main road south from the city, passing through the main gate.
- Watch the right side of the road for fallen logs beside a small cliff.
- Head up the slope toward the cliff and find the stone stairs leading down into it.
- Follow the stairs into the hidden cave.
- Turn right immediately after entering.
- Search the bookshelf on the right-hand wall, behind the other books, for the formula scroll.
The entrance has no map or minimap marker. Use the fallen logs and descending stone stairs as your landmarks. A nearby Tea Recipe is a separate pickup, so check the bookshelf carefully before leaving.
Spire of Insight route
The Spire of Insight contains another copy on a bookshelf in its upper section, beside the Celestial object. Reach that room by solving the tower’s illustrated object-and-pot puzzles.
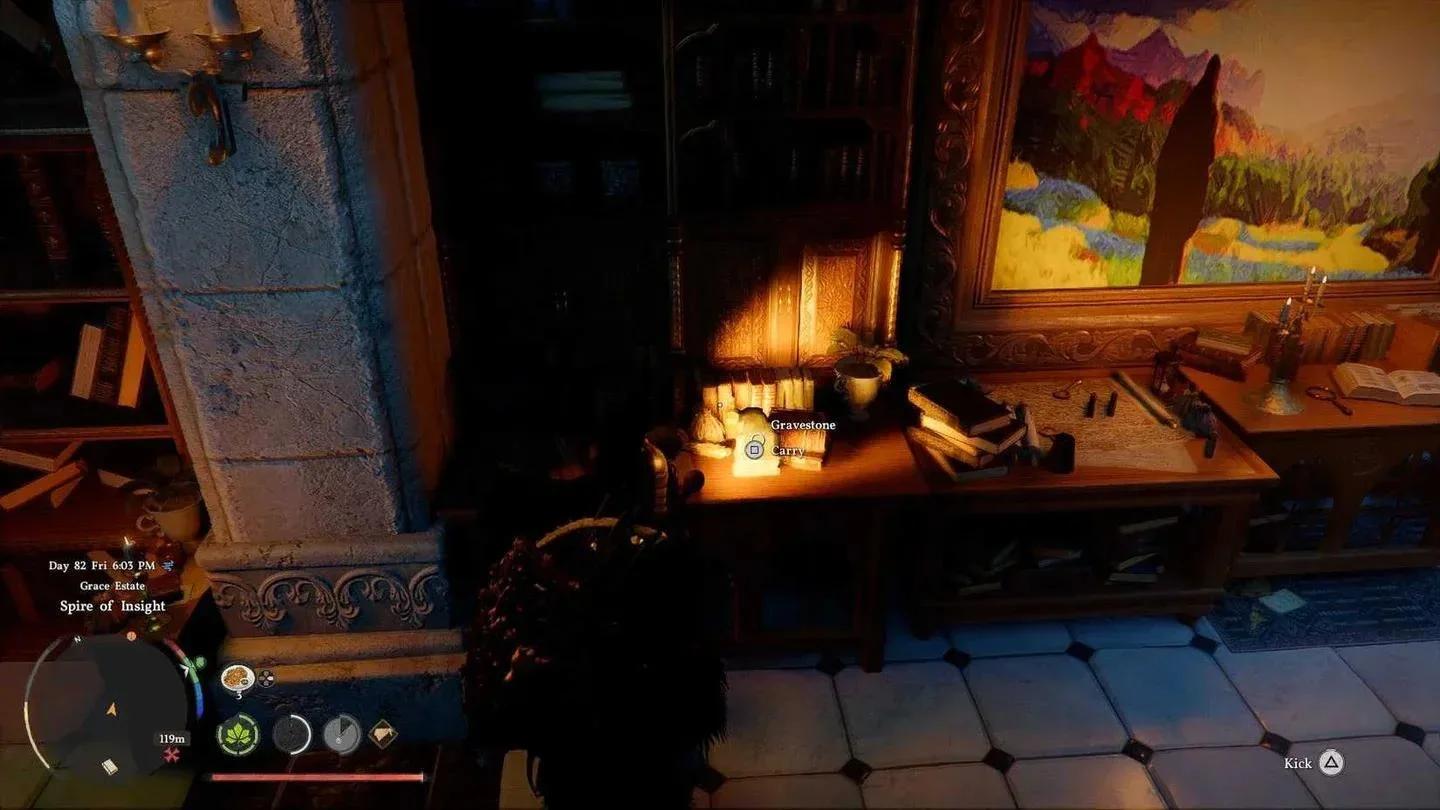
Spire of Insight interior
| Part of the route | Required action |
|---|---|
| Entrance | Burn the brambles with Blinding Flash using Focus Light, clear the bandits, and place the pebble in the front-door pot |
| Ground floor | Find the gravestone at the back of the room and put it in the central pot |
| Next puzzle floor | Collect the telescope and pen tip, then place them in the appropriate pot |
| Upper section | Inspect the bookshelf beside the Celestial object and collect the Gold Bar formula |
You can leave after collecting the document. Completing the remaining tower puzzles is a separate objective that opens the Abyss fast-travel point at the top.
Register the formula with your Lantern
Picking up the scroll and learning its contents are separate actions. Equip the document from your inventory, shine your Lantern on its glowing blue text, and complete the interaction. Open Knowledge afterward to confirm that the formula is registered.
Gold Bar alchemy formula
Once learned, the formula remains registered. You do not need to keep carrying the physical document to use the Witch recipes.
Craft Gold Bars at the correct NPC
Learning the formula does not make every crafting interaction suitable. For Witchcraft, speak directly to a Witch who offers the required service. For the ore-only conversion, use a Blacksmith.
Witch crafting steps
The Witch in Witches’ Woods, southwest of Greymane Camp, is a location to check. Inspect the NPC’s services first: an apprentice may have a more limited selection than another Witch.
- Speak directly to the Witch.
- Select Craft Abyss Gear.
- Move across the crafting categories to Special Items.
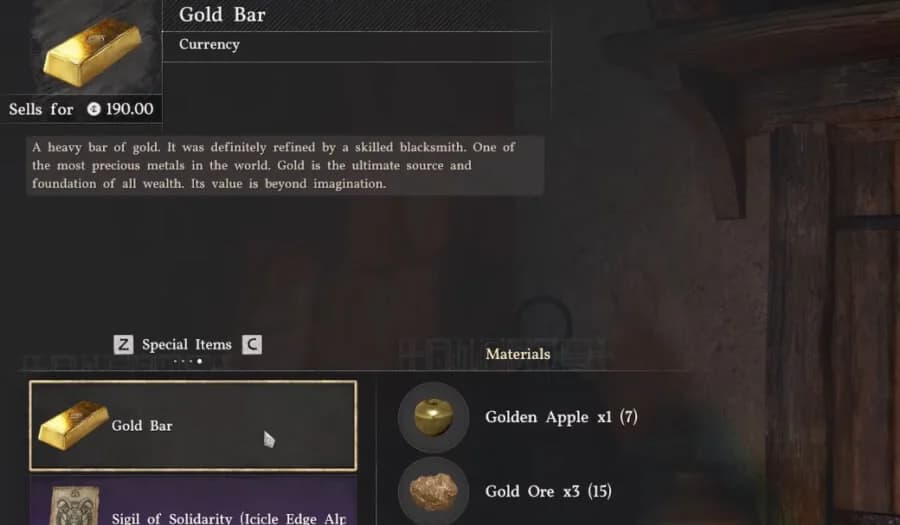
- Select Gold Bar and choose the ingredient combination you prepared.
- Check the material preview, then confirm the craft.
The Gold Bar entries belong to the Witch’s special-item crafting menu. An ordinary cooking interaction is not the menu you need.
If the service is absent, try another Witch with the appropriate menu. If the service exists but the recipe does not, check the formula’s registration before travelling to its other pickup location. Collecting a duplicate scroll will not fix an unfinished Lantern interaction.
Blacksmith crafting steps
For the ore-only method, speak to a Blacksmith and open Crafting → Special Items → Gold Bar. Check the ore requirement shown in the preview and confirm when you have enough.
If the Hernand Blacksmith does not display the entry, check the Greymane Camp Blacksmith. The conversion is separate from Witchcraft, so searching the Witch’s categories will not reveal it.
Where to gather Gold Bar materials
Gather the ingredients for one chosen recipe before returning to the crafting NPC. Switching between recipes halfway through a trip can leave you with several incomplete material sets.
Gold Ore: start at Anvil Hill
Anvil Hill Cave’s canyon entrance in southwestern Demeniss is a useful starting point for gathering Gold Ore in Crimson Desert. Look for the large golden boulder blocking the passage at the bottom of the canyon.
Break the obstruction with Force Palm, then search the cave for gold-colored deposits. A regular Pickaxe can harvest the ore; the Mining Knuckledrill is another mining tool option.

Anvil Hill’s gold deposits
For a wider mining route, complete Estate in Dismay, which involves liberating Karin Quarry and defeating Marni’s Excavatron. Use the rewarded Gold Vein Map from your inventory to reveal additional Gold Ore locations. Several discovered mines are more useful for the Blacksmith method than repeatedly checking one emptied cave.
Golden Apples: look for the right hedgehog
Search for hedgehogs carrying a glowing fruit when collecting Golden Apples in Crimson Desert. Ordinary apple trees do not supply this ingredient.
Useful search areas include:
- Grey Rock Dock: grassy areas around the river between Hernand and Demeniss.
- Tinkerton Fields: white-flower patches north of Tinkerton in Delesyia.
- Tariv: terraced flax and cotton fields in northern Demeniss.
Use an arrow to knock the fruit loose, then check the ground for the dropped apple. Read the pickup prompt before taking it. If it displays Steal, equip a mask and avoid nearby witnesses.
Move to another known field if you cannot find the special hedgehog. The recipe’s low ore requirement does not make waiting indefinitely at one spawn area worthwhile.
Brimstone, Mercury, and Silver Ore
The mineral-only Witch recipe is most convenient when these resources are already part of your exploration route. Enemy drops can supply the specialist materials, while Silver Ore comes from mining deposits.
| Material | Collection option | Main limitation |
|---|---|---|
| Brimstone | Enemies around Brimstone Springs near Hexe Sanctuary, or stone crabs near Brimstone Lake Watchtower | Drops are not guaranteed |
| Mercury | Rare drops from Ants around Gorthak | Gathering enough can take several encounters |
| Silver Ore | Deposits in the cave behind Three Saints’ Falls in Hernand | You need to enter the waterfall cave and clear its blocked passage |
At Three Saints’ Falls, climb to the rocky ledge halfway up the right waterfall. Use Stab Level 1 or higher to pass through the water, then break the deeper passage’s boulder with Force Palm. Mine the deposits inside.
Mercury has a later collection route through Delesyia’s research. After Chapter XI: Truth and Reality, progress through the relevant Basic Science and Mercury Research at the Delesyian Institute to obtain the Electromagnetic Frostspitter. It freezes Liquid Mercury Pools so you can collect the chunks after the frozen surface breaks. Pools near Hexe Sanctuary and Silver Wolf Mountain provide places to use it.
Spare Hides offer another possibility at Scholastone Research Center. Building Trust with the scholar orcs can produce gifts containing Brimstone or Mercury, but Rubber is also a possible reward. Do not count on a specific material from each gift.
Decide what to do with your finished Gold Bars
Keep enough bars for your next Platinum craft before committing spare bars to bank investments in Crimson Desert. Platinum requires its own learned formula, plus 1 Gold Bar, 4 Brimstone, 3 Mercury, and 2 Holy Water.
For an immediate Silver payout, compare the Bank’s exchange preview with an ordinary merchant’s sale preview before confirming. Investment is a separate decision, with risk and withdrawal terms to check before depositing materials you may need soon.
Check the finished item’s full name before banking or reserving it for crafting. A Crude Gold Bar is separate loot, not the regular Gold Bar produced by these recipes.