
Free kicks are the most wasted opportunity in EA Sports FC 27. Most players step up, guess at the power, and watch the ball sail into the stands. The system rewards consistency once you understand what each input actually controls, and players who put the work in turn every foul in the final third into a genuine scoring chance.
The free kick framework in FC 27 carries over from FC 24: you place a reticle on the goal, drag a marker across the face of the ball to set spin and lift, then hold for power. The part most players miss is that the strike marker and the power bar interact directly. Identical aim produces completely different results depending on where you contact the ball, which is why so many free kicks look right but land wrong.
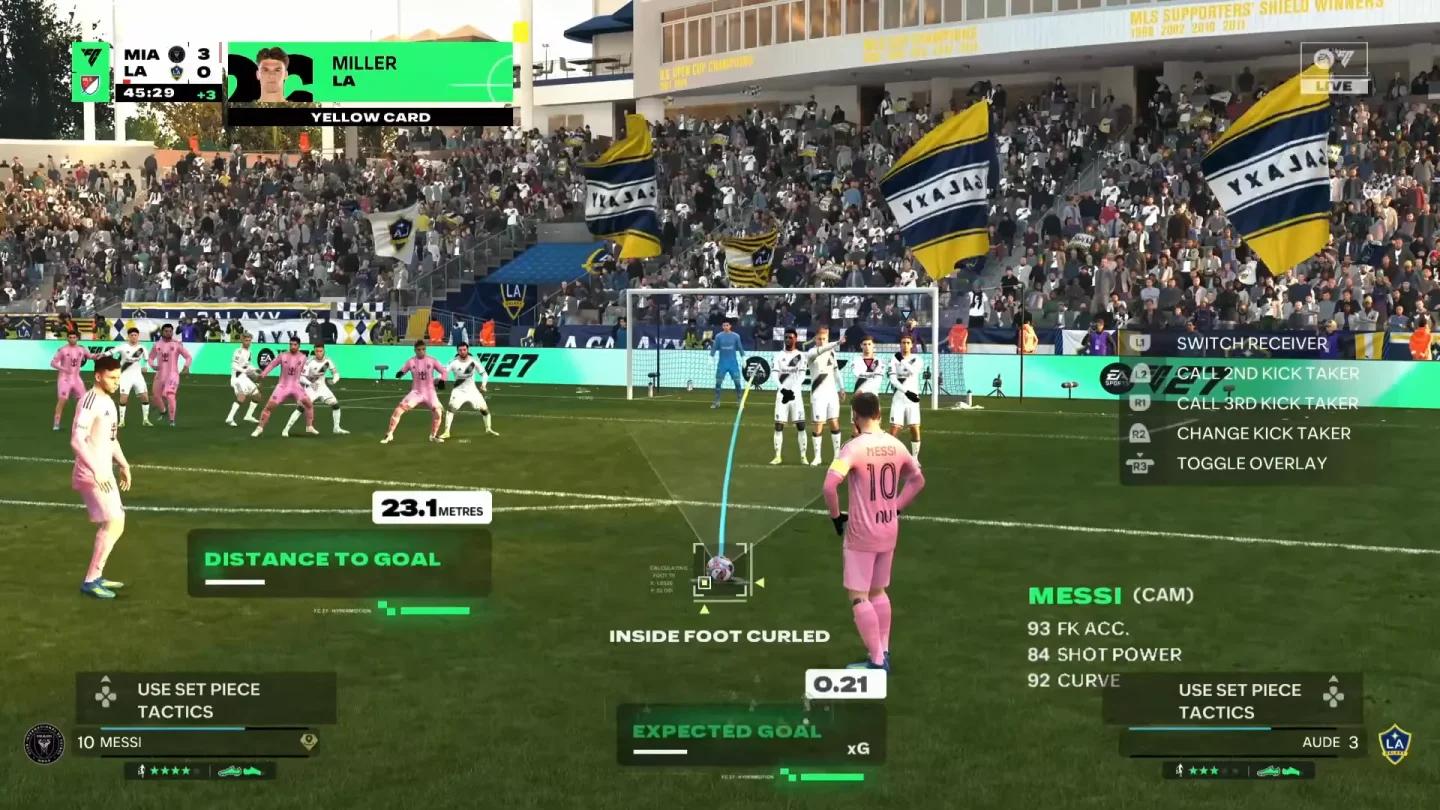
Messi lines up from 22 yards
How the free kick system actually works
Four inputs control every free kick, and the order you apply them matters.
Aim first. The reticle sits on the goal face and you move it to the corner you want. Think of it as a destination marker for a clean, spin-free strike. The ball goes there if everything else is neutral.
Strike marker second. A point appears on the ball itself. Shifting it left produces rightward curl. Shifting it right produces leftward curl. Placing it low adds lift. Dead centre with high power gives a knuckleball. High on the ball keeps the shot flat and driven. This single input explains more missed free kicks than any other variable, yet most players never consciously adjust it.
Power third. Hold the shoot button and release at your chosen level. The bar fills quicker than it does during open play, and the amount that feels natural under match pressure is almost always excessive for a stationary dead ball.
Run-up last. The approach angle can be adjusted before contact. A wider angle adds a touch more curl. Stick with the default until you are scoring regularly, then experiment with it.
Timed finishing works on free kicks the same way it does on open-play shots. A second press that lands in the green window produces a cleaner, harder strike. Miss the window and the kick is worse than if you had not attempted timing at all. Get the power dialled in first. Add timed finishing once you are converting without it.

What to read before you take the kick
Two seconds of observation before you aim saves you from picking the wrong technique entirely. Three things are worth checking.
First, keeper position. He covers one side of the goal more than the other. The corner he is furthest from is where you aim. Straightforward in theory, consistently skipped in practice because players are already holding the power bar.
Second, which side the wall covers. The wall lines up to block the near post relative to the ball position. From a wide-left foul it protects the left post, making the far corner the keeper's responsibility. From a central position it covers whichever side the keeper is not standing on.
Third, wall size. Fewer defenders in the wall means a narrower barrier and more room to go around it rather than over it. A five-man wall from 22 yards makes lifting over the top almost compulsory. A two-man wall from 30 yards leaves a gap to drive through past the end.
Put those reads together and the decision simplifies: aim at the corner the keeper is furthest from, use the strike marker to bend the ball away from the wall on the way there.
How to score free kicks from every distance
Distance picks the technique. Everything else follows.
Inside 20 yards: curl it over the wall
This close, the wall dominates the goal and the keeper covers most of what remains. Power is your enemy here. Use a side strike with the marker placed slightly low on the ball, aim at the top corner the keeper is furthest from, and keep the bar at around a third to two fifths full. The ball climbs over the wall and drops inside the post because it never had enough pace to clear the crossbar entirely.
A taker with high Curve makes this close to automatic. A player with average Curve will still clear the wall but the ball may not dip in time, so aim for the lower portion of the top corner rather than right at the bar.
For shots from the right side with a right-footed player, align your aim slightly off the left shoulder of the fourth wall player. From the left, shift to their right shoulder. The referee's spray line is a useful reference for locating that sweet spot.
20 to 28 yards: the primary scoring range
This is where most direct free kicks get scored. Two techniques apply.
The curled ball uses the same side-strike approach as the close-range version but with more power, roughly half the bar, to cover the extra distance. Aim for the top corner and place the marker a fraction low on the ball.
The driven ball is for situations where the keeper has left a low corner open. Strike higher on the ball, keep the marker near centre, and use half to three fifths of the bar. The ball stays flat and quick. This only works when there is a gap past the end of the wall, so count the defenders before committing to it.
From 25 to 30 metres specifically, the curled approach still applies but the power needs to climb to around 3 to 3.5 bars. Keep your aim within roughly two ball-lengths of the spray endpoint and the ball will find the corner reliably from wide angles. From directly in front, top-rated keepers read this more consistently, so the angled position is where it pays off most.
28 yards and beyond: knuckleball or power strike
Curl loses energy from this range. The ball either dies short or floats straight into the keeper's hands. The better option is a strike through the centre of the ball with the bar at three quarters or more. With the marker at dead centre or fractionally below, the ball travels with minimal spin and shifts late in flight, which is what makes it difficult to read.
Aim a little inside the post rather than at the corner, because a knuckleball cannot be placed as precisely as a curled ball. Use a player with high Shot Power. With a weak striker it is just a fast, straight shot the keeper tracks from start to finish.
Beyond 30 metres, even the best keepers in the game can produce saves from angles that look impossible after a seemingly perfect strike. Long-range free kicks are low-percentage regardless of technique. If you are attempting one, pick a player with the Dead Ball PlayStyle, aim two players off the barrier, and accept that misses will outnumber goals.
Wide angles: cross or go short
From a tight angle near the byline, a direct attempt is low percentage even for a specialist. Play it as a cross instead. Aim at the penalty spot or the back post, strike slightly under the ball so it lifts, and use medium power. Your tallest players attack it the same way they would a corner.
The short option is underused at most levels. A quick pass to the player standing over the ball changes the angle and lets you cross from a better position or run at a defender who has not set. It produces a real chance far more often than a shot from the corner flag.
Power settings by distance and technique
The figures below are starting ranges, not fixed rules. A taker with high Shot Power gets more out of the same fill, so find your specific taker's number in the arena and remember it.
| Distance | Technique | Strike marker position | Power range |
|---|---|---|---|
| Inside 20 yards | Curl over the wall | Side of ball, slightly low | Around one third, never past two fifths |
| 20 to 28 yards | Curled top corner | Side of ball, fraction low | Roughly half the bar |
| 20 to 28 yards | Driven past wall | Centre to upper centre | Half to three fifths |
| 28 yards and beyond | Knuckleball | Dead centre or slightly below | Three quarters or more |
| 28 yards and beyond | Power strike | Upper centre, no side | Around two thirds |
| Wide angle | Cross to back post | Under the ball for lift | Medium, enough to reach far post |
| Wide angle | Short pass | Not applicable | Tap only |
What attributes actually matter
Four stats determine how good a taker is, and they do different jobs.
Free Kick Accuracy is the headline number. It controls how close the ball lands to your aim point and how much room for error you have on the strike marker placement. No other stat on this list matters more.
Curve determines how tightly the ball bends. High Curve lets you clear a close wall and still bring the ball back down under the bar. Low Curve means you need to hit the corner more exactly because the ball will not bend its way home on its own.
Shot Power changes how the power bar behaves for each individual player. A high Shot Power taker needs less of the bar to produce the same result, which makes the knuckleball and driven strike significantly easier to calibrate.
Dead Ball PlayStyle does more than the raw number implies. A taker who has it bends the ball more sharply and keeps it on target from further out. Between two players with similar accuracy, the one with this trait is the better pick.
Best free kick takers in EA FC 27
Lionel Messi leads all takers at 93 Free Kick Accuracy. The gap between him and the next tier is genuine. Alejandro Grimaldo sits at 92 and is the standout option for wide-left deliveries, turning angled positions into direct scoring chances as easily as crosses. James Ward-Prowse follows at 90, and then a cluster including Julián Álvarez, Dušan Vlahović, and Dominik Szoboszlai are tied at 89.
Men's takers ranked by Free Kick Accuracy
| Player | Free Kick Accuracy |
|---|---|
| Lionel Messi | 93 |
| Alejandro Grimaldo | 92 |
| James Ward-Prowse | 90 |
| Dominik Szoboszlai | 89 |
| Dušan Vlahović | 89 |
| Julián Álvarez | 89 |
| Ángel Di María | 88 |
| Cristian Biraghi | 88 |
| James Maddison | 87 |
| Paulo Dybala | 87 |
| Bruno Fernandes | 86 |
| Anton Stach | 85 |
| Hakan Çalhanoğlu | 85 |
| Trent Alexander-Arnold | 85 |
| Kevin De Bruyne | 83 |
For specialist roles by position: Grimaldo (92) is the clear pick for wide-left free kicks. From the right channel, Szoboszlai and Trent Alexander-Arnold both curl confidently with their inside foot. Álvarez and Vlahović cover central positions from 20 to 25 yards, where their Shot Power lets them drive through a jumping wall rather than lift over it. Bruno Fernandes, Maddison, and Dybala are the options for edge-of-the-box dead balls from central positions just outside the D.
If you want to see how these takers fit into a complete squad setup, the EA FC 27 best formations guide covers how to position set-piece specialists within your tactical shape.
Women's takers ranked by Free Kick Accuracy
The women's pool shares the same Ultimate Team base and the same accuracy scale, so these takers work in identical set-piece situations.
| Player | Free Kick Accuracy |
|---|---|
| Claudia Pina | 84 |
| Olivia Moultrie | 84 |
| Sherida Spitse | 84 |
| Alexia Putellas | 83 |
| Nerea Eizagirre | 83 |
| Manuela Giugliano | 82 |
| Mapi León | 82 |
| Carolin Simon | 81 |
| Chloe Kelly | 81 |
| Ángela Sosa | 80 |
How to score a Trivela free kick
The Outside Foot Curled technique, known as the Trivela, produces a flight path the keeper has a harder time reading because the ball bends in the opposite direction from a standard inside-foot curler.
For a right-footed player: move the right stick all the way to the left until the free kick type label changes to Outside Foot Curled. Use the left stick to set direction. Hit around 3.5 bars of power. FC 27 requires noticeably more power on Trivela free kicks than previous entries, so do not underhit it. Get the angle, spin, and power calibrated and the ball bends around the wall with the outside of the foot.
Julián Álvarez is the go-to example for this technique, combining an 89 Free Kick Accuracy rating with the natural foot position that makes the Trivela work from Atlético Madrid's left-channel set-piece spots.
How to set up your takers before the match
Assigning takers in the squad screen before kick-off means you are not scrolling through your roster with the clock running when a foul drops in the 88th minute.
- Open the set-piece menu in your squad screen before the match.
- Assign a left taker and a right taker separately.
- The game auto-selects the correct foot for the angle, so your highest-accuracy option is available for each foul without manual switching.
- During a match, use RT / R2 to switch to your designated taker if the game has not auto-selected them.
How to build a practice routine that sticks
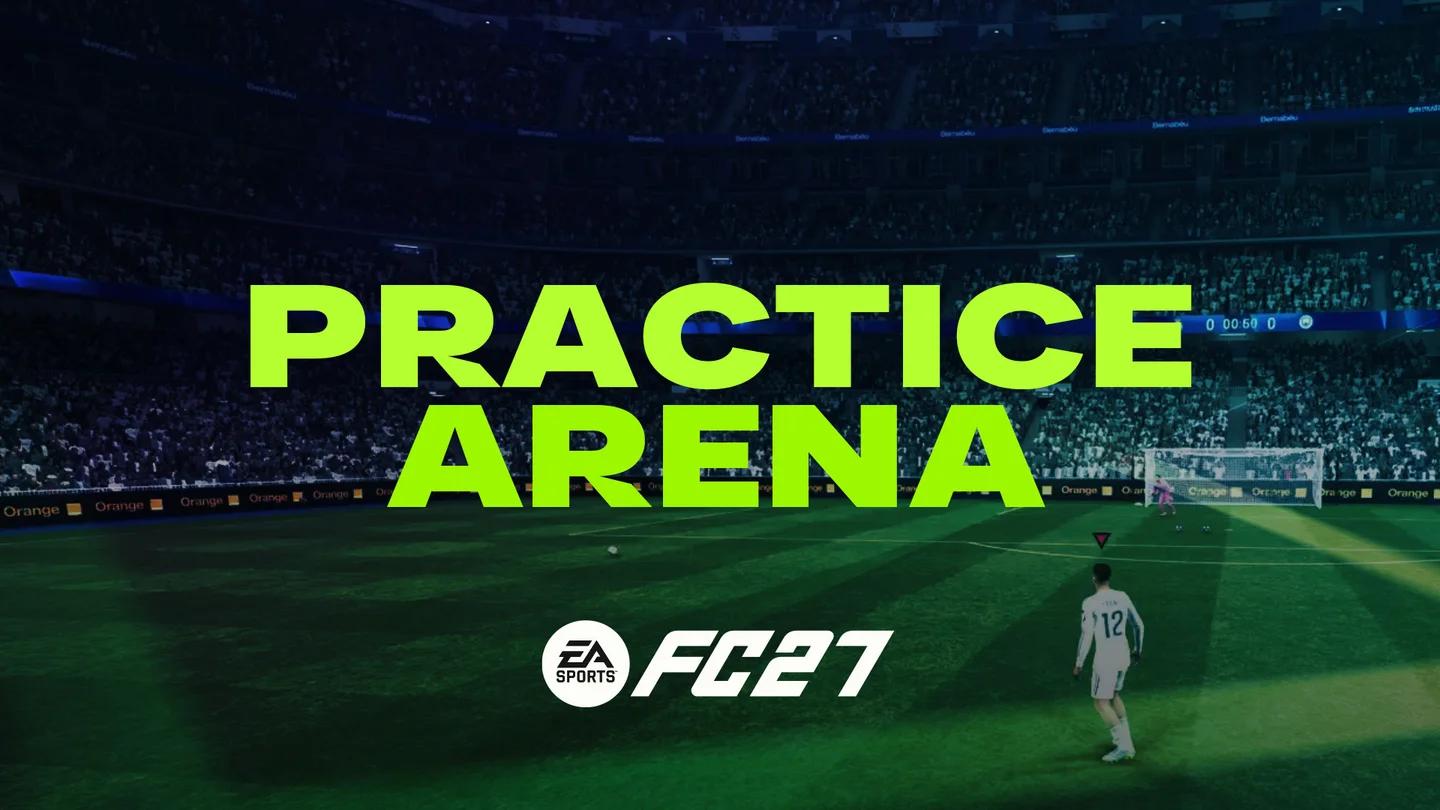
Matches will not fix your free kicks on their own. The arena and set-piece practice mode are the right tools because they let you repeat the exact same kick without anything else demanding attention.
Start with one distance and one technique. Pick 22 yards, slightly to the right of centre, and the curled top-corner ball over the wall. Take a set of attempts at a third of the bar, another set at two fifths, another at half. You will find the exact fill level where the ball starts clearing the crossbar for your specific taker, and that number is what you carry into matches.
Once that is locked in, shift the ball position. Try the same kick from the left, from straight on, from wider. Notice how the wall and keeper adjust and how much your aim needs to change. Keep the power constant. Changing one variable at a time is how you isolate what is actually working.
Only after that should you introduce the knuckleball from 30 yards, and only then add timed finishing on top. Ten minutes of this before a competitive weekend is enough to build the muscle memory that pays off when a foul drops in a tight game.
Practice Arena
Common mistakes that cost goals
The mistake most players make is applying the same power regardless of distance. A setting that works from 25 yards clears the bar from 18. A technique that scores from a wide angle gets saved comfortably from straight on.
The second mistake is ignoring keeper position entirely and aiming at a favourite corner out of habit. That approach scores against average keepers and gets stopped by good ones.
The third mistake is adding timed finishing before the untimed technique is consistent. Layering timing on top of a shaky power read makes both problems worse at once.
For more ways to put the ball in the net once you are past the wall, the EA FC 27 shooting guide covers low driven shots, power shots, and near-post finishes in open play.
FAQ
What is the best distance to score a free kick from in EA FC 27?
Between 20 and 26 yards with a slight angle is the most reliable range. Far enough for a curled ball to clear the wall and dip under the bar, close enough that a driven strike still beats the keeper. Straight-on kicks from 30 yards and beyond are the hardest to convert consistently.
How do you score a Trivela free kick in EA FC 27?
For a right-footed player, move the right stick all the way to the left until the free kick type shows Outside Foot Curled. Use the left stick to set direction and hit around 3.5 bars of power. FC 27 requires more power on Trivela free kicks than previous entries, so do not underhit it.
Why do my free kicks keep going over the bar?
Power, almost every time. The bar fills fast and the amount that feels right in open play is far too much from a dead ball. Curled free kicks inside 25 yards need roughly a third to a half of the bar. Striking the bottom of the ball adds lift on top of that, which compounds the problem.
Which attributes matter most for free kick takers?
Free Kick Accuracy is the headline stat, then Curve for anything you want to bend, then Shot Power for driven and knuckleball strikes. The Dead Ball PlayStyle on top of good base numbers makes a real difference to how tightly the ball bends and how much margin you have on power.
Should I use timed finishing on free kicks?
Yes, once your untimed routine is consistent. A press in the green window gives a cleaner, harder ball. A mistimed press makes it worse than not attempting timing at all. Get the power right first, then layer in the timing.
For more on building a complete squad around your set-piece specialists, including striker options that can double as free kick threats, check out the best players for the Nine Duty Evolution and the full EA Sports FC 27 guides collection covering everything from FUT builds to Career Mode tactics.