
To swim faster in Grand Theft Auto 6, click the left stick while moving, then dive after stamina runs out to keep swimming quickly using lung capacity.
That input applies to the default controller layout. Other control schemes change the buttons for speeding up, diving, and surfacing, so check your layout before starting a long crossing. Managing the change from surface swimming to underwater movement lets you extend your fast pace, but you still need enough air to return to the surface.
Swimming controls
Check Control Scheme in your settings before using the inputs below. The game offers Default, Classic, and Left-Handed layouts, and their swimming controls differ.
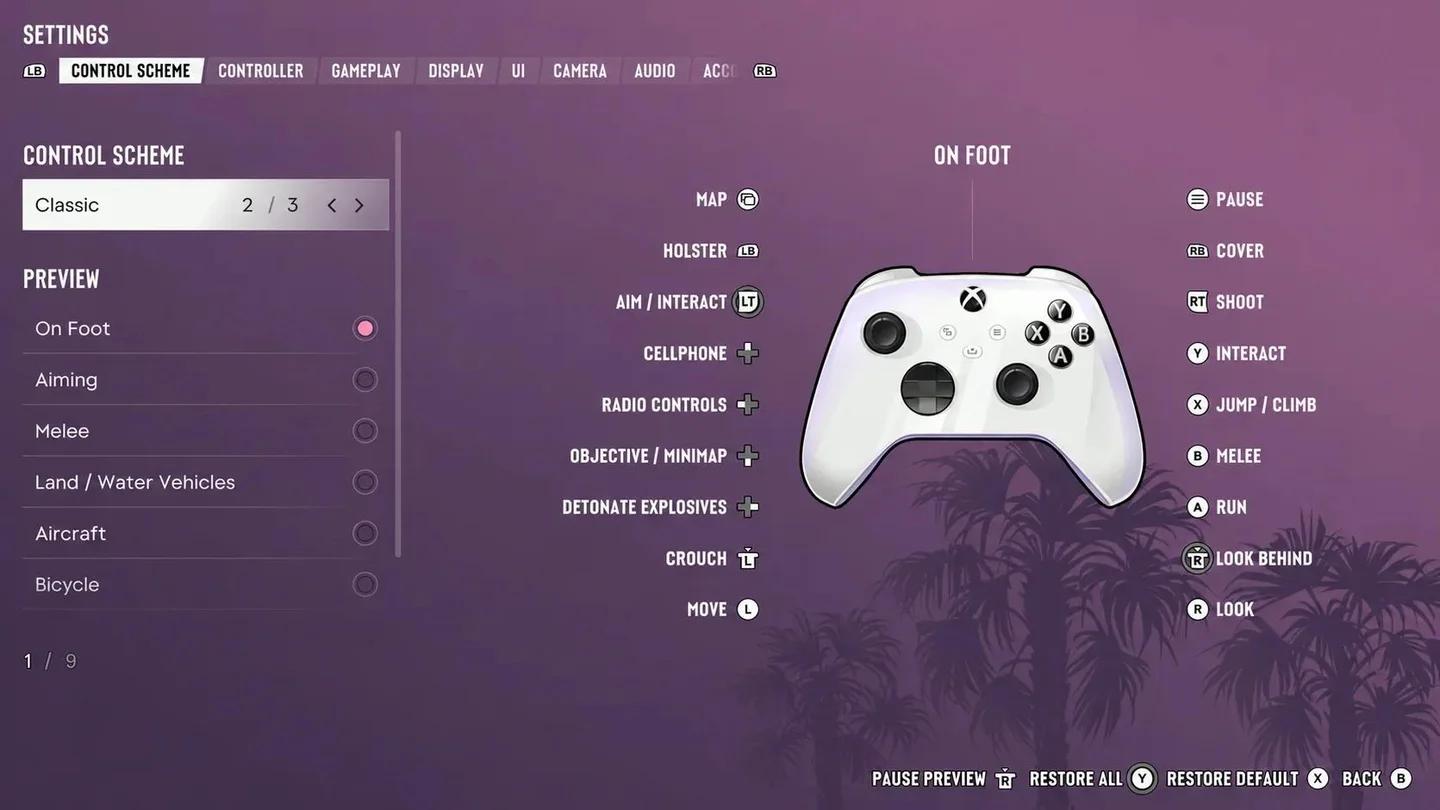
Controller layout options


Default controls on PlayStation 5 and Xbox
These are the swimming inputs for the default PlayStation 5 and Xbox Series X|S layouts. A stick click means pressing the stick inward, not simply pushing it in a direction.
| Action | PlayStation 5 | Xbox Series X|S |
|---|---|---|
| Move | Left stick | Left stick |
| Look | Right stick | Right stick |
| Swim faster | L3, left-stick click | LS, left-stick click |
| Dive | R1 | RB |
| Surface | Cross (X) | A |
| Aim or strafe | Hold L2 | Hold LT |
| Look behind | Hold R3 | Hold RS |
Keep the speed and surface inputs separate. On the default layout, the bottom face button brings you upward, so repeatedly pressing it underwater will interfere with a level crossing.
Classic and left-handed controls
On PlayStation 5, Classic assigns Swim Faster to Cross (X) and Surface to Square. Diving remains on R1.
The Left-Handed layout moves directional movement to the right stick. Fast swimming uses R3 on PlayStation 5 or the right-stick click on Xbox, while diving moves to L1 or LB, respectively.
Choose the layout whose movement and camera inputs feel comfortable. Learn its dive and surface buttons together, since both are needed to manage an underwater crossing.
How to increase swimming speed
Activate both speed increases
Moving the stick steers your character, but the fast-swim action increases your pace. The swimming tutorial also allows a second press to speed up further.
Use this sequence when you enter the water:
- Push the movement stick toward your destination.
- Press your layout's fast-swim input to increase speed.
- Press it again to increase your pace further.
- Watch the stamina meter while you continue across the surface.
If you're struggling with slow movement despite steering correctly, check the swimming bindings for your selected layout. The control used for sprinting in an older game may have a different job here.
Dive after surface stamina runs out
Fast surface swimming consumes stamina. Once that resource is empty, diving lets you swim at top speed again because underwater movement uses lung capacity instead.
Use this switch to extend a crossing when land is still ahead. You are spending a second resource, not removing the limit on fast movement. Judge whether the underwater distance you can cover is worth using some of your breathing reserve.
For a straightforward trip toward shore, there is little reason to descend toward the seabed. Keep your underwater route shallow enough that returning to the surface stays a short trip.
Stamina and underwater limits
Leave air for the return upward
Your lung-capacity bar becomes the meter to watch once you are submerged. Start heading up before it is exhausted, particularly if you have descended below a wreck or another underwater landmark.
A deep route adds vertical travel to your return. Air spent reaching the surface is air you cannot spend moving horizontally toward your destination, so depth is a practical cost even when your swimming pace is high.
Treat the dive as extra time at speed. Avoid planning a crossing around an endless surface-and-dive loop, and make your next move based on the meters you can actually see.
Train stamina between trips
Running and swimming contribute to stamina training. You can also use the boxing bag at your safehouse for cardio, making it a useful stop before heading out to explore.
Strength and stamina gains are restricted to certain intervals. Take workout opportunities when they are available instead of expecting uninterrupted progress from one extended exercise session.
How to reach shore safely
Set your destination before committing
Pick a visible stretch of land before beginning a long swim. A clear destination makes it easier to keep moving in one direction while checking your remaining resources.
You can hold D-pad Down to open Quick Navigation and mark a nearby point of interest. If your chosen landing spot has no marker, open the full map and place a custom marker before setting off. Use it to keep your destination clear without relying on an underwater landmark.
Make each underwater leg serve the crossing. Detouring toward the bottom to investigate something uses breathing reserve and adds a return ascent before you can reassess the shoreline.
Separate treasure searches from water crossings
Shipwreck diving unlocks early and involves using a metal detector to locate treasure. If you stop to search, account for that time separately from the distance you still need to swim.
Before leaving land for a longer diving trip, save your Grand Theft Auto 6 progress. Keep the search focused by using the metal detector instead of spending your breathing reserve circling the wreck at random.
Leave the wreck while you still have air for the ascent. Once you reach the surface, check your position and choose the route back to shore before starting another dive.