

Cartridges are the backbone of every character build in Neverness to Everness. Pick the wrong set and you're leaving a shocking amount of damage and utility on the table. Pick the right one and your team starts hitting significantly harder from the moment you equip them. This tier list covers all Cartridges available in Version 1.0, ranked by how much they contribute across damage, buffing, and survival roles.
What are Cartridges and how do they work?
Cartridges function as equippable gear sets in NTE. Each set has two bonus thresholds: an Epic (2-piece) effect that activates with two matching pieces, and a Legendary (4-piece) effect that unlocks the full power of the set. The 4-piece effect is almost always what you're building toward, since that's where the meaningful combat bonuses live.
Sets are divided into three functional roles: Damage, Buff, and Survival. Knowing which role your character fills on the team is the first step to choosing the right Cartridge.
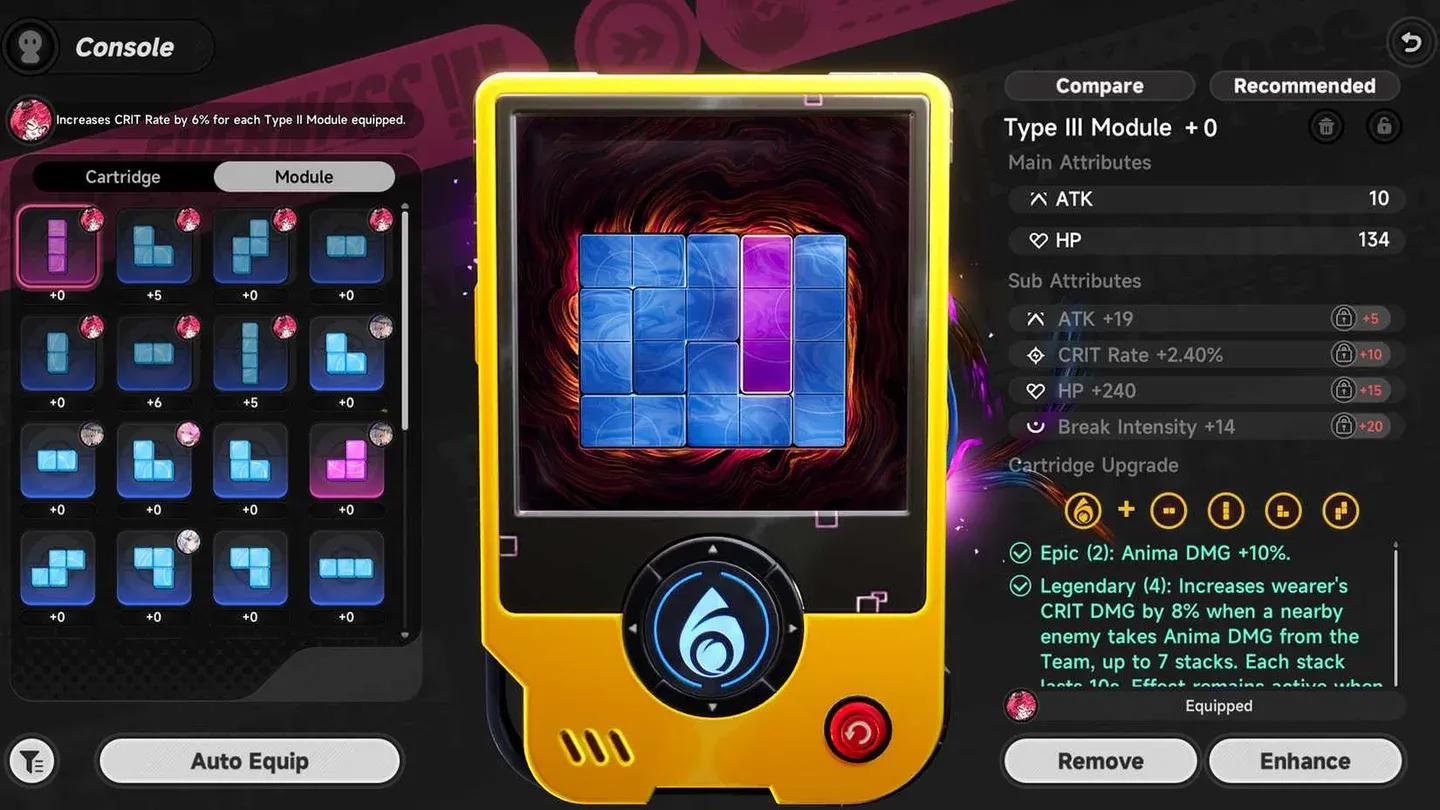
Cartridge set bonuses screen


Cartridge Tier list
The table below covers the complete ranking across all roles.
| Tier | Cartridge | Role | Key Bonus |
|---|---|---|---|
| S | Lost Radiance | Damage | Ignores 25% enemy DEF for 20s after Ultimate |
| S | Devil's Blood: Curse | Damage | 18% DMG unconditional; 36% vs Nova/Stain targets |
| S | Speedy Hedgehog | Buff | +12% Charge Efficiency; all allies +15% ATK after Ultimate |
| A | Street Boxer | Damage | CRIT Rate +14%; up to +28% with Remora/Stain active |
| A | Fireflies and the Forest | Damage | Up to 56% CRIT DMG (7 stacks, 8% each, 10s per stack) |
| A | Shadow Creed | Buff | +25% ATK for 20s after casting a Skill |
| B | Diabolos | Damage | 12% Chaos RES ignore; 24% more after Nova/Scorch |
| B | Crimson: Twin Butterflies | Damage | Up to 36% ATK when nearby enemies take Incantation DMG |
| B | Tiny Big Adventure | Survival | Up to 40% Max HP increase; 10 stacks on Ultimate cast |
| B | Kingdom's Guard | Survival | DEF +15%; Shields +20% |
| C | Quiet Manor | Damage | Up to 46% Mental DMG Bonus (stacks decay in 6s) |
| C | Thea's Night Tavern | Survival | Healing Bonus +20% |
S Tier Cartridges
Lost Radiance
Lost Radiance earns its S-tier spot through one of the most efficient damage bonuses in the game. The 4-piece Legendary effect ignores 25% of enemy DEF for 20 seconds after the wearer casts their Ultimate. What makes this exceptional is that the DEF-ignore benefit applies regardless of the wearer's damage type. You don't need to be running a Cosmos character to get full value from it. Any DPS who casts Ultimates regularly gets a near-unconditional damage boost, which is exactly what you want from a top-tier set.
The 2-piece Epic bonus adds Cosmos DMG +10%, which is a bonus on top for Cosmos characters specifically, but the 4-piece is the reason you're here.
Devil's Blood: Curse
Devil's Blood: Curse gives a flat 18% DMG increase with zero conditions attached. That alone would make it competitive. The Legendary 4-piece goes further: if the target is affected by Nova or Stain, that bonus doubles to 36% total DMG. For teams that can naturally trigger either of those status effects through their Esper Cycle, this set is a top-two damage option in the game. Even on teams without consistent Nova or Stain access, the unconditional 18% is still worth serious consideration over more conditional alternatives.
Speedy Hedgehog
On a buffer or support character, Speedy Hedgehog does something no other S-tier set does: it helps the entire team. The 2-piece grants +12% Charge Efficiency, which means your support reaches their Ultimate faster. The 4-piece then rewards that faster Ultimate by giving all allies +15% ATK for 20 seconds after it fires. Running at least one team member on Speedy Hedgehog is strongly recommended because the team-wide ATK buff compounds with everything else your DPS characters are doing. The effect does not stack from multiple wearers, so one copy is enough.
A Tier Cartridges
Street Boxer
Street Boxer offers CRIT Rate scaling that can reach +28% at full value. The base Legendary effect adds 14% CRIT Rate, and triggering Remora or Stain reactions pushes it to the full 28% for 20 seconds. For Lakshana characters or any build that naturally incorporates those reactions, this is a best-in-slot option. Outside of that specific setup, the baseline 14% is still useful but puts it behind Lost Radiance and Devil's Blood for general use.
Fireflies and the Forest
The ceiling on Fireflies and the Forest is genuinely impressive: up to 56% CRIT DMG from 7 stacks, each adding 8% and lasting 10 seconds. The stacks accumulate as nearby enemies take Anima DMG from your team, and they remain active even when the wearer is off-field. The catch is that your team needs a reliable Anima DMG source. If you're not running an Anima character, you're either giving up a team slot to enable the set or accepting that you won't hit the full stack count. For Anima-focused teams, this is an outstanding set.
Shadow Creed
Shadow Creed is the most straightforward buff-role Cartridge at A-tier. Cast a Skill, get 25% ATK for 20 seconds. The condition is trivially easy to meet in normal gameplay, which makes it one of the most reliably active ATK bonuses available. Crimson: Twin Butterflies technically offers a similar ATK ceiling but requires an Incantation DMG source to stack, making Shadow Creed the default pick for buff characters who don't fit that specific element.
B Tier Cartridges
Diabolos hits a respectable 36% total Chaos RES ignore when the wearer triggers Nova or Scorch reactions, but it only works on Chaos characters. That element restriction keeps it out of A-tier regardless of how strong the number looks in isolation.
Crimson: Twin Butterflies stacks ATK by 6% per nearby enemy taking Incantation DMG, up to 6 stacks for a 36% total ATK bonus. The stacks persist off-field, which is useful, but most non-Incantation characters will reach the same or better ATK bonus from Shadow Creed with far less setup.
For survival options, Tiny Big Adventure builds up to 40% Max HP by taking hits, with each stack lasting 10 seconds. Casting the Ultimate instantly grants all 10 stacks. As of Version 1.0, this set functions best on Fadia specifically, since the design requires the wearer to absorb damage regularly. Kingdom's Guard is simpler: DEF +15% at 2-piece and Shields +20% at 4-piece. It's the go-to for shield-generating characters, with Adler being the primary user.
C Tier Cartridges
Quiet Manor gives up to 46% Mental DMG Bonus total (10% from the 2-piece plus 36% from three Basic Attack stacks at 12% each). The problem is that those stacks last only 6 seconds, making them difficult to maintain consistently. Any character who benefits from Mental DMG can usually get more reliable value from a broader damage set that doesn't require constant Basic Attack upkeep.
Thea's Night Tavern adds 20% Healing Bonus, which sounds useful on paper for a healer. In practice, even Edgar (the primary healer as of Version 1.0) doesn't need this set to heal effectively. He gets more value running a Buffer Cartridge set, which means Thea's Night Tavern has no clear best-in-slot user right now.
How to choose the right Cartridge for your character
The simplest framework: identify your character's role first, then match the set to that role.
- DPS characters should default to Lost Radiance for universal DEF-ignore, or Devil's Blood: Curse if your team runs Nova or Stain.
- Buffer/Support characters should almost always run Speedy Hedgehog to accelerate team-wide ATK buffs.
- Anima DPS specifically benefits from Fireflies and the Forest for the CRIT DMG ceiling.
- Lakshana DPS with Remora or Stain access should look at Street Boxer as a best-in-slot option.
- Chaos characters triggering Nova or Scorch can make Diabolos work, but it's a niche pick.
- Shield-focused supports (primarily Adler) fit Kingdom's Guard naturally.
What's the best Cartridge for most players?
For the majority of DPS characters in Version 1.0, Lost Radiance is the answer. The 25% DEF-ignore on Ultimate is active, meaningful, and requires no team composition adjustments to trigger. For support characters, Speedy Hedgehog is the equivalent no-brainer. Running one of each on your core team gives you a strong baseline that works across most content.
For more NTE guides covering builds, characters, and team compositions, browse the full guide library at GAMES.GG to find everything you need for Version 1.0 and beyond.