
Start GloryBound by choosing a class, training Strength, unlocking Gladiator's Oath, and equipping armor before your first Colosseum run.
SphereX Studio's gladiator survival game on Roblox rewards preparation between arena attempts. Your class determines your starting weapon style, while training, skills, and equipment improve your character before the fighting starts. Follow the opening checklist below, then learn how to choose round rewards, claim free upgrades, and separate regular Colosseum progression from Trials and the weekly raid.
Which starting class should you choose?
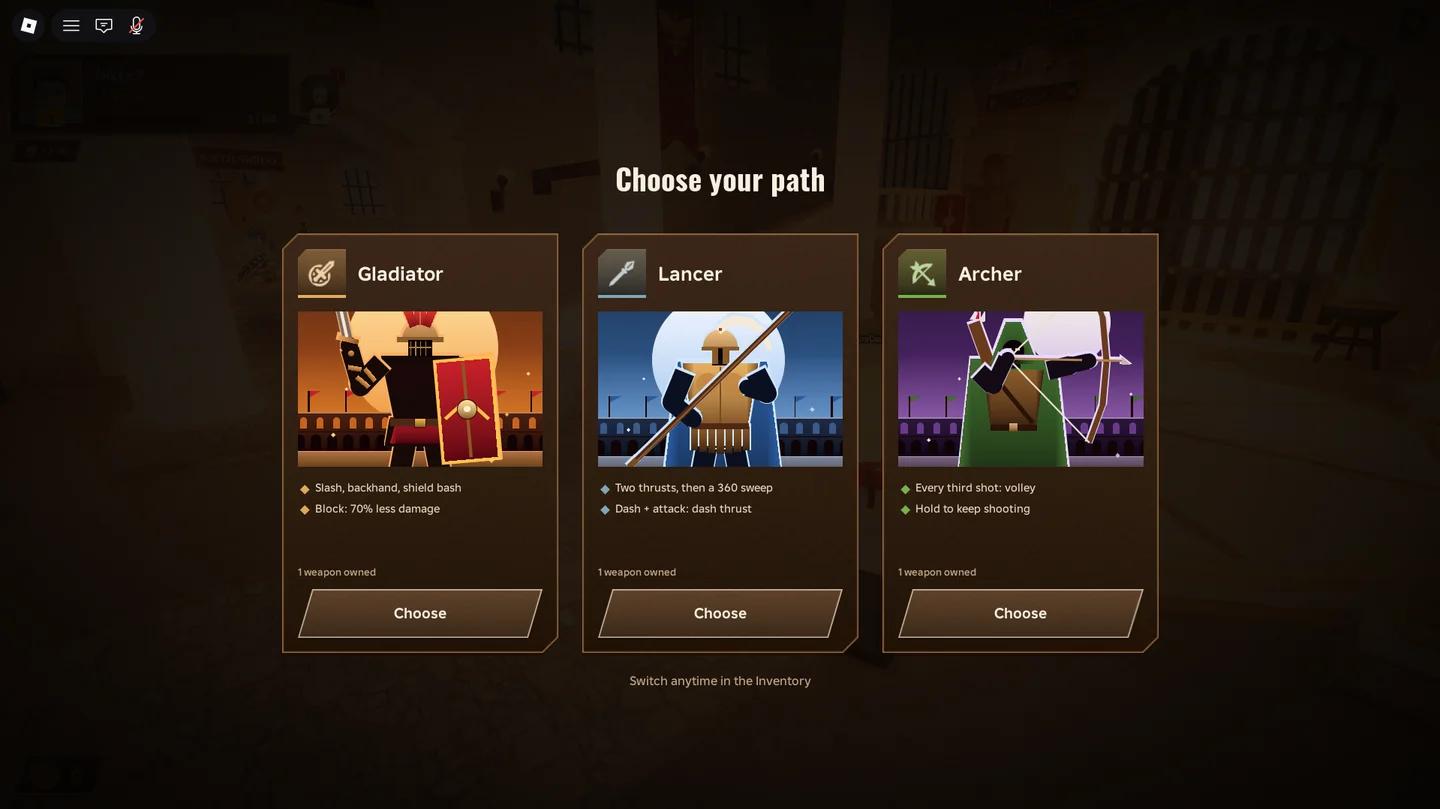
The Choose your path menu offers three starting classes: Gladiator, Lancer, and Archer. Pick based on your preferred fighting distance and whether you want a shield for close combat.
GloryBound starting classes
| Starting class | Weapon | Main strength | Choose it when you want |
|---|---|---|---|
| Gladiator | Sword and shield | Defense in close combat | A defensive melee starting point |
| Lancer | Spear | Longer melee reach than the sword | Melee combat with more reach |
| Archer | Bow | Attacks from a distance | A ranged weapon style |
Gladiator is a sensible first choice for close-range defense. Its sword-and-shield setup suits players who want to fight near enemies. Choose Lancer if reach is your main concern, or Archer if you prefer attacking from farther away. These are practical differences, not a damage ranking.
Berserker is listed with a greataxe, but it is not one of the three starting cards. Begin with an opening class instead of delaying your first run to search for that weapon.

What should you do before entering the Colosseum?
Finish the gym, skill-tree, and equipment steps before pushing deeper into the arena. Your starting class supplies a combat style, but it does not replace the upgrades available around the lobby.
Train Strength at the bench press
Use the bench press in the training hall. Press E rapidly when prompted, then use Push as directed by the training interface. The early Strength bar starts at 0/50; work toward the displayed 50 target before attempting deeper waves.
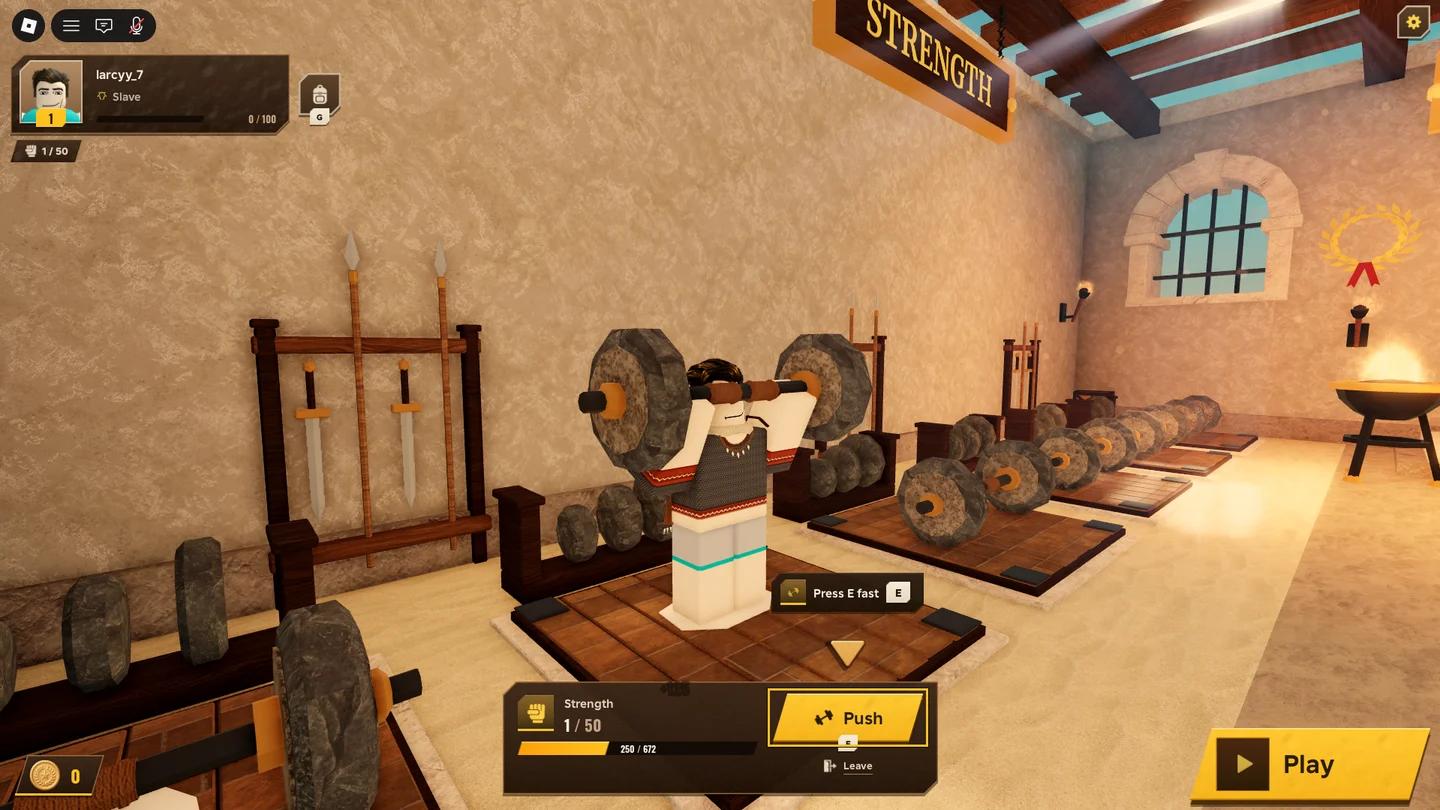
The GloryBound training gym
Keep the gym in your routine between arena attempts. Training is a separate progression route from equipment, so collecting a better weapon is not a reason to leave Strength untouched.
Unlock Gladiator's Oath
Open the skill tree, spend one skill point on Gladiator's Oath, and confirm the purchase. The node grants +1% damage and +1% max health and opens access to Gladius, Scutum, and Fortuna.
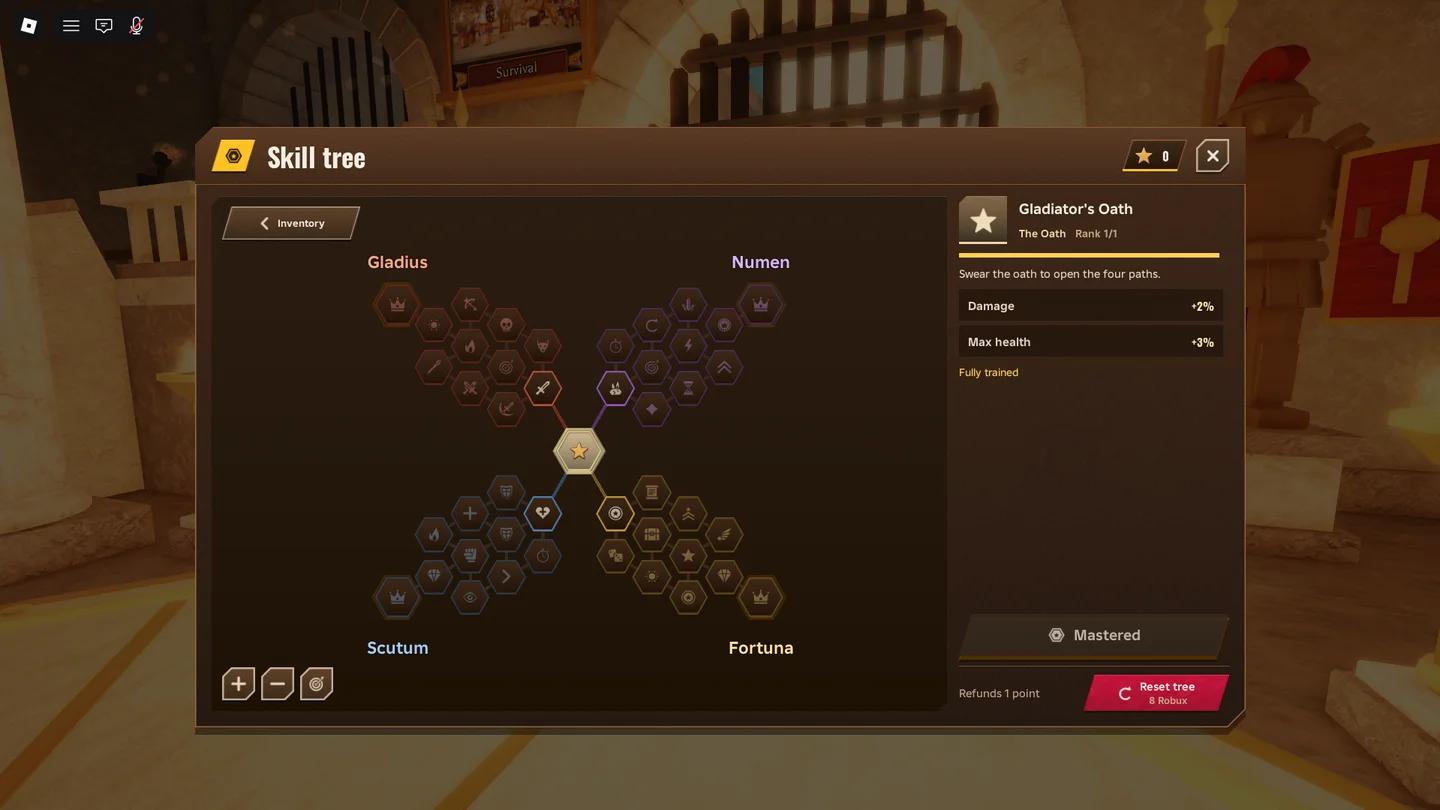
Gladiator's Oath skill tree
For later nodes, read the displayed effect before committing points. Choose an upgrade that addresses a problem in your runs, such as low damage or difficulty surviving, instead of picking a branch because its name sounds suitable.
Open the stone-hall chest and equip an upgrade
Visit the stone hall and open the Rare chest. Read the item popup, compare the reward with your current equipment, and select Equip if you want to use it. Opening a chest and equipping its contents are separate steps.
Centurion Lorica is a chestplate worth recognizing: it grants +4 Vitality and +20 Max HP. If you receive it, compare those bonuses with your equipped armor. Do not plan your opening around getting that specific item.
Weapons and armor range from Common to Mythic. Check new drops instead of keeping starter equipment automatically, and look at whether a weapon fits your chosen class. Cash also supports progression through skills and armor sets, so consider those upgrades alongside chest purchases.
How should you approach your first arena runs?
Colosseum survival runs last up to 60 waves. You can enter solo or in a squad of up to 4 players. Solo play lets you concentrate on learning your weapon and enemy behavior; squad play adds the ability to revive downed teammates.
Keep track of your squad during difficult fights. Look for an opportunity to revive a fallen teammate when you can do so safely, instead of focusing entirely on the enemy directly in front of you.
Choose boons for your current weakness
After each round, choose a boon. Read the offered effects and think about what caused trouble in the previous wave: losing health quickly calls for a different choice from taking too long to defeat enemies.
Use these priorities when matching options appear:
- Health or Vitality: Favor survival when incoming damage is ending your runs.
- Damage: Favor stronger attacks when you can stay alive but struggle to finish enemies.
- Class-fitting effects: Choose bonuses that support the weapon style you actually use.
Treat these as conditional choices, not a fixed ranking. A damage upgrade does not solve every failed run, and more health is less urgent when you are already surviving comfortably.
Prepare for arena bosses
The Colosseum's bosses include the War Lion, Undead Brute, and Cerberus. Check your equipment before entering and coordinate with your squad during these encounters.
If repeated attempts end at the same fight, identify what is stopping you before returning. Running out of health points toward survival upgrades; struggling to defeat enemies points toward damage. Use that diagnosis to decide which available improvement deserves attention next.
How do you claim free upgrades after your first fight?
Codes provide Lucky Spins and chest rewards for your character. The following strings were active on November 12, 2026. Codes can expire, so claim their rewards while they remain available.
| Code | Reward |
|---|---|
| ABILITY | 5 Lucky Spins |
| UPDATE_3 | 5 Lucky Spins |
| TRIALS | 1 Legendary Chest |
Open the gift menu to redeem
Select the gift-box icon near the top left of the screen, then open Codes. The code entry screen contains a text field and a redemption button.
- Enter one code exactly as written.
- Select the redemption button to claim its reward.
- Repeat for the remaining strings.
If a code fails, check for typing errors and extra spaces. If it still fails, check the GloryBound codes guide before retrying an old string.
Review rewards before your next run
Lucky Spins give you chances to roll abilities and bonuses. Read each result and consider whether its effect supports your chosen weapon and the way you fight. A bonus you can use regularly is a clearer early goal than chasing a result without understanding its effect.
The Legendary Chest reward goes to your Vault. Open it and compare its contents with your equipped items before starting another run. A higher-rarity chest is a chance at an equipment upgrade, not a promise of a particular weapon or armor piece.
When should you try Hardcore, Trials, and the weekly raid?
Learn the basic cycle of preparation, combat, and round rewards before making Trials or the weekly raid your main goal. These challenges are separate from the regular arena boss roster.
Recognize the different challenges
Use the activity names to identify what you are preparing for. Hardcore introduces later-wave changes, Trials names specific opponents, and the weekly raid features an Extreme version of the Hydra encounter.
| Activity | What you will encounter | Beginner priority |
|---|---|---|
| Colosseum survival | Enemy waves and regular arena bosses | Learn your class and how round rewards affect your run |
| Hardcore progression | The arena turns blood red at wave 21 and reaches Insane at wave 41 | Prepare for the challenge to change as the run advances |
| Trials | Ignis, Glaucus, the Hydra of Lerna, and Janus | Attempt these once the basic arena loop feels familiar |
| Weekly raid | Hydra of Lerna Extreme with your squad | Prepare your group for a dedicated raid encounter |