

Getting started in Valheim without losing your mind
Valheim drops you into the tenth world with almost no explanation. There is a raven, a shrine, and a lot of trees. What the game does not tell you is that your food choices matter more than your weapon, that your base needs a chimney, and that the biome directly next to your spawn might contain something that will kill you in two hits. This guide covers everything you need to know to survive the early hours, build good habits, and push into each new biome without making the same mistakes twice.
Why does food matter so much in Valheim?
Valheim does not use a traditional hunger system. You will not starve if you forget to eat. What food actually does is set your maximum Health and Stamina for a period of time, which means heading into a fight with an empty stomach is the equivalent of showing up with half your stats missing.
You can have three different food effects active simultaneously. Each food item has a different balance of Health, Stamina, and regeneration. Red foods lean toward Health, yellow foods lean toward Stamina, and white foods offer a more balanced split. Blue foods boost Eitr, the magic resource introduced in the Mistlands, but that is not something you need to worry about early on.
For your first hours, rely on Cooked Boar Meat, Cooked Deer Meat, Raspberries, and Mushrooms. These are all available in the Meadows and give you a meaningful stat boost over running around with nothing active. The real upgrade comes after defeating Eikthyr, when you can access Copper and Tin in the Black Forest and eventually build a Cauldron. That unlocks proper cooked meals that dramatically increase both Health and Stamina compared to raw ingredients.
Stamina deserves particular attention. Almost every action in the game costs it: attacking, blocking, dodging, sprinting, jumping, swimming, and using tools. Running out of Stamina mid-fight leaves you unable to defend yourself. Keep the yellow bar in mind at all times, and never completely drain it during combat.
How does the Rested buff work and why should you care?
The Rested buff is one of the most impactful mechanics in the game, and new players often ignore it entirely. While Rested is active, your Health regenerates 50% faster and your Stamina regenerates 100% faster. That second number is the one that matters most. The difference in how quickly your Stamina bar refills during combat is enormous.
To gain the Rested buff, spend about 20 seconds sheltered near a fire. Sleeping in a bed also grants it. The duration of the buff scales with your Comfort level, which increases as you place more furniture and comfort-providing objects around your base. Early on, even a basic shelter with a fire and somewhere to sit is enough to get started.
Before every boss fight, every serious biome push, and every long expedition, check your Rested timer. If it is about to expire, going home to refresh it takes less than a minute and pays off immediately.
What should you build first?
Your first base does not need to be impressive. It needs to be functional. At minimum, you want a Bed, fire, Workbench, storage chests, and enough shelter to gain the Rested buff. That is the whole list for the first hour.
One thing Valheim does not explain clearly is that repairing equipment costs nothing. No materials, no penalty. Just interact with the appropriate crafting station and click the repair button. Make this part of your routine every time you return home. Leaving with a damaged weapon or broken armor is an avoidable problem.
Smoke is also modeled in the game. If you build a fire inside a sealed structure without a chimney or vent, your character takes damage from smoke buildup and the fire eventually stops working. Leave an opening above your fire or build a proper chimney.
As you progress, your base will need room for additional crafting stations. The Workbench is only the beginning. You will eventually add a Forge, Cauldron, Smelter, Charcoal Kiln, and Portals. Leave space for these early rather than rebuilding half your settlement every time you unlock something new.
How do Workbench upgrades work?
The Workbench has its own upgrade path, and its level directly controls how far you can upgrade your equipment. Building improvements near the Workbench raises its level and unlocks new crafting options.
During Meadows and Black Forest progression, three upgrades matter most:
If the game refuses to let you upgrade a weapon further, the answer is almost always a higher Workbench or Forge level, not a new weapon.
How do damage types and combat work?
Combat in Valheim is not about finding the strongest weapon and using it on everything. Enemies have weaknesses and resistances, and your damage numbers show you exactly how effective each hit is. Yellow numbers mean the enemy is weak to that damage type. White means normal. Gray means resistant.
Skeletons are one of the first examples you will encounter. They resist Pierce damage, which makes your Spear and Bow significantly less effective against them. A Club deals Blunt damage and performs much better. Trolls, on the other hand, are vulnerable to Pierce, making Spears and Bows excellent choices.
Two combat mechanics are worth learning early:
Parrying is one of the strongest tools available. Instead of holding your shield up passively, block just before an enemy's attack connects. A successful parry staggers the enemy and causes your next attacks to deal significantly increased damage during the stagger window. The Bronze Buckler has an especially strong parry bonus compared to standard shields, making it worth prioritizing if you are comfortable with the timing.
Dodging gives you a brief window of invulnerability when timed correctly. It is particularly useful against attacks that are difficult to parry or enemies whose hits would overwhelm your shield. Sometimes simply moving out of range is even better than either option.
Never drain your Stamina bar completely during a fight. If you spend everything attacking and the enemy survives, you have no Stamina left to block, dodge, or reposition when it strikes back.
What is the biome progression order?
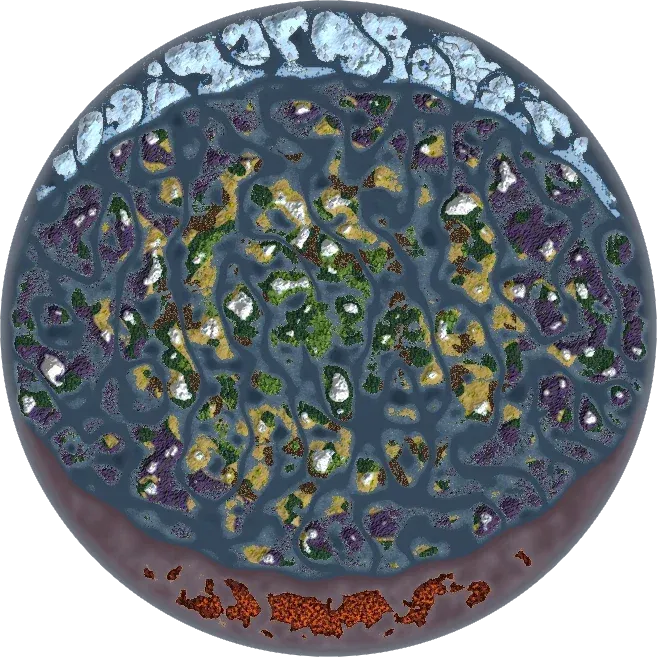
Valheim's world is divided into biomes, each with its own enemies, resources, equipment tier, and boss. The intended order is:
Meadows → Black Forest → Swamp → Mountains → Plains → Mistlands → Ashlands → Deep North
The important thing to understand is that the world generates all biomes at once. You can physically walk into the Plains before you have defeated Eikthyr. The game will not stop you. But a Deathsquito in the Plains can kill an underprepared character in one hit, so biome borders deserve respect.
Before entering a new biome seriously, check your weapon upgrades, armor, food, Rested buff, and any resistances or consumables the biome requires. The Swamp inflicts constant Wet status and enemies like Blobs deal Poison damage, making Poison Resistance Mead extremely valuable before exploring it. The Mountains introduce freezing temperatures that deal continuous damage without Frost Resistance Mead or Wolf Armor.
Each boss also drops something that enables the next stage of progression. Eikthyr drops Hard Antlers for the Antler Pickaxe, which lets you mine Copper and Tin. The Elder drops the Swamp Key for Sunken Crypts. Bonemass drops the Wishbone for finding Silver in the Mountains. Bosses are not just optional challenges; they are the gates between stages.
For a full breakdown of every boss location, summon requirements, and rewards, check out the Valheim boss locations and rewards guide.
How should you use Portals?
Portals become available once you have Fine Wood, Greydwarf Eyes, and Surtling Cores. Surtling Cores are found inside Burial Chambers in the Black Forest, so you can unlock Portals relatively early in your progression.
Two Portals connect when given the same tag. Once linked, you can travel between them instantly. The catch is that metals and ores cannot normally pass through Portals. Items that are blocked show a crossed-out Portal icon in your inventory, so always check before relying on a Portal as your way home with a full inventory of Copper or Iron.
The most useful Portal habit to build early is keeping one unused Portal at your main base at all times. When heading out on a long expedition, bring Portal materials, set up a second Portal at your destination, and give both the same tag. This lets you return home to repair equipment, refresh your Rested buff, and drop off inventory without making the full journey back on foot. Dismantle the expedition Portal when you move on and keep the materials for next time.
Label every Portal with a Sign. Once you have six or seven active Portals, unlabeled ones become genuinely confusing.
What happens when you die?
Death leaves your entire inventory and equipped gear inside a Tombstone at the location where you died. You respawn at your claimed bed with nothing. The equipment that kept you alive is now sitting in the same dangerous area that just killed you.
The best preparation for death is done before it happens:
- Keep a backup set of food at your main base. Do not take your entire supply on expeditions.
- Store your previous armor set instead of dismantling it. An old set is far better than running back naked.
- Establish a Portal near any dangerous area before pushing deep into it.
- Keep a small chest near your bed with emergency food, an old weapon, and basic armor.
After retrieving your items from the Tombstone, you receive the temporary Corpse Run effect, which provides defensive and mobility benefits specifically designed to help you escape. Use it to get somewhere safe rather than immediately re-engaging whatever killed you.
The most common mistake after dying is immediately sprinting back without food, Rested, or a plan. If the enemy that killed you is still standing next to your Tombstone, it will simply kill you again.
What should you pick up?
Valheim reveals crafting recipes when you pick up a required material for the first time. This means every unfamiliar resource you ignore is potentially hiding a useful recipe.
Pick up at least one of everything you have not seen before. New types of wood, ore, seeds, enemy drops, trophies, and plants can all unlock crafting options, building pieces, food recipes, or workstation upgrades. Flint found near water in the Meadows unlocks the Chopping Block and several early weapons. Surtling Cores from Burial Chambers unlock the Smelter, Charcoal Kiln, and Portals.
Mark useful locations on your map as you explore. Copper deposits, Tin coastlines, Burial Chambers, berry bushes, and Mushroom patches are all worth pinning. Raspberries and Mushrooms in particular remain useful in food and Mead recipes well beyond the early game.
For a complete walkthrough of every achievement and unlock in the game, the Valheim achievements guide covers all 53 with tips on the hardest ones.
Custom uploaded: valheim map.webp
Quick-reference checklist before entering a new biome
Use this before every major push into unfamiliar territory:
For console commands, god mode, and item spawning across PC, Xbox, and Mac, the Valheim cheat list has every command explained with setup steps.
There is a lot more to learn in Valheim beyond these fundamentals. For guides covering every part of the game from sailing to boss strategies, browse the full Valheim guide collection.