The longest side quest in the game, and worth every minute
Valor Mortis hides its Monster Hunt side quest in plain sight. The moment you pick up the first child's drawing pinned to a tree near the Tribunal Square lantern, the quest locks in and sends you hunting 16 more sketches across the entire City of Orphans chapter. These drawings are tucked behind burning corridors, dropped into poison-filled cellars, and buried deep in the sewer network below the city. None are missable, and you can collect them all after finishing the story. Finishing the set rewards a Quintessential Transmutation Material and unlocks The Book of Beasts trophy.
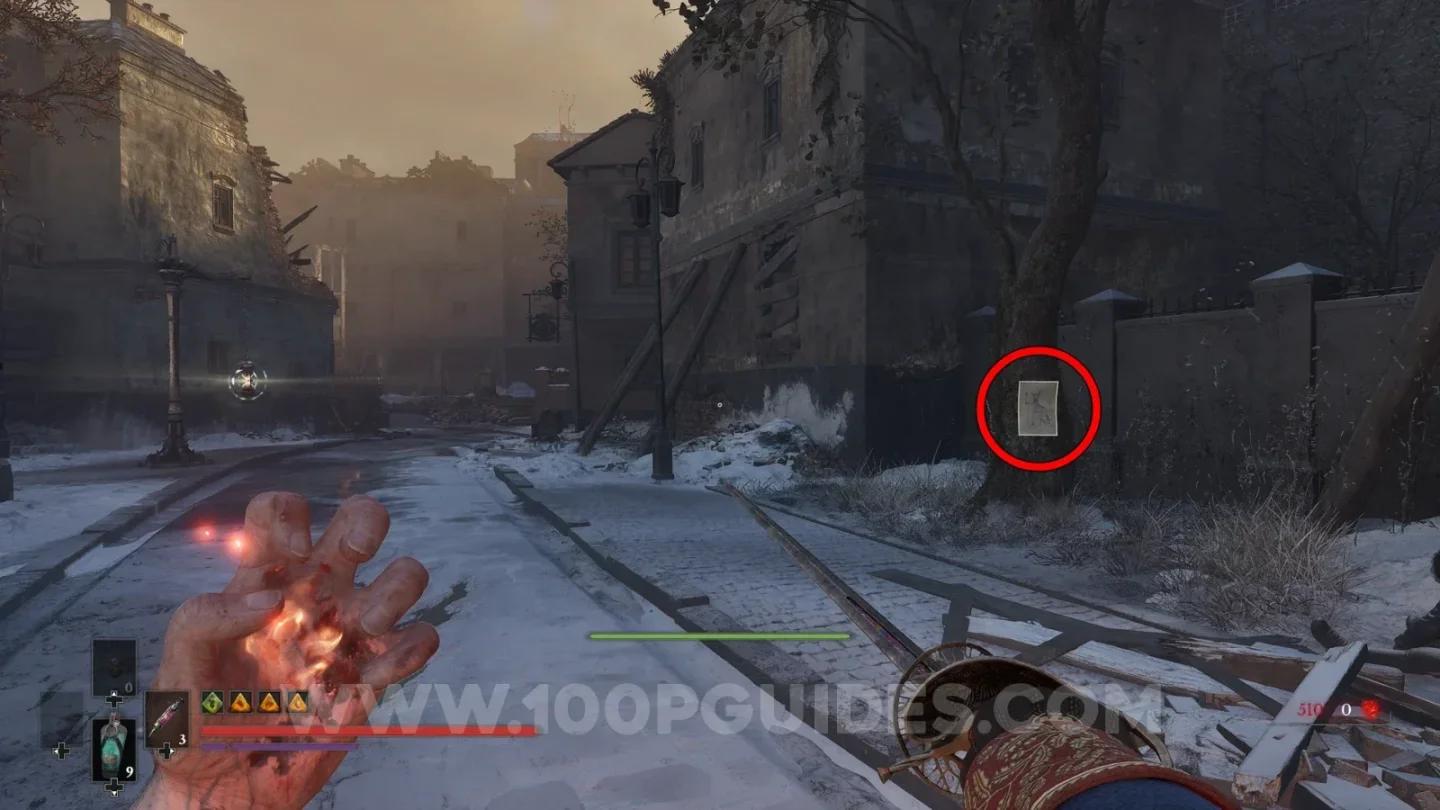
Drawing #1 starts the quest

How many drawings are there in Monster Hunt?
Here's the short answer: 17 drawings total, spread across three distinct zones inside the City of Orphans. The quest log tracks each one as a separate entry, so you can check your running total at any time. The breakdown is 4 in Tribunal Square, 8 in Shamble Street, and 5 in the Sewers.
| # | Drawing Name | Zone |
|---|---|---|
| 1 | Lancer | Tribunal Square |
| 2 | Risen Soldier | Tribunal Square |
| 3 | Howler | Tribunal Square |
| 4 | Volunteer | Tribunal Square |
| 5 | Eternal Guard | Shamble Street |
| 6 | General Lothaire | Shamble Street |
| 7 | Sapeur | Shamble Street |
| 8 | Slaughtermill | Shamble Street |
| 9 | Swarm Mother | Shamble Street |
| 10 | Shambling Civilians | Shamble Street |
| 11 | Remnant of the Iron Regiment | Shamble Street |
| 12 | Sphinx | Shamble Street |
| 13 | Carrion | Sewers |
| 14 | Grenadier | Sewers |
| 15 | Unknown Monstrosity | Sewers |
| 16 | Abomination | Sewers |
| 17 | Unknown Figure | Sewers |
Tribunal Square drawings (1 to 4)
Drawing 1: Lancer
Right at the start of the City of Orphans chapter. The Drawing of a Lancer is pinned to the tree immediately beside the Tribunal Square lantern. Picking it up triggers the Monster Hunt quest.
Drawing 2: Risen Soldier
From the guillotine area, follow the left-hand street downhill, then continue right along the main road. Take the stairs descending on your right. At the bottom, the Drawing of a Risen Soldier is on the wall beside the stream of water.
Drawing 3: Howler
Head back up the stairs and follow the street to its end. Go through the burning stretch on your right, then turn left at the far end. A small dead-end area opens to your right, with a tree in the center. The Drawing of a Howler is on the wall beside it.
Drawing 4: Volunteer
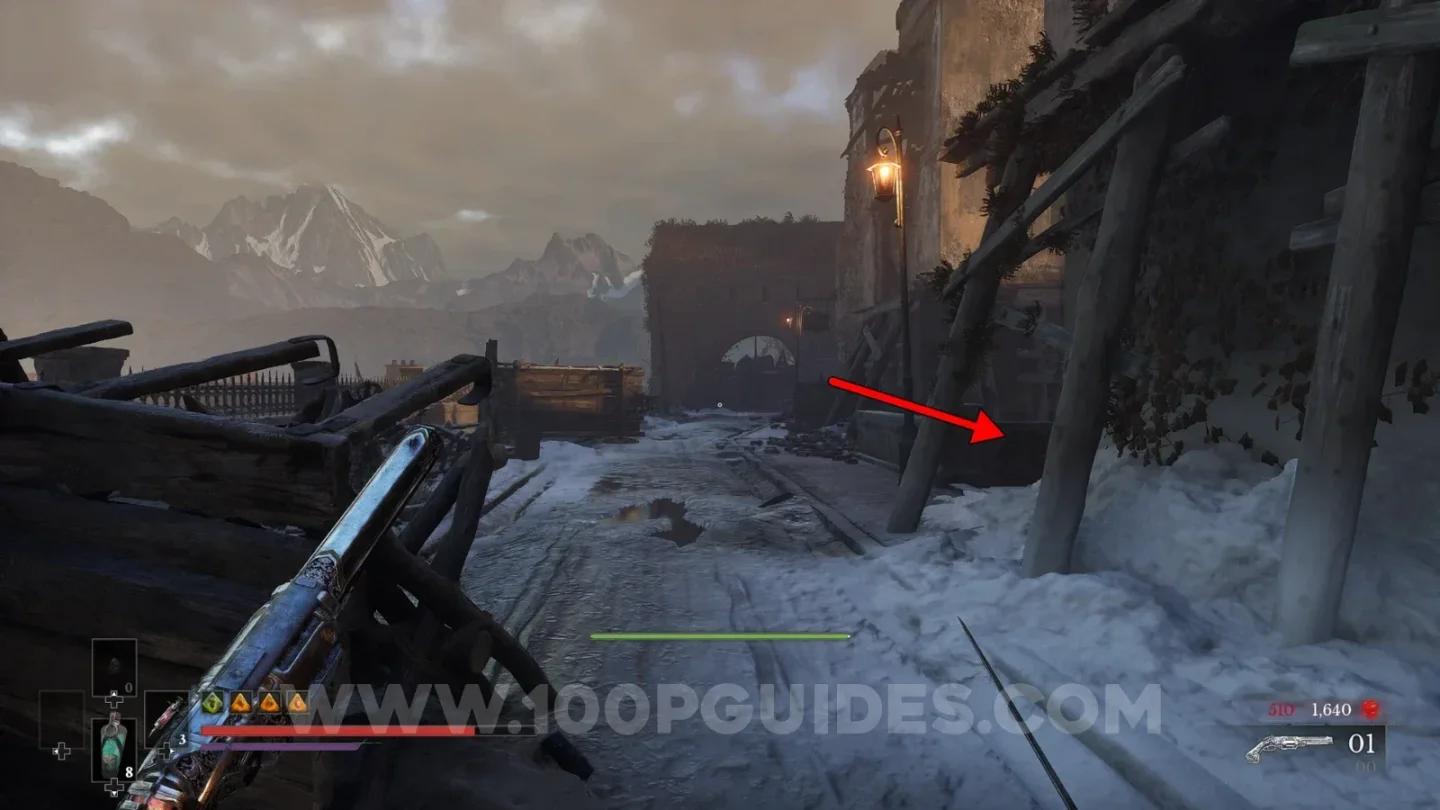
Coming out of the burning street, head in the opposite direction and enter the building with crates stacked in the first room. In the next corridor, find the ramp leading up to the second floor. The Drawing of a Volunteer is tucked underneath that ramp, on the left wall.
Drawing #4 under the ramp
Shamble Street drawings (5 to 12)
This zone has the highest concentration of drawings and the trickiest hiding spots. Several require grappling across gaps or dropping through holes in floors.
Drawing 5: Eternal Guard
From the Shamble Street lantern, backtrack through the burning street and take the first right available. The Drawing of an Eternal Guard is on the right wall inside a small alcove.
Drawing 6: General Lothaire
Leave the lantern heading toward the burning street. Before you reach the fire, look right for a cart parked in a small side area. The Drawing of General Lothaire is on the side of that cart.
Drawing 7: Sapeur
Jump into the building immediately beside the Shamble Street lantern, then drop through the holes in the floor to reach the lowest level. The Drawing of a Sapeur is on the wall down there.
Drawing 8: Slaughtermill
From the same building, climb back up and cross to the opposite end of the top floor. Use the grapple point to swing across the courtyard to the building on the other side. Go through the door on your right, and the Drawing of the Slaughtermill is inside the wardrobe.
Drawing 9: Swarm Mother
Use the gate shortcut next to the Shamble Street lantern and enter the building on the left, where boxes block the entrance. Climb to the top floor and step out onto the balcony. Turn right immediately to find the Drawing of a Swarm Mother on the wall in the corner.
Drawing 10: Shambling Civilians
After using the gate shortcut, continue straight to the waterfront. Turn left, then left again up the ramp toward the burning street. At the top of the ramp, turn left. The Drawing of Shambling Civilians is on a stone pillar.
Drawing 11: Remnant of the Iron Regiment
Pass through the burning street to reach the large plaza with the tower. On the far side of the plaza, look at the arches and the building behind the statue. The Drawing of a Remnant of the Iron Regiment is on the wall of that building.
Drawing 12: Sphinx
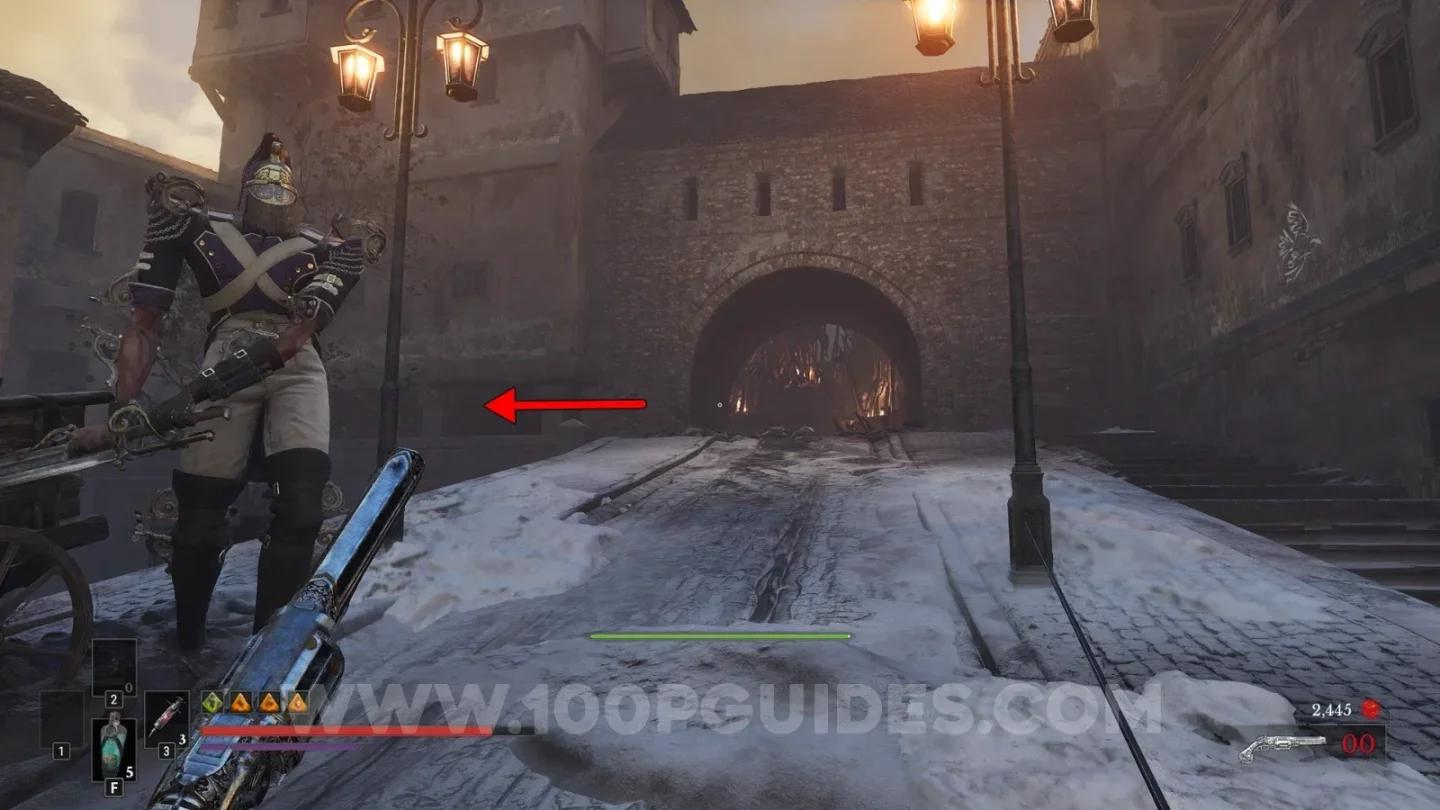
Climb the tower and ride the zipline down to the circular sewers building. If you have the shortcut already open, you can reach it via the wooden structure on the left side of the plaza instead. Circle around the right side of the circular building. At the end, the Drawing of a Sphinx is on the wall to your left.
Drawing #12 near the sewer entrance
Sewers drawings (13 to 17)
The mistake most players make here is rushing straight through on the main path and missing the branching routes. Pay attention to forks in the tunnels and look for wooden planks you can crouch under.
Drawing 13: Carrion
From the Sewers lantern, follow the main route until you hit a fork: a tall enemy stands on the left, and wooden boards block the right-hand path. Crouch under the boards and take the right route. Follow it until you are above the starting lantern, then climb down the ladder beside the waterfall. At the bottom, the Drawing of a Carrion is on the right wall beside a wooden bridge.
Drawing 14: Grenadier
Continue from the lantern along the main sewer path until you reach the room with the cell. Turn right, then check the next tunnel for a gap on your left where an enemy hangs from the ceiling. The Drawing of a Grenadier is on the wall right beside that hanging enemy.
Drawing 15: Unknown Monstrosity
Advance through the sewers to the circular chamber with the grapple point in the center. Do not use the grapple. Instead, unlock the door on your left with the Sewers Key. In the next area, cross to the far side and turn right. The Drawing of an Unknown Monstrosity is at the dead end, beside a locked gate.
Drawing 16: Abomination
From the previous drawing, continue along the same path. The Drawing of an Abomination is on the left wall of the large tunnel ahead of you.
Drawing 17: Unknown Figure
Take the door on the right side of that same tunnel and follow the white raven markings painted on the walls until you exit to the outside. Head to the far end, turn right toward the tree, and the Drawing of an Unknown Figure is on the wall. Picking this one up completes the quest.
What do you get for completing Monster Hunt?
Finishing the quest rewards a Quintessential Transmutation Material and a Tiny Whisker Gift (an XP consumable), plus the The Book of Beasts trophy or achievement. The Quintessential Transmutation Material is the more valuable of the two. It pushes a Transmutation to its maximum tier, and each upgrade costs one unit. The only other copies in the game sit in chests at the University and the Fortress, so this is a reliable way to secure an extra one early.
If you want to know which Transmutation to spend it on first, check out our guide on how to access poison areas safely, since the Shield Transmutation is the one that unlocks the most blocked routes in the city.
Common mistakes players make on Monster Hunt
- Skipping the branching path in the Sewers because the main route looks obvious. Drawing #13 (Carrion) is entirely off the critical path.
- Missing Drawing #7 (Sapeur) because the poison basement discourages exploration. It is there, and the poison damage is survivable if you move quickly.
- Forgetting Drawing #12 (Sphinx) because it sits past the zipline in the opposite direction from the sewer entrance. Most players ride the zipline and head straight in without circling the building first.
- Spending the Quintessential Transmutation Material immediately on the first Transmutation that comes to mind. Hold it until you know which upgrade tier you need most.
For a full breakdown of every enemy you will encounter while hunting these drawings, the Valor Mortis boss locations guide covers weak spots and combat tips that apply to the tougher patrols in this chapter.
FAQ
Can you miss any Monster Hunt drawings? No. All 17 are available after completing the story. The only side quest in the game that can be missed is The Choir, which is locked to a specific jail section during Chapter 10. Monster Hunt has no such restriction.
Do you need any special items to collect all drawings? You need the Sewers Key for Drawing #15 (Unknown Monstrosity). This key is obtained automatically during the main story, so if you are doing a cleanup run after the credits, you already have it.
Does the quest log track which drawings you have collected? Yes. Each drawing registers as a separate entry in the Monster Hunt quest log, so you can check at any time to see your current count and identify which monster you still need to find.
What is The Book of Beasts trophy? It is a bronze trophy (or achievement on PC) that unlocks when you collect all 17 drawings and complete the Monster Hunt quest. For a full list of every trophy in the game, see the Valor Mortis trophy list guide.
For more walkthroughs and collectible guides across the whole game, browse the full Valor Mortis guide collection.