
FINAL FANTASY RESONANCE has 99 Tablet Shards scattered across every region, town, and dungeon in the game. They look like nothing at first — just a golden sparkle on the ground — but turn enough of them in to the Enigmatic Princess at Oblivion Palace and you'll unlock some of the best gear in the game, including Jake's Ancient Firearm at 76 shards and Rain's Lightbringer at the full 99. Here's every location, organized by chapter and region, so you can track them down without backtracking more than necessary.
Where do you turn in Tablet Shards?
Bring your shards to the Enigmatic Princess at Oblivion Palace, located southwest of Kol in the Grandshelt region. The palace sits near Grandport Harbor. Behind the princess are four chambers, each containing numbered chests. She unlocks them in order as your shard count climbs.
The Princess's Reward trophy unlocks when you open your first chest (3 shards). The Memento trophy triggers after you've handed over 60 shards total.


All Oblivion Palace rewards
| Shards Required | Reward | Type |
|---|---|---|
| 3 | Vitality Charm | Accessory |
| 6 | Earrings (+10 Magic Attack) | Accessory |
| 9 | Magicite Shard | Upgrade Material |
| 12 | Stagger Ring (+10% stagger power) | Accessory |
| 16 | Dreadwing Mallet | Lid Weapon |
| 20 | Compound Bow | Fina Weapon |
| 24 | Magicite Shard | Upgrade Material |
| 28 | Astral Jacket | Armor |
| 32 | Cure Drop | Fina Weapon |
| 36 | Celaeno Fragments | Nichol Weapon |
| 40 | Magicite | Upgrade Material |
| 44 | Phantom Robe | Armor |
| 48 | Repeater Rifle | Jake Weapon |
| 52 | Protective Gear | Armor |
| 56 | Briar Edge | Rain Weapon |
| 60 | War Pick | Sakura Weapon |
| 64 | Magicite Cryst | Upgrade Material |
| 68 | Mirage Jacket | Armor |
| 72 | Sundering Odachi | Lasswell Weapon |
| 76 | Ancient Firearm | Jake (Legendary Arm base) |
| 80 | Adamantite | Crafting Material |
| 84 | Ancient Whip | Archwitch Fina Weapon |
| 89 | Adamantite | Crafting Material |
| 94 | Arch Drain | Nichol Weapon |
| 99 | Lightbringer | Rain Weapon |
Chapter 1 tablet shard locations (Kingdom of Grandshelt)
All of these are available from the moment you arrive in each area. Siren's Tower can be tricky to access early — save it for last if the door won't open yet.
Grandshelt, the Royal Capital
- Shard 1: Down the stairs in the marketplace area, near the weapon shop. Look behind the crates.
- Shard 2 (Chapter 5 only): Past the stairs leading to the Colosseum, hidden among boxes on the left side of the western area.
Village of Kol
- Shard 1: Southwest corner of the map, left side of the smaller pond near the rocks.
Town of Felicitas
- Shard 1: Right side of the Item Shop entrance, back corner of town.
- Shard 2: Back left corner of town. Find the hidden path left of the bridge, follow it to the end, then take the ladder up to a wooden platform.
Kolobos Ruins
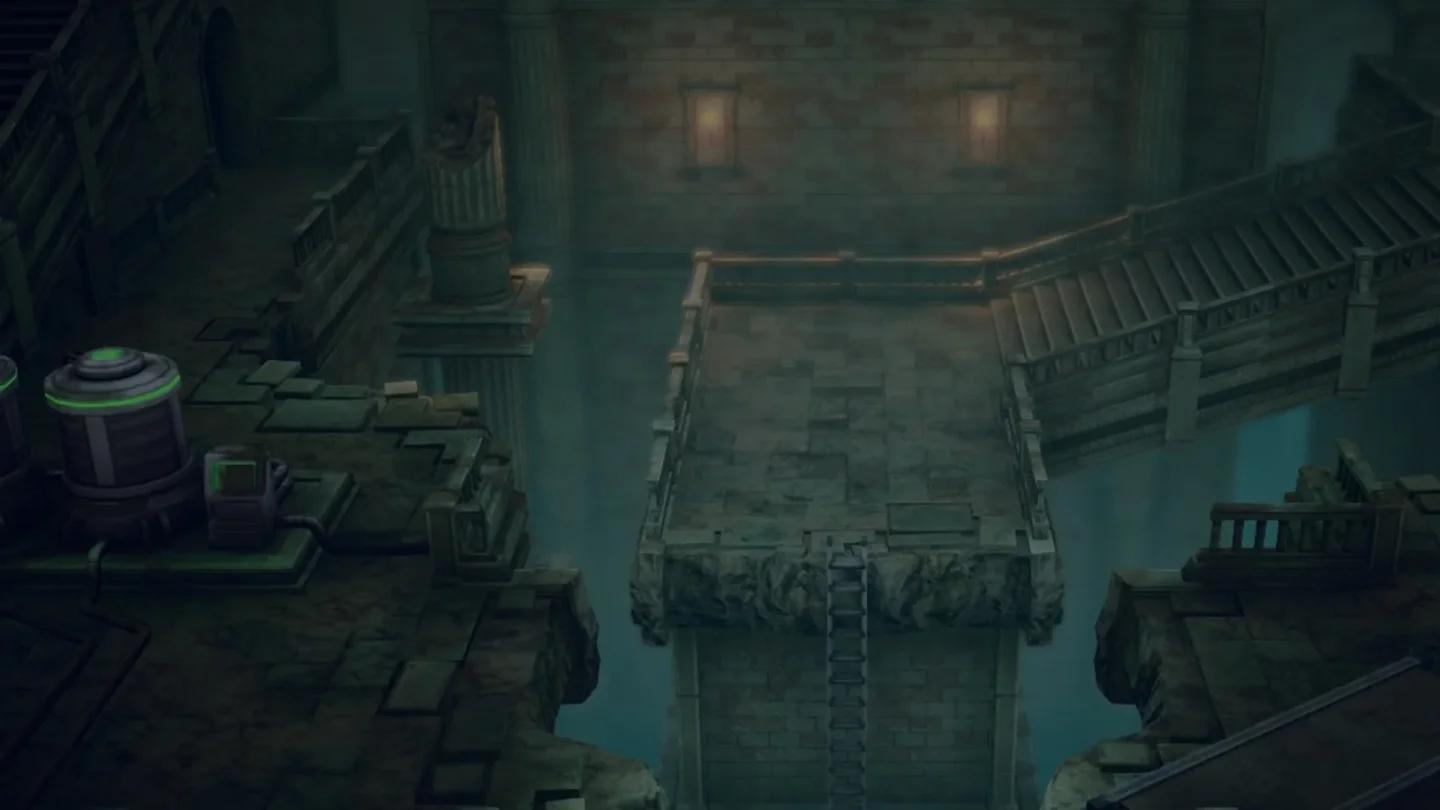
- Shard 1: Behind the machinery with green lights at the bottom of the first staircase.
- Shard 2: Cross the bridge past the first shard, then check behind the collapsed pillar.
Cavern of Swords
- Shard 1: Northeast corner of the desert. Inside the cave, at the back next to a stalagmite.
Grandport Harbor
- Shard 1: Behind the tree opposite the upper pier.
- Shard 2: Behind the row of barrels on the lower L-shaped pier.
Siren's Tower
- Shard 1: At the entrance, go right of the large staircase near the bottom of the dungeon.
- Shard 2: Right side of the long walkway leading toward the upper section, before the Genji Gloves chest.
- Shard 3: After the Gilgamesh fight, head up the stairs, go right to the back of the room, then left. The shard is on a raised platform before the next staircase.
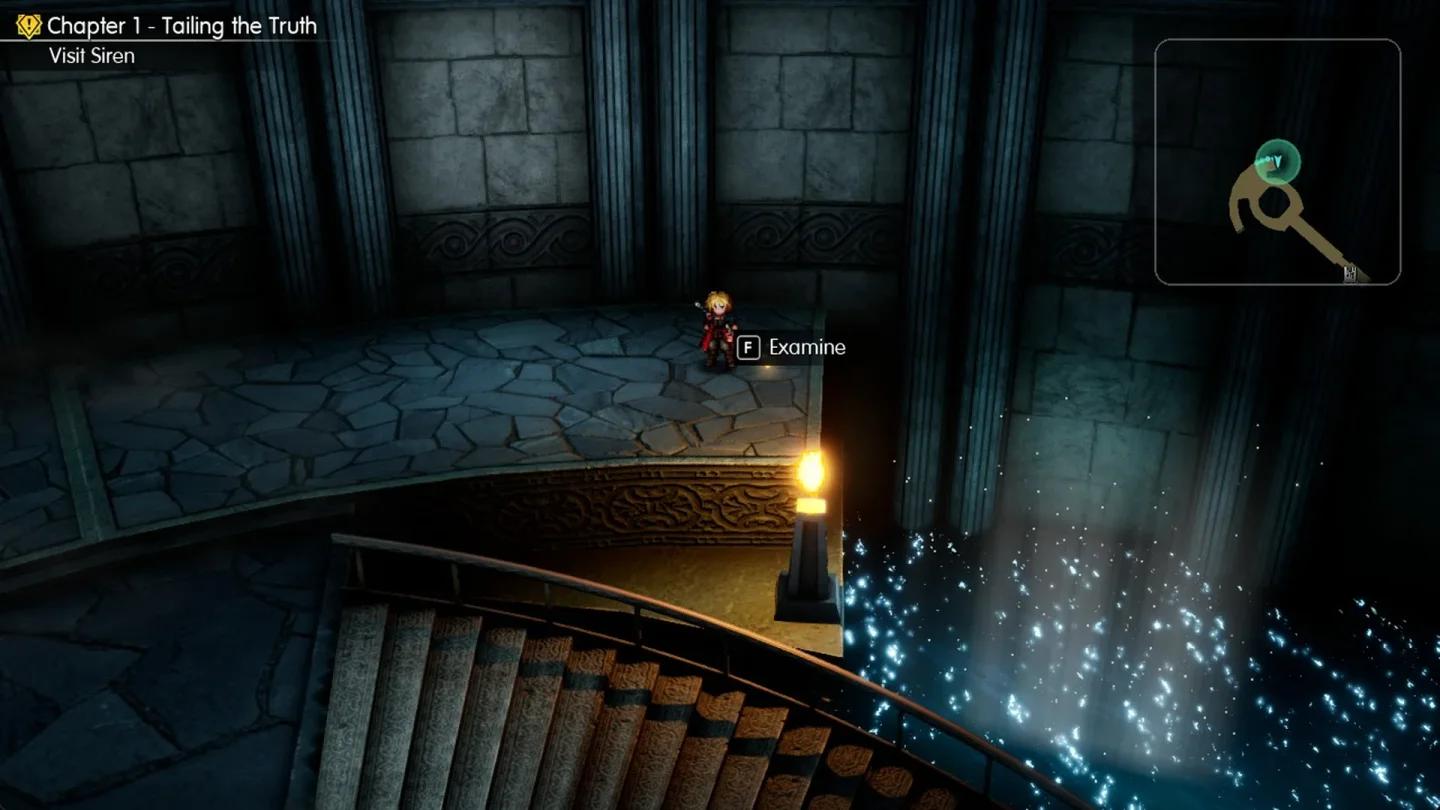
Siren's Tower shard location
Chapter 2 tablet shard locations (Dirnado, Continent of Wind)
Dilmagia, the Machinopolis
- Shard 1: Immediately left of the entrance gate, tucked behind girders.
- Shard 2: Between wooden crates on the right side of the crossroads near the Item Shop.
- Shard 3: Shipyard area, upper left gangway, at the far end near the ladder.
- Shard 4: Shipyard area, lower right path, midway down the hallway beside a metal column.
Mt. Thunderclap
- Shard 1: Right side of the path between two slopes on the main route.
- Shard 2: Pay 1,000 gil to Lid for the ladder shortcut at the entrance cliff, then follow the path to the end. Alternatively, enter from the back entrance east of Zidane's Sanctum.
- Shard 3: Enter Mt. Thunderclap through the alternate entrance (the same path used to reach Ramuh). The shard is near the ramp close to that entrance.
Dwarven Forge
- Shard 1: Cross the gangway over the mining area and head toward the screen. The shard is at the end of the platform.
- Shard 2: Go down to where the dwarves are mining. The shard is among the rocks near a metal container.
Mobliz Shipyard
- Shard 1: Bottom left corner of the entrance area, behind a large crate.
- Shard 2: Take the left elevator up, run through the fence gap, find the ladder in the bottom left corner of the enclosed area, and follow the low gangway to the end.
- Shard 3: Take the middle elevator up, go around to the stairs but don't descend. Look behind the red container next to the stairs.
Wind Shrine
- Shard 1: Behind the right-hand pillar beside the first lift.
- Shard 2: At the top of the stairs leading to the next lift, look to the right.
- Shard 3: Take the second lift over to the platform with a central lift. The shard is behind the left pillar.
Chapter 3 tablet shard locations (Olderion Federation)
Olderion, the Aquapolis
- Shard 1: Behind the stairs near the Plaza taxi boat.
- Shard 2: Between two benches on the left side of the central plaza with the Leviathan statues.
- Shard 3: On the high walkway to the right of the central plaza, next to a flower pot.
- Shard 4: Behind the tree in the small plaza to the north.
Cave of Waters
- Shard 1: Go right at the beginning, take the boat, sail to the doorway at the top of the room, and grab the shard on dry land.
- Shard 2: Near the second save point, in front of the waterfall.
- Shard 3: Return to the entrance, take the left doorway, continue to the room with multiple ladders, and check the second ledge.
Waterfall Way
- Shard 1: Right of the first ladder, tucked in an alcove.
- Shard 2: In the waterfall area, bottom left corner of the last rocky outcrop.
- Shard 3: In the wooden bridge section, go all the way to the back left between two waterfalls.
Town of Amore
- Shard 1: On the small islet, next to the well.
- Shard 2: At the base of the tree before the wooden walkway at the back of town.
Water Shrine
- Shard 1: Go right, down two ladders, and look left of the doorway at the back.
- Shard 2: Through the doorway, take the boat up, disembark at the ladder platform, and look to the right.
- Shard 3: Back at the ladders, go down the stairs on the left to another ladder. The shard is at the bottom, to the left.
Chapter 4 tablet shard locations (Zoldaad Empire Territory)
Mozul Station
- Shard 1: Far left end of the train platform, at the base of the leftmost pillar.
Capital Station
- Shard 1: Opposite the right-side staircase on the platform.
Zoldaad, the Imperial Capital
- Shard 1 (Castle Plaza): Near right corner of the plaza, by the streetcar.
- Shard 2 (Residential District): Bottom right corner near a lamppost.
- Shard 3 (Slums): Midway between the tram platform and the covered market.
- Shard 4 (Underground Tunnel): Find the doorway hidden under an overhead walkway, go through and up the stairs.
- Shard 5 (Underground Tunnel): Go down the ramp below the flight of stairs and follow the path to its end.
- Shard 6 (Dungeon): After getting the Master Key (Dungeon Key), open the cell with the Beefy Man in the southernmost jail cells.
- Shard 7 (Dungeon): Head south from the key room and open the first cell on the right (the Merchant's cell).
- Shard 8 (Zoldaad Castle): Behind the left horse statue at the base of the stairs leading to the throne room.
- Shard 9 (Zoldaad Castle): Go up the central staircase, enter the first room on the right, and check the southeast corner.
Rebel Hideout
- Shard 1: Up the stairs on the right side near the large doorway, behind the support pillar.
- Shard 2: Go right of Jake's room, down the concealed passage to a ladder. The shard is at the top, left of the ladder.
Weapons Factory
- Shard 1: Go left, climb to the orange crystal, activate it to create a bridge, cross it, and grab the shard left of the ladder.
- Shard 2: From the entrance, go right and climb to the area with three levers. Use them to form a path to the leftmost walkway.
Chapter 5 tablet shard locations (Mysidia and surroundings)
Chapter 5 opens up the airship and a lot of the world map. Several shards here span multiple regions.
Town of Sian
- Shard 1: Right of the shops, at the base of the blossom tree next to the bridge.
Mysidia, the Magiapolis
- Shard 1: Down the right staircase from the entrance, against the left wall.
- Shard 2: Shopping area, between the boxes and the railing south of the weapon shop.
- Shard 3: Take the teleportation platform to the higher level, behind a pillar on the right.
- Shard 4 (Arcane Library entrance): Walk between the long tables to the left of the Arcane Library entrance.
- Shard 5 (Arcane Library forbidden wing): Take elevator I up, go down the stairs left, take elevator VI up, use the teleport to the Forbidden Text Wing, climb the ladder to the balcony, and go to the far left end.
Village of Sunioo
- Shard 1: Right at the entrance, between a wooden cart and frozen water troughs.
- Shard 2: Right side of the village, between the snowman and a tree stump near the igloo.
Nameless Ruins
- Shard 1: From the entrance, go left to the collapsed pillar. The shard is on the floor beside it.
- Shard 2: Down the stairs left of the second save point, by the fallen candelabra.
Fina's Psyche (Part 1, inside Arcane Library)
- Shard 1: Left side of the large padlocked gate, where one of the chains meets the ground.
- Shard 2: Top left tent in the campsite, in the top right corner among wooden crates.
- Shard 3: At the back edge of the clearing at the end of the forest path.
Tower of Mysidia
- Shard 1: Directly behind the large icicle at the entrance, on top of an engraved flagstone.
- Shard 2: On a landing between two smaller staircases partway up the spiral staircase.
- Shard 3: After running around the outside of the tower, opposite another spiral staircase.
- Shard 4: On top of a pile of snow near the lift to the top floor.
Fina's Psyche (Part 2, inside Tower of Mysidia)
- Shard 1: After crossing the bridge to the campsite of the Sworn Eight, go right and check behind the stacked boxes under the tent.
Chapter 6 tablet shard locations (Gronoa, the Shuttered Land)
Gaberada, the Undertown
- Shard 1: Against the right exterior wall of the building at the back left of town (where Fina learns Holy).
Research Center Ruins
- Shard 1: Office room with the green teleporter. Behind the collapsed filing cabinets between the two right-side tables.
- Shard 2: Three-switch room. Climb the ladder at the back right onto the shelves and run to the bottom near the screen.
- Shard 3: Multiple green teleporter room. Choose Right, Left, Left to reach the ladder up to the gantries. Go down the broken gantry to the right of the ladder.
Rugged Mountain Path
- Shard 1: Just past the starting save point, beside the dead tree to the west.
- Shard 2: Back right corner of the large open square-shaped area along the path.
Town of Duggle
- Shard 1: Behind the waterfall to the right of the combined Weapons/Armor/Item Shop at the north end of town.
Gronoa Shrine
- Shard 1: Right side of the balcony at the start of the dungeon, before either staircase.
- Shard 2: After crossing the gap, go right and up the blocked staircase. The shard is among the rubble.
- Shard 3: In the wide area with tall ladders at each end, climb the left ladder and run around to the collapsed pillar.
Sanctissimus Shrine
- Shard 1: When you reach the room with an enemy on the right side, go to the back wall and behind the stairs to the right. Through the door, climb the stairs as far as possible, then use the ladder.
- Shard 2: In the tall purple-lit chamber with multiple lifts, reach the lift one level below the top (right of the save point) and run to the left end.
Chapter 7 tablet shard locations (Kingdom of Pharm)
Mt. Reizan
- Shard 1: At the first fork, take the zig-zag path downward. The shard is halfway down.
- Shard 2: At the second fork, go down and look for the shard by the trees between the two bridges.
Lake Ryusei
- Shard 1: Under the first tree to the left of the cliff edge, after the Alluvian boss fight.
Forest Path
- Shard 1: North of the first save point, at the corner where the path turns right.
- Shard 2: Southwest of the second save point, at the dead end near a rock.
Wandering Lands
- Shard 1: On the main path, tucked against the rocks on the right side.
- Shard 2: After the cutscene with Sir Raegan, among the debris nearby.
Chapter 8 tablet shard locations (Crystal Tower and Dragon's Maw)
Crystal Tower
- Shard 1: Follow the main path from the entrance to the first fork, then go right to the dead end.
- Shard 2: Past the first shard, the path forks again. Go left to reach a dead end before a chest.
- Shard 3: In the invisible bridge section, go left at the first fork and follow the bridge to the end.
Dragon's Maw
- Shard 1: Midway through the dungeon, defeat the Rogue Magitek Weapon mini boss. The shard is directly behind where it was standing.
The mistake most players make
The merchant ship shard (the Ancient Tome for Nichol) works differently from the rest. The roaming merchant ship cycles through its stock, so if the item you need isn't available, buy whatever it currently has and check back later. The same applies to the Ancient Cloak for mage-type characters. Both cost gil (45,000 and 40,000 respectively) rather than being found in the field.
For the airship scanner shards, Lid won't offer the scanner upgrade until you've already found everything the basic scanner can reach. Once you hit that wall, talk to Lid with the required upgrade item (Resonance Stone from Mt. Reizan for the first upgrade, Magi-tenna from a hooded NPC in Gaberada for the second) and she'll expand the range.
For more content to tackle alongside your shard hunt, check the all Esper locations guide to make sure you're not missing summons in the same areas, or browse the full Final Fantasy Resonance strategy guide collection for everything else the game throws at you.
Crystal Tower invisible path shard
Frequently asked questions
How many Tablet Shards are in Final Fantasy Resonance? There are exactly 99 Tablet Shards in the game.
Can Tablet Shards be missed permanently? No location is permanently missable. Every area remains accessible after the story, so you can return to collect any shards you skipped. The Crystal Tower and Dragon's Maw shards are among the last you'll encounter naturally.
What is the best reward from Oblivion Palace? For most players, the Ancient Firearm at 76 shards is the priority since it's required to craft Jake's Legendary Arm. The Lightbringer at 99 shards is Rain's strongest weapon and worth the full collection effort if you want the best endgame loadout.
Where exactly is Oblivion Palace? Southwest of Kol in the Grandshelt region, near Grandport Harbor. It becomes accessible once you reach that part of the map early in the game.
Do Tablet Shards appear on the minimap? No, they don't appear as map markers. Each one shows as a gold pulsating sparkle on the ground when you're in the same area. They are never hidden inside containers or invisible.