

For a magic-focused attacker in FINAL FANTASY RESONANCE, build Sakura around Terra, Magic +3, and equipment that keeps her casting. Choose Wizard's Rod+ for elemental-weakness damage, Roselia for opening buffs, or Unyielding Staff when surviving a lethal hit matters more than raw offense.
Sakura learns Thundaga at level 26, Flare at level 51, and Meteor at level 56, but her equipment needs to support those spells. Gold Hairpin halves MP costs, while upgraded Lordly Robes increase maximum MP by 30%. Your strongest setup depends on what needs fixing: damage, MP efficiency, or survivability.
How does Sakura's magic damage build work?
Sakura is a magic Commando who uses rods and can equip robes or Light armor. Her job is spell damage, so this setup favors Magic Attack and useful casting effects rather than treating every higher-stat weapon as an automatic upgrade.
The core equipment choices each solve a different problem:
| Build component | Recommended choice | Why it fits |
|---|---|---|
| Character | Sakura | Her Commando kit includes offensive spells and self-buffs |
| Vision | Terra | Magic Attack +30%, Magic Boost, and additional elemental coverage |
| Stat bonus | Magic +3 | Improves Sakura's spell damage |
| Damage weapon | Wizard's Rod+ | Adds 30% damage when attacking an elemental weakness |
| Opening-buff weapon | Roselia | Grants Concentrate for 3 turns and Sage's Eye for 4 turns at battle start |
| Survival weapon | Unyielding Staff | Lets Sakura survive otherwise lethal damage with 1 HP once per battle |
| Armor target | Lordly Robes, then their upgraded version | Enables magic to hit targets under Reflect; the upgrade adds maximum MP +30% |
| MP accessory | Gold Hairpin | Halves MP costs |
Terra is the default because her magic bonuses directly support Sakura's role. Magic Boost becomes available at MR 3, and LB Double Charge at MR 5, giving you clear Vision-development targets.
Shantotto is a useful alternative if you want Dualcast or group-targeted magic supported by Area Effect Adept. Compare those options in the best Visions and character pairings guide before assigning Terra elsewhere.


Can another character use Terra at the same time?
Each Vision can be assigned to only one character at a time. If Archwitch Fina is using Terra, you must move that Vision to Sakura or choose another pairing, such as Shantotto.
Which stats should a magic-focused attacker prioritize?
Put Magic and Magic Attack first, then address MP efficiency and survival through equipment effects. Sakura's Magic +3 stat choice supports spell damage, while Terra supplies a separate Magic Attack +30% bonus.
Use these priorities when comparing upgrades:
- Magic Attack: Your main offensive equipment consideration. Roselia has 204 Magic Attack, while Wizard's Rod+ has 227.
- MP efficiency: Gold Hairpin halves MP costs, making it the straightforward choice for sustained casting.
- Maximum MP: Upgraded Lordly Robes increase maximum MP by 30%, giving Sakura a larger casting reserve.
- Survival effects: Unyielding Staff's lethal-hit protection or Wizard's Rod+'s 20% magic evasion can matter more than another offensive bonus in the right fight.
Sanctity improves healing magic. It matters for a healer such as Fina, but it is not the stat to chase for Sakura's spell-damage role.
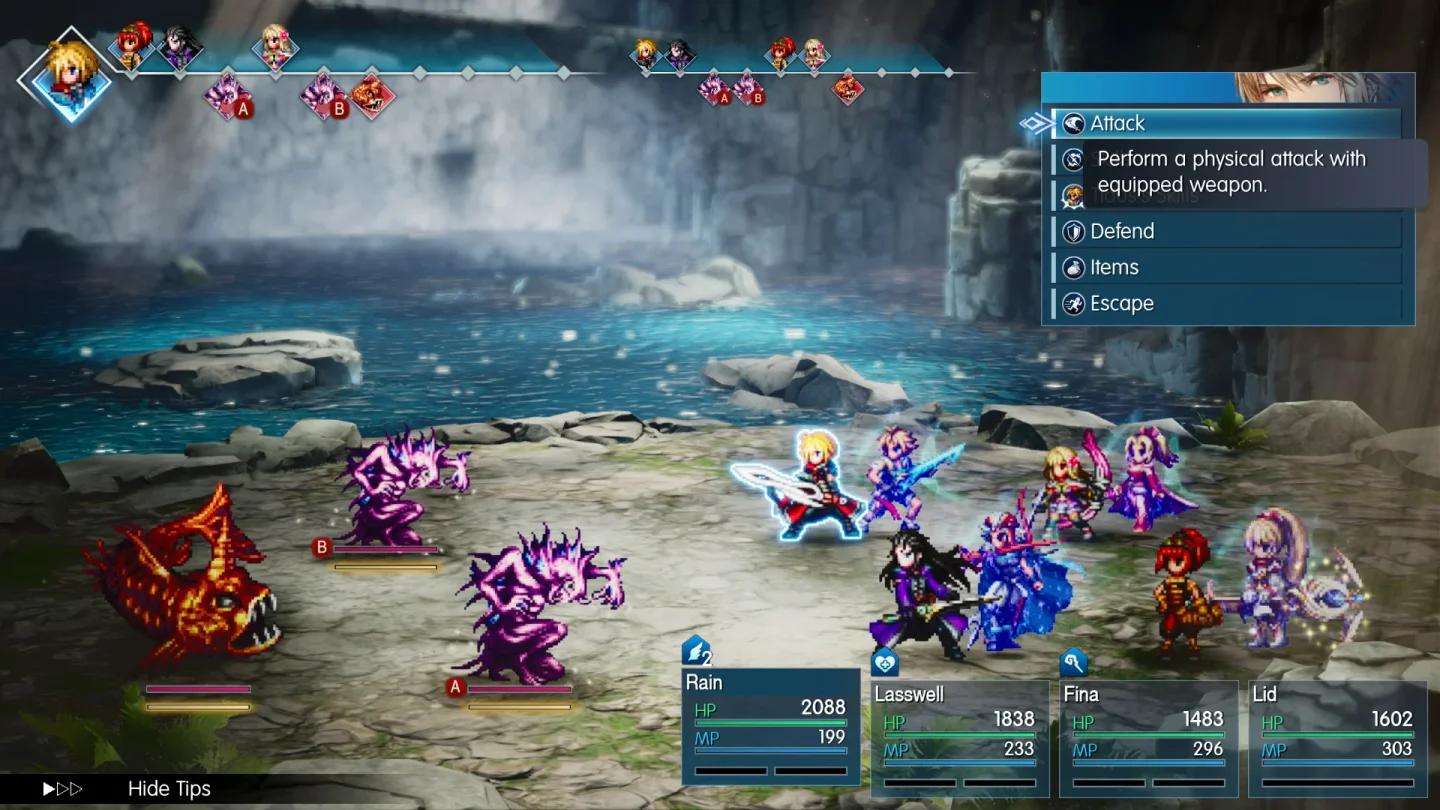
Set Sakura's damage priorities
Which weapons and equipment should Sakura use?
Change Sakura's loadout through Equipment & Abilities. Keep multiple rods available when their effects serve different purposes, particularly Unyielding Staff, Roselia, and Wizard's Rod+.
Which rod is best for your next fight?
| Rod | Relevant effect | Best for |
|---|---|---|
| Mythril Rod | Fills the Limit Burst gauge by 10% when Sakura staggers an enemy | An initial shop option with an extra reward for staggering |
| Unyielding Staff | Survives otherwise lethal damage with 1 HP once per battle | Fights where Sakura needs protection against a lethal hit |
| Silver Staff | A later shop weapon available in the Town of Sian | A shop-based progression option before choosing endgame effects |
| Roselia | Grants Concentrate for 3 turns and Sage's Eye for 4 turns at battle start | Starting combat with Sakura's buffs already active |
| Wizard's Rod+ | Adds 30% weakness damage, 20% magic evasion, and a 99,999 damage cap | Exploiting elemental weaknesses with an offensive endgame setup |
Wizard's Rod+ is the strongest recommendation here when you can trigger its weakness bonus. Roselia offers a different advantage: its opening buffs support Sakura immediately, rather than tying its main benefit to the enemy's elemental weakness.
Unyielding Staff remains worth keeping after you obtain other rods. Its once-per-battle survival effect has a clear purpose that a higher Magic Attack value does not replace.
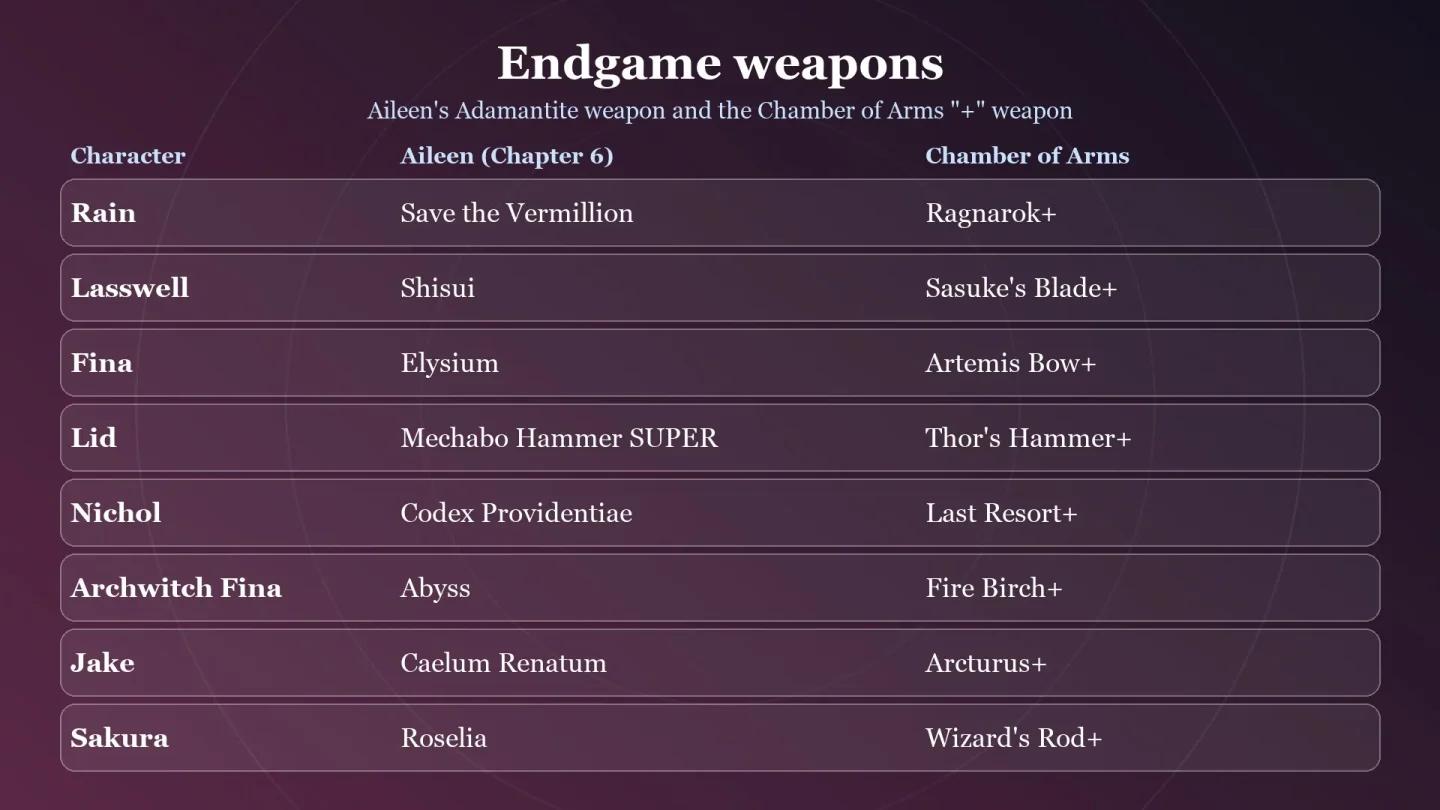
Endgame weapons for all characters
Which armor and accessory complete the build?
Lordly Robes are the endgame armor target because they allow magic to hit enemies under Reflect. Their upgraded version also increases maximum MP by 30%, combining a specific answer to Reflect with a larger MP reserve.
For accessories, choose Gold Hairpin when MP costs are limiting Sakura's casting. Use Amulet of Magic Absorption as a recovery option if you are willing to deal damage with standard attacks to restore MP.
How do you balance damage and MP efficiency?
Sakura's resource options work differently. Gold Hairpin reduces spending, upgraded Lordly Robes increase the size of her MP pool, and Amulet of Magic Absorption restores MP through a particular action.
| Equipment | Resource effect | Best use |
|---|---|---|
| Gold Hairpin | Halves MP costs | Sustained spellcasting |
| Upgraded Lordly Robes | Maximum MP +30% | Increasing the MP available to spend |
| Amulet of Magic Absorption | Restores 2% of maximum MP when a standard attack deals damage | Recovering MP through standard attacks |
Gold Hairpin is the cleanest spell-first accessory choice: you benefit while continuing to cast. Amulet of Magic Absorption asks you to use a standard attack, so its recovery comes with a different action choice.
Stretch Sakura's casting resources
Which skill unlocks should you plan around?
Sakura's build develops as she gains offensive spells and buffs. Use these level milestones to see which parts of the setup she can support with her own skills:
| Level | Skill unlocked | Build relevance |
|---|---|---|
| 1 | Sage's Eye | Part of Sakura's native kit immediately |
| 16 | Thundara | An offensive spell option |
| 22 | Eminent Casting | Another key ability in her magic kit |
| 26 | Thundaga | A later Lightning spell option |
| 39 | Concentrate | Adds the self-buff also granted by Roselia |
| 51 | Flare | Expands her later offensive spell selection |
| 56 | Meteor | Another late-level damage option |
Roselia grants Sage's Eye and Concentrate at the start of battle. Keep that equipment effect in mind alongside Sakura's learned abilities when deciding which rod to equip.
What are the budget and endgame gear options?
Sakura's initial weapon path begins much later than Rain's or Fina's first shop purchases. Mythril Rod is sold in the Village of Sunioo, followed by Unyielding Staff in the Town of Duggle and Silver Staff in the Town of Sian.
For the party members supporting Sakura before those locations, use the early-game weapons and equipment guide. Sakura's own progression should focus on the rod effects above rather than equipment intended for another character's weapon type.
What should you use before endgame trials?
Build toward the expensive systems gradually:
- Mythril Rod: Start here for Sakura's initial shop progression. Its Limit Burst gain triggers when she staggers an enemy.
- Unyielding Staff: Choose this when survival is the immediate problem. It protects against otherwise lethal damage once per battle.
- Amulet of Magic Absorption: Obtain it through Mysidia, Ever Blooming if you want standard-attack MP recovery before settling on Gold Hairpin.
Terra supports Sakura's damage throughout this progression. You can develop her Magic Boost and LB Double Charge abilities while working toward endgame equipment.
How do you obtain Roselia and Wizard's Rod+?
Roselia is Sakura's Aileen-forged weapon. Starting in Chapter 6, complete Forger of Wills, then visit Aileen on the airship deck. Forging Roselia costs 1 Adamantite.
Wizard's Rod+ belongs to the Chamber of Arms progression. Restore the weapon through its trial, then complete its ultimate trial after Sakura reaches level 70 to obtain the upgraded version.
Gold Hairpin and Lordly Robes also come through the Chamber of Arms. Their resource and Reflect-related effects make that system relevant to more than Sakura's final rod.
How should you adjust the build for enemy defenses?
What if the enemy has an elemental weakness?
Equip Wizard's Rod+ and use an attack matching the target's elemental weakness to gain its 30% damage bonus. Terra expands Sakura's coverage with three elements outside her base skillset, giving you more ways to make use of that effect.
Roselia remains an alternative when its opening Concentrate and Sage's Eye buffs are more useful for your setup. The choice is between specific benefits, not simply 204 versus 227 Magic Attack.
What if the target has Reflect?
Equip Lordly Robes to let Sakura's magic hit targets under Reflect. This is a direct equipment answer to that defense, and upgrading the robes adds maximum MP +30% without replacing their Reflect-related function.
What if Sakura keeps taking lethal damage?
Switch to Unyielding Staff for its once-per-battle survival effect. If incoming magic is the concern, Wizard's Rod+ also provides a 20% chance to evade magic attacks, giving the offensive option a defensive benefit of its own.
Common mistakes
- Comparing only Magic Attack. Wizard's Rod+ has 227 Magic Attack, but Roselia's opening buffs and Unyielding Staff's survival effect solve different problems.
- Expecting Amulet of Magic Absorption to reward spell damage. Its 2% maximum-MP recovery requires a damaging standard attack.
- Building Sakura around Sanctity. Sanctity supports healing; Sakura's damage setup favors Magic, Magic Attack, and casting support.
- Planning to share Terra between two characters. Each individual Vision can be assigned to only one character at a time.
Pro tips
Fix the problem that is stopping Sakura from casting
If you're struggling with MP costs, equip Gold Hairpin before changing your entire damage setup. Halving spell costs directly addresses resource pressure, while Amulet of Magic Absorption requires standard attacks to recover MP.
Keep a survival rod beside your damage rod
Treat Unyielding Staff as a situational swap rather than an item to discard automatically. Wizard's Rod+ rewards weakness exploitation, but surviving one otherwise lethal hit may be the more useful effect in a fight that keeps dropping Sakura.
FAQ
Is Terra or Shantotto better for Sakura?
Terra is the default for Magic Attack +30%, Magic Boost, and additional elemental coverage. Shantotto is an alternative for Dualcast and Area Effect Adept, particularly when you want more emphasis on repeated casts or group-targeted magic.
Should Sakura use Magic +3 or build around healing?
Choose Magic +3 for this damage-focused setup. Sanctity improves healing magic, while Sakura's recommended role here is offensive spellcasting supported by MP-efficient equipment.
What is the best accessory for keeping Sakura's MP costs down?
Gold Hairpin halves MP costs. Amulet of Magic Absorption instead restores 2% of maximum MP when a standard attack deals damage, making it a recovery option rather than a casting-cost reduction.
Is Roselia better than Wizard's Rod+?
Roselia suits setups that value opening Concentrate and Sage's Eye buffs. Wizard's Rod+ rewards elemental-weakness attacks with 30% more damage and adds 20% magic evasion. Compare their progression and alternatives in the FF Resonance endgame weapons and upgrades guide before committing your Adamantite.