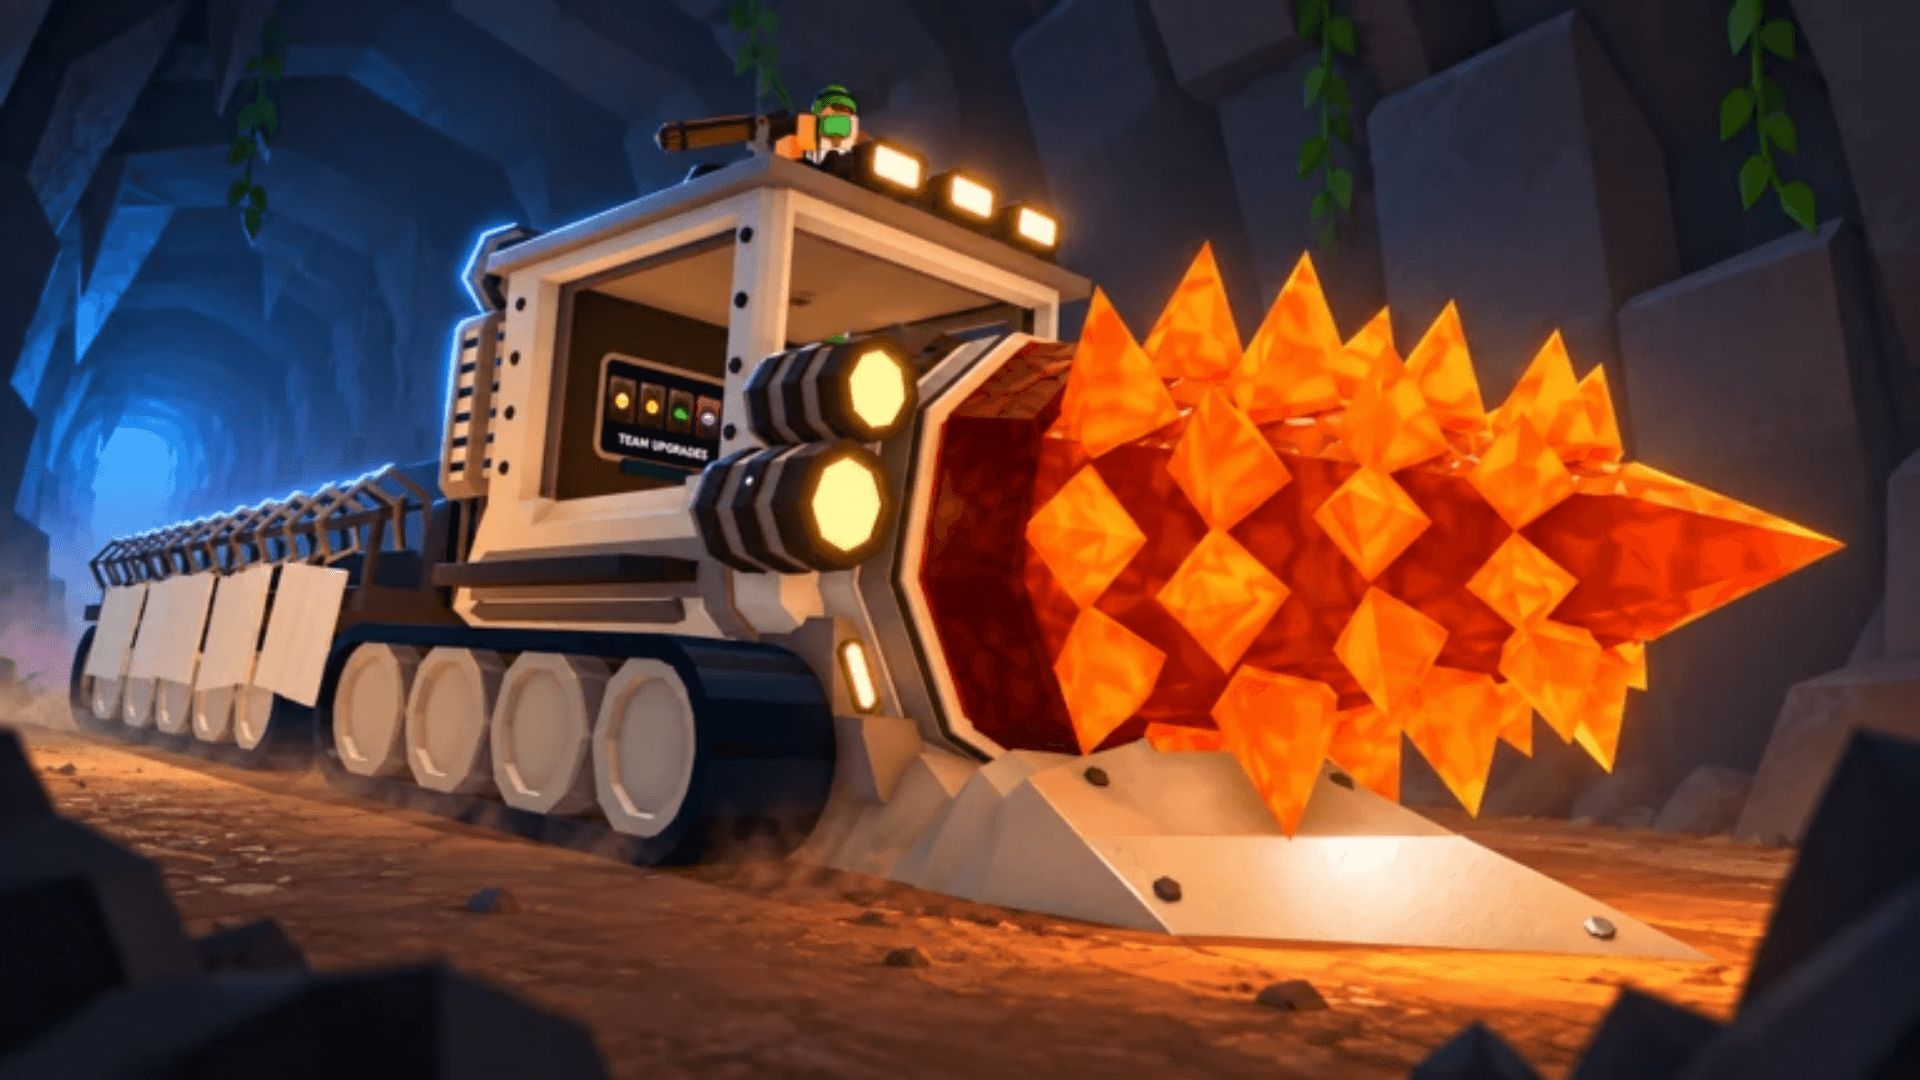

Drill to Earth's Core packs 28 classes into its roster, and the gap between the best and worst is enormous. The right pick can double your damage output, flood your team with resources, or make boss fights trivial. The wrong one leaves you grinding with a Rusty Sword wondering why nothing is working. This guide breaks down every class from S to D tier so you know exactly where to spend your Cores.
How the Class System Works in Drill to Earth's Core
Classes are purchased with Cores from the Class Shop, located on the left side of the main game lobby. The shop rotates its available selection periodically, so not every class is accessible at all times. Each class has four perk levels, with the Level 4 perk always being a team-wide bonus that benefits every player in the session.
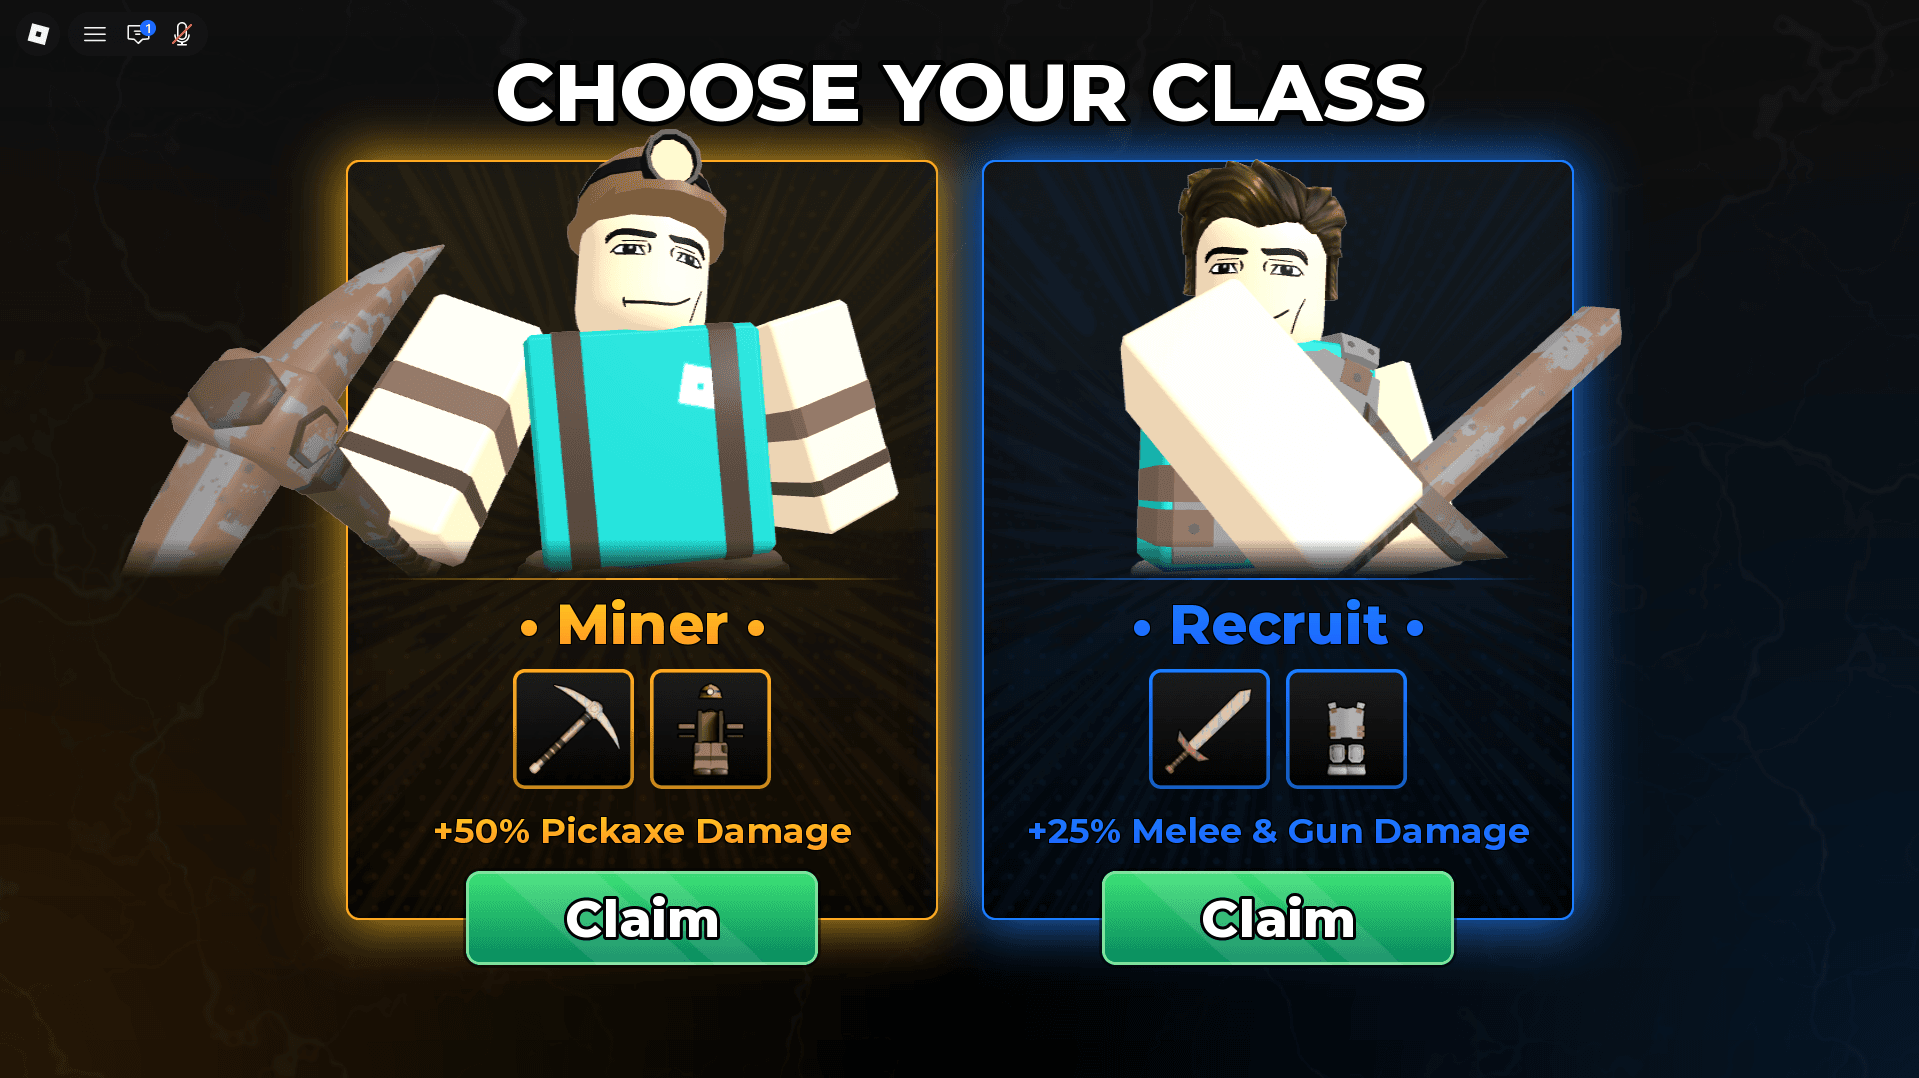
Starting out, you choose between the Miner and Recruit as your free options. There is technically a "none" class in the shop, but equipping it gives you zero benefits, so treat it as a non-option.
Tier rankings here weigh damage output, survivability, resource generation, economic value, team utility, and how well each class's perks work together. Team perk strength factors in heavily for multiplayer, since a Level 4 bonus that helps your whole squad is worth more than one that only benefits you.

Drill to Earth's Core Full Tier List
| Tier | Classes |
|---|---|
| S | Executioner, Gunslinger, Prospector, Goblin King, Engineer |
| A | Tank, Lucky Looter, Bruiser, Salvager, Samurai, Bounty Hunter, Witch, Reaper, Crafter |
| B | Gunsmith, Healer, Mechanic, Scout, Demolitionist, Nightcrawler, Princess, Pirate |
| C | Miner, Racer, Driller, Mercenary, Priest |
| D | Recruit |
S-Tier Classes
These five classes provide the strongest advantages in the game. Their perks scale well, work across multiple situations, and their Level 4 team bonuses are genuinely impactful.
Executioner
Starting gear: Outfit, Executioner Sword
The Executioner is built entirely around boss fights, and that turns out to be one of the best specializations in the game. Level 1 gives +200% damage to bosses, which is an absurd multiplier that makes every major encounter dramatically shorter. Each boss kill then grants a random permanent +10% bonus to Max HP, Melee Damage, or Gun Damage, plus a Gem drop (60% Diamond, 30% Emerald, 10% Ruby). The Level 4 team perk awards a free Drill Upgrade chosen from 3 options every time a boss dies, which accelerates the whole team's progression.
The only real limitation is that the class needs you to actually reach and kill bosses consistently. Once you do, the snowball effect is hard to match.
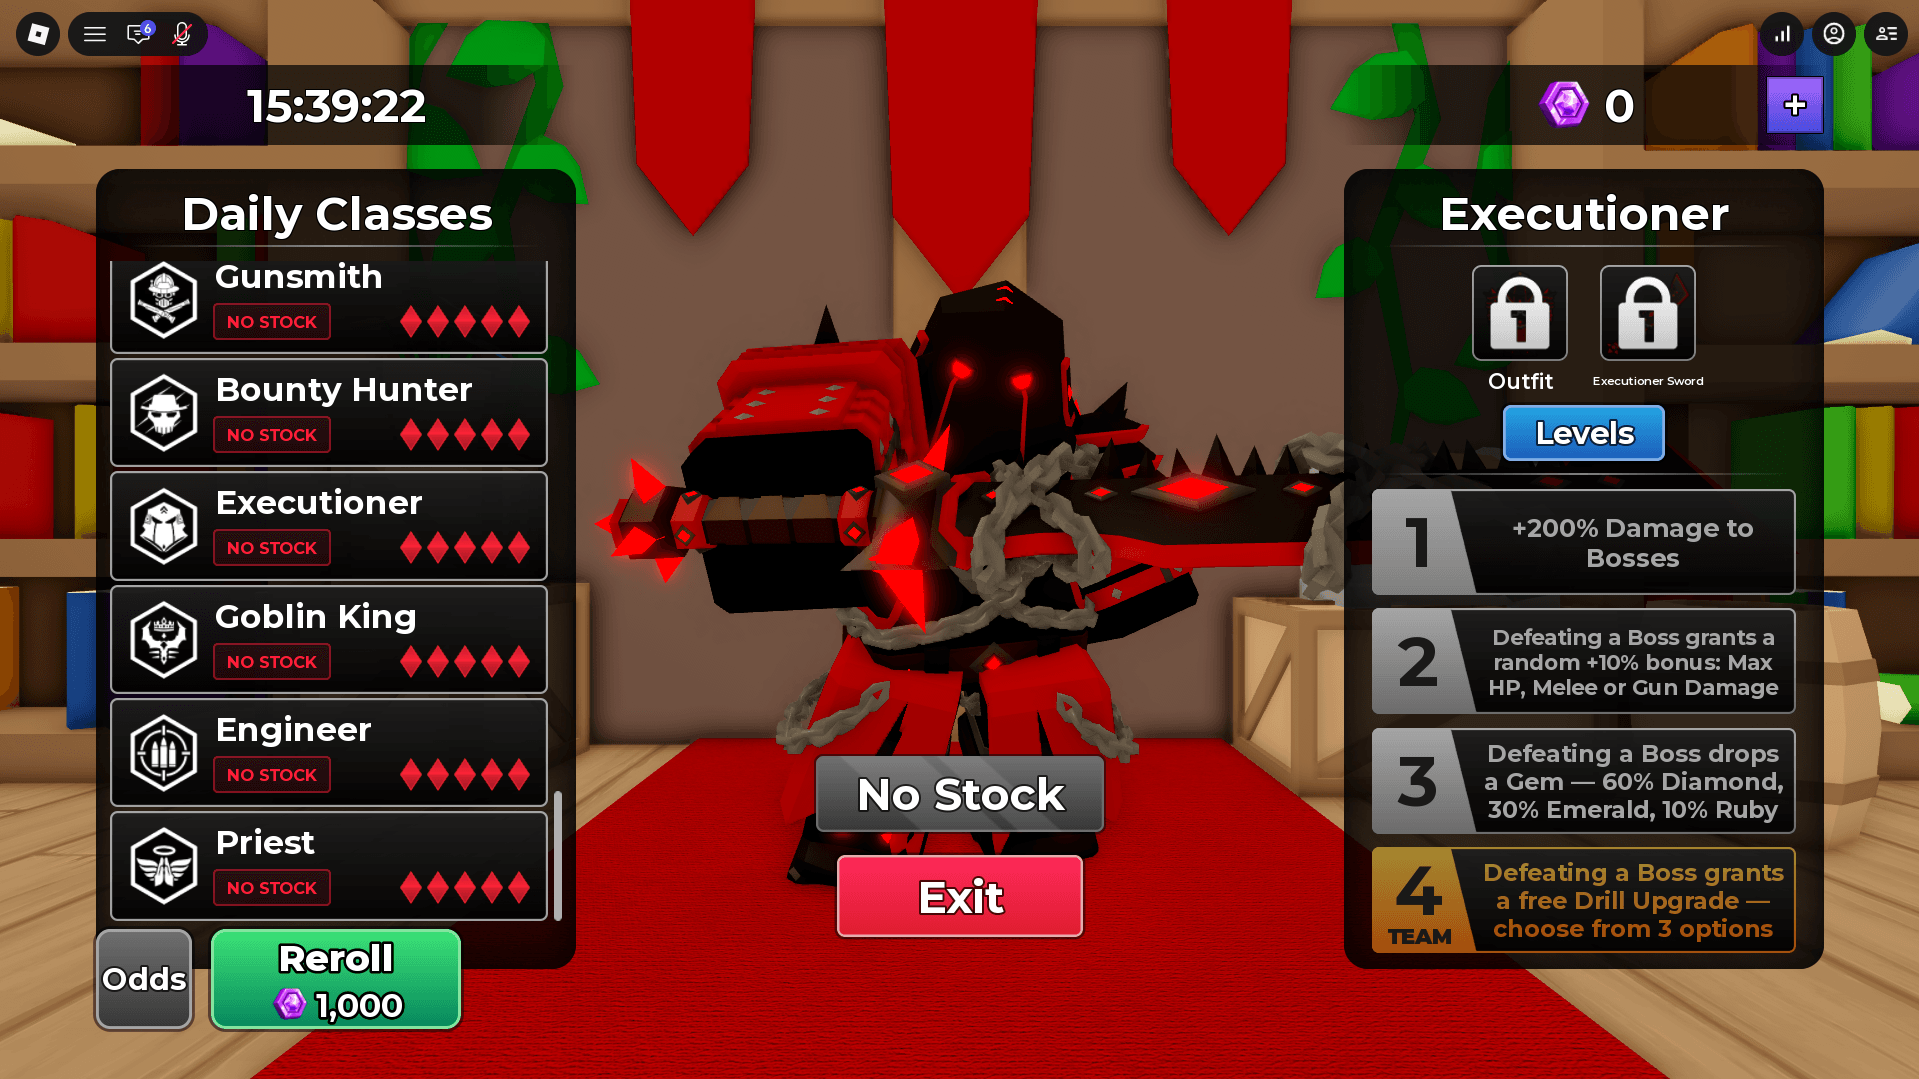
Drill to Earth's Core Class Tier List: All Classes Ranked
Gunslinger
Starting gear: Outfit, Revolver
Double damage and double fire rate on guns. That is the Gunslinger's core identity, and it delivers. Level 1 provides +100% Gun Damage, Level 3 adds +100% Gun Fire Rate, and the Level 2 perk drops Pistol, Shotgun, and Rifle Ammo from enemies at a 10% rate to keep you supplied. The Level 4 team bonus of +50% Gun Damage means even teammates who aren't running gun builds benefit from having a Gunslinger in the party.
If your team leans into melee, the Gunslinger loses some value. For gun-heavy compositions, it is the best damage class available.
Prospector
Price: 30,000 Cores | Starting gear: Outfit, Prospector Pickaxe
Resource generation at a level that makes every other mining class look underpowered. Ore and Gem Veins drop multiple items more often (up to 4), and Level 3 guarantees at least 2 items per vein. Level 2 automatically smelts Ores into Bars on pickup, removing an entire processing step. The Level 4 team perk gives mined Gems a 5% chance to be Pristine, which increases their value for everyone.
The Prospector does not contribute much to combat directly, but the economic advantage it generates funds upgrades that more than compensate.
Goblin King
Price: 30,000 Cores | Starting gear: Outfit, Goblin King Scepter
Goblins sell for +200% Coins at Level 1, which is a strong economic foundation. The real power comes from Level 2: +5% Melee and Gun Damage per active Goblin Recruit. Level 3 raises the recruit cap by 1 for each Goblin Lord defeated, up to a maximum of 20. At 20 recruits, that is a +100% damage bonus on top of everything else. Every player also starts with a Goblin Knight thanks to the Level 4 team perk.
The scaling here is conditional on maintaining active recruits, but the ceiling is genuinely ridiculous.
Engineer
Starting gear: Outfit, Basic Sentry, Advanced Sentry, Flamethrower
No class starts with more equipment than the Engineer. Three useful tools from the first second of a run is a substantial head start. Level 1 adds +50% Sentry Range and Damage, Level 2 makes Turrets 50% cheaper in the Crafting Shack, and Level 3 gives enemies defeated by Turrets a 5% chance to drop Scrap. The Level 4 team bonus extends +25% Sentry Range and Damage to every player.
The Engineer requires committing to a turret-based strategy, but within that strategy it is exceptionally efficient.
A-Tier Classes
A-tier classes are strong picks with clear roles. They do not quite match the S-tier ceiling, but several of them are better choices depending on your playstyle or team composition.
Tank
Price: 5,000 Cores | Starting gear: Outfit, Taunt Banner
Level 1 gives +100% Health. Level 3 adds another +150% Health. Taunted enemies deal 25% less damage to you. The Level 4 team perk adds +50% Health to everyone. Pure survivability, no frills. At 5,000 Cores it is also one of the cheaper options that actually delivers meaningful power.
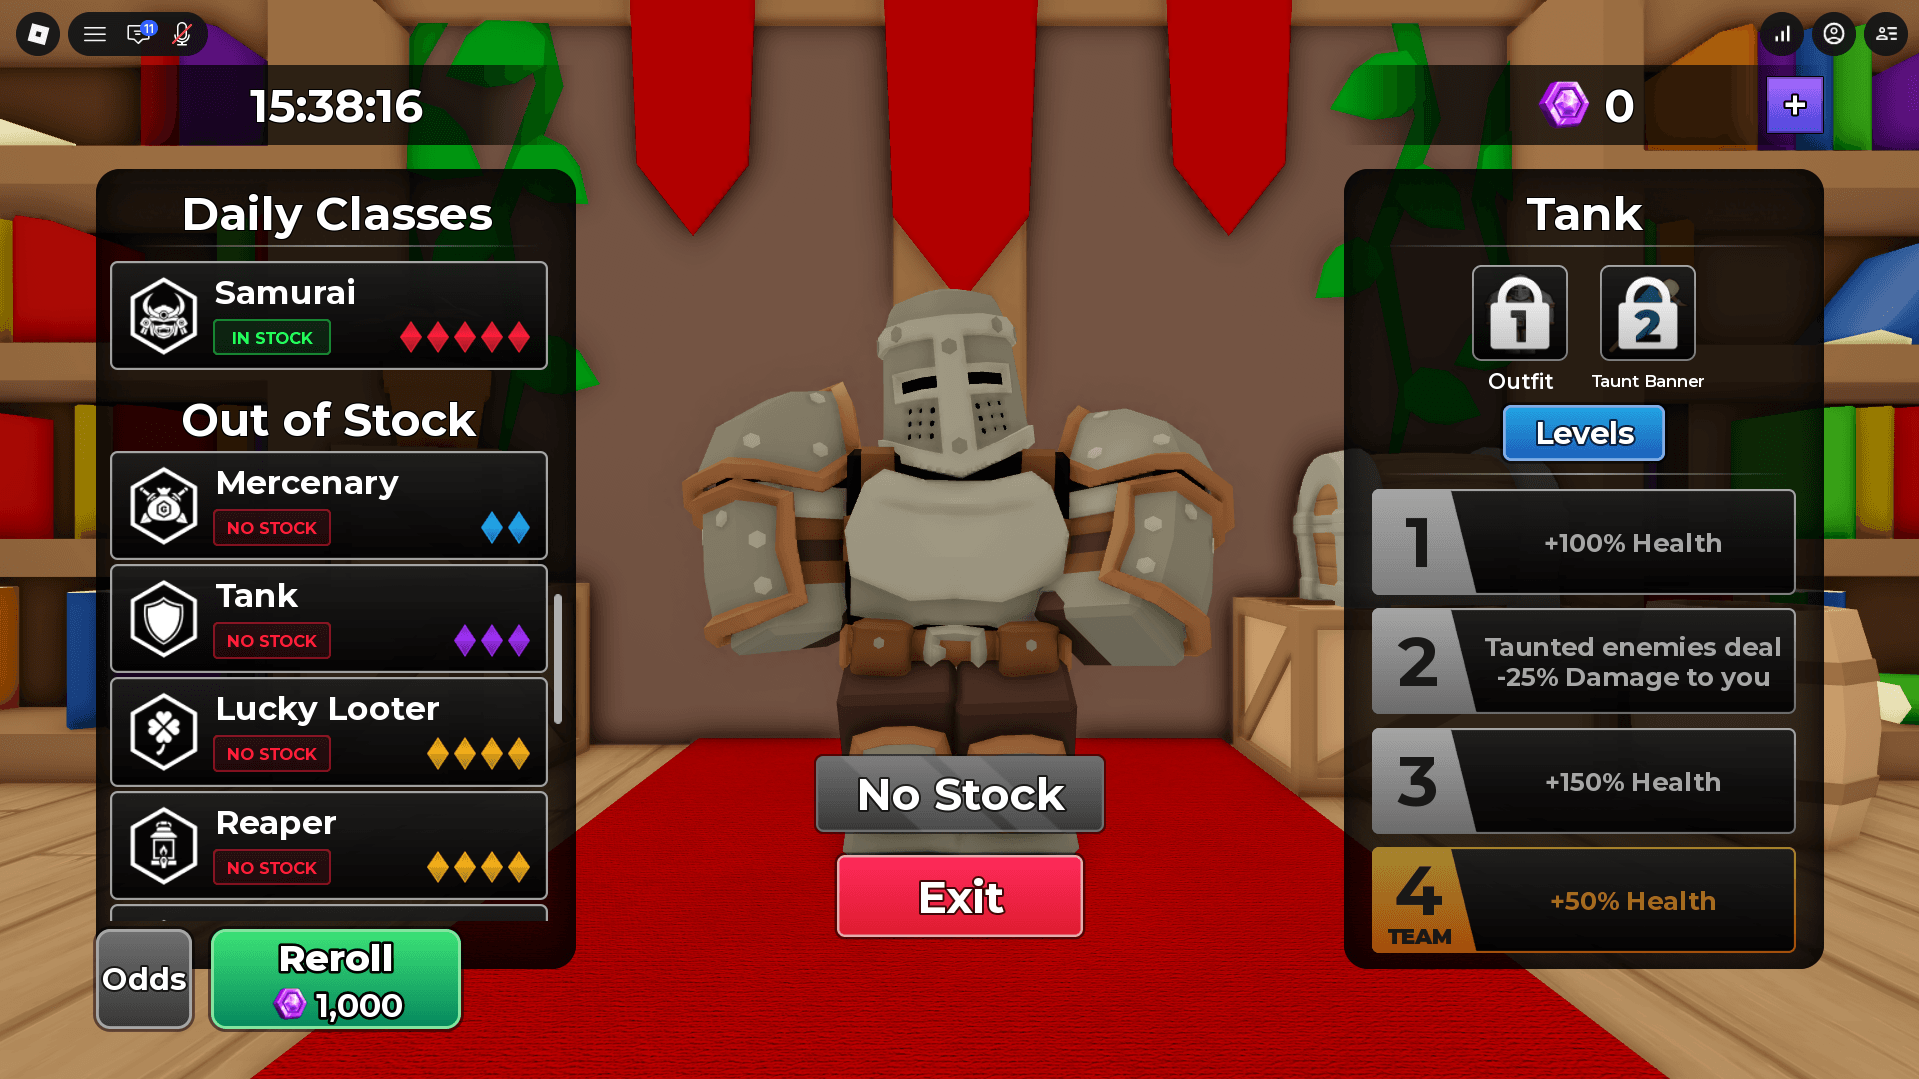
Drill to Earth's Core Class Tier List: All Classes Ranked
Bruiser
Price: 5,000 Cores | Starting gear: Outfit, Steel Sword
+100% Melee Damage at Level 1, with consecutive hits granting +5% Melee Damage stacks at Level 3. The Level 4 team perk adds +50% Melee Damage for the whole squad. Strong in melee-focused teams, less relevant if your group is running guns.
Lucky Looter
Price: 10,000 Cores | Starting gear: Outfit
Chests always drop at least 2 items (Level 2) and can drop up to 4 (Level 1). Level 3 doubles Legendary and Mythic Luck from Chests. The Level 4 team perk adds a +50% Money Fog chance. Consistent chest value every run, with a meaningful chance at top-tier loot.
Salvager
Price: 10,000 Cores | Starting gear: Outfit, Magnet
Enemies have a 10% chance to drop Iron Bars, Scrap shredding yields +50% more Cogs, and Scrap sells for +100% Coins. The Level 4 perk extends the Iron Bar drop to the whole team. Economic and resource-focused, but the Scrap sell bonus is one of the stronger passive income perks in A-tier.
Samurai
Starting gear: Outfit, Samurai Katana
20% Melee Crit Chance at Level 1, with crits chaining to a nearby enemy at Level 3. Level 2 lets melee attacks slice through Stone enemies, Leeches, and Watchers simultaneously. The team perk gives everyone a 10% Melee Crit Chance. Excellent crowd clearing for melee players.
Bounty Hunter
Starting gear: Outfit, Bounty Hunter Cleaver
+50% Gun and Melee Damage at Level 2 makes this one of the most versatile damage perks in the game. Bounties give +50% Coins, Dungeon Bosses you defeat become Bounties, and the Level 4 team perk gives enemies a 10% chance to become Bounties. The damage bonus alone keeps this in A-tier.
Witch
Price: 3,000 Cores | Starting gear: Outfit, Strength Potion, Invisibility Potion
Potions last +100% longer at Level 1. Level 3 makes potions you use also affect nearby teammates. The Level 4 team perk adds another +50% potion duration. Starts with two immediately useful consumables and costs only 3,000 Cores, making it one of the best value picks in A-tier.
Reaper
Starting gear: Outfit, Soul Lantern
Defeated enemies drop Soul Orbs that heal 5 HP. Every 10 enemies killed adds +5 Max HP and +1 Weapon and Tool Damage permanently. The Level 4 team perk doubles Soul Orb healing. The Reaper scales continuously throughout a run, making it stronger the longer a session goes.
Crafter
Starting gear: Outfit, Resource Scanner, Wrench, Furnace
Crafting Shack prices are 10% off (Level 1), Scrap shredding returns 50% of its value in Coins (Level 2), and Drill Boosts grant +50% more Distance, Speed, and Wall Damage (Level 3). The team perk adds another 5% Crafting Shack discount. Strong utility class with good starting equipment.
B-Tier Classes
B-tier classes are reliable and useful in the right setup, but their perks are narrower or come with notable limitations.
| Class | Key Perks | Limitation |
|---|---|---|
| Gunsmith (30,000 Cores) | Gun crafting, piercing shots, Golden enemy drops, team ammo doubles | Expensive for what it offers; gun-only |
| Healer | +100% healing, team healing aura, starts with Medkit and Revive Kits | Near-useless in solo play |
| Mechanic | +50% Fuel Contribution, auto-deposit Fuel from kills, craftable Gas Cans | Specialized around Fuel only |
| Scout (3,000 Cores) | +20% Movement Speed, dungeon item highlights, team speed bonus | Low direct combat value |
| Demolitionist | +100% Explosive Damage, 25% enemy explosion on death, team explosive bonus | Tied to explosive weapons |
| Nightcrawler | Stealth, melee and speed boost in Darkness, 1% HP regen per second in Darkness | Only works in dark areas |
| Princess | Start with 1,000 Coins, 25% of teammate Money Bag income, Gems sell for +50% | Economy-only, no combat |
| Pirate | Gold Bar drops, +200% Coins for Golden items, starts with Flintlock and Cannons | Depends on obtaining Golden items |
C-Tier Classes
C-tier classes have functional perks but significant restrictions that limit their overall impact.
Miner starts with a Rusty Pickaxe and gets +50% Pickaxe Damage with a 25% chance for +300% burst damage. Ores and Gems sell for +25% Coins. The problem is that the Prospector does everything the Miner does but better, and at S-tier. The Miner is only worth running if the Prospector is unavailable in the current shop rotation.
Racer and Driller are both driver-locked classes. Racer gives +50% Drive Speed and Acceleration, with a +100% bonus when Fuel drops below 10%. Driller gives +50% Wall Damage as the Driver, with the same low-Fuel bonus. Both are cheap (3,000 Cores each) and provide solid team perks (Engine Overdrive III for Racer, +25% Wall Damage for Driller), but they do nothing when you are not behind the wheel.
Mercenary adds +30% Melee Attack Speed and converts defeated enemies into Money Bags automatically. Useful, but the Bruiser and Samurai both offer stronger melee packages.
Priest regenerates 1% Max HP every 2 seconds and can instantly revive Blessed teammates. The Level 4 perk increases Church Spawn Rate by 50%. The instant revive is genuinely powerful, but the Priest is listed as rare in the shop, making it hard to access consistently.
D-Tier Classes
Recruit
Price: 100 Cores | Starting gear: Outfit, Rusty Sword
The Recruit is the worst class in the game with a real perk set. +20% Melee and Gun Damage, +50% Health, and Scrap sells for +25% Coins. The Level 4 team bonus is only +10% Melee and Gun Damage. Every single number here is the lowest version of what better classes offer at higher tiers. The 100 Core price makes it the first class most players buy, and that is fine, but replace it as soon as possible.
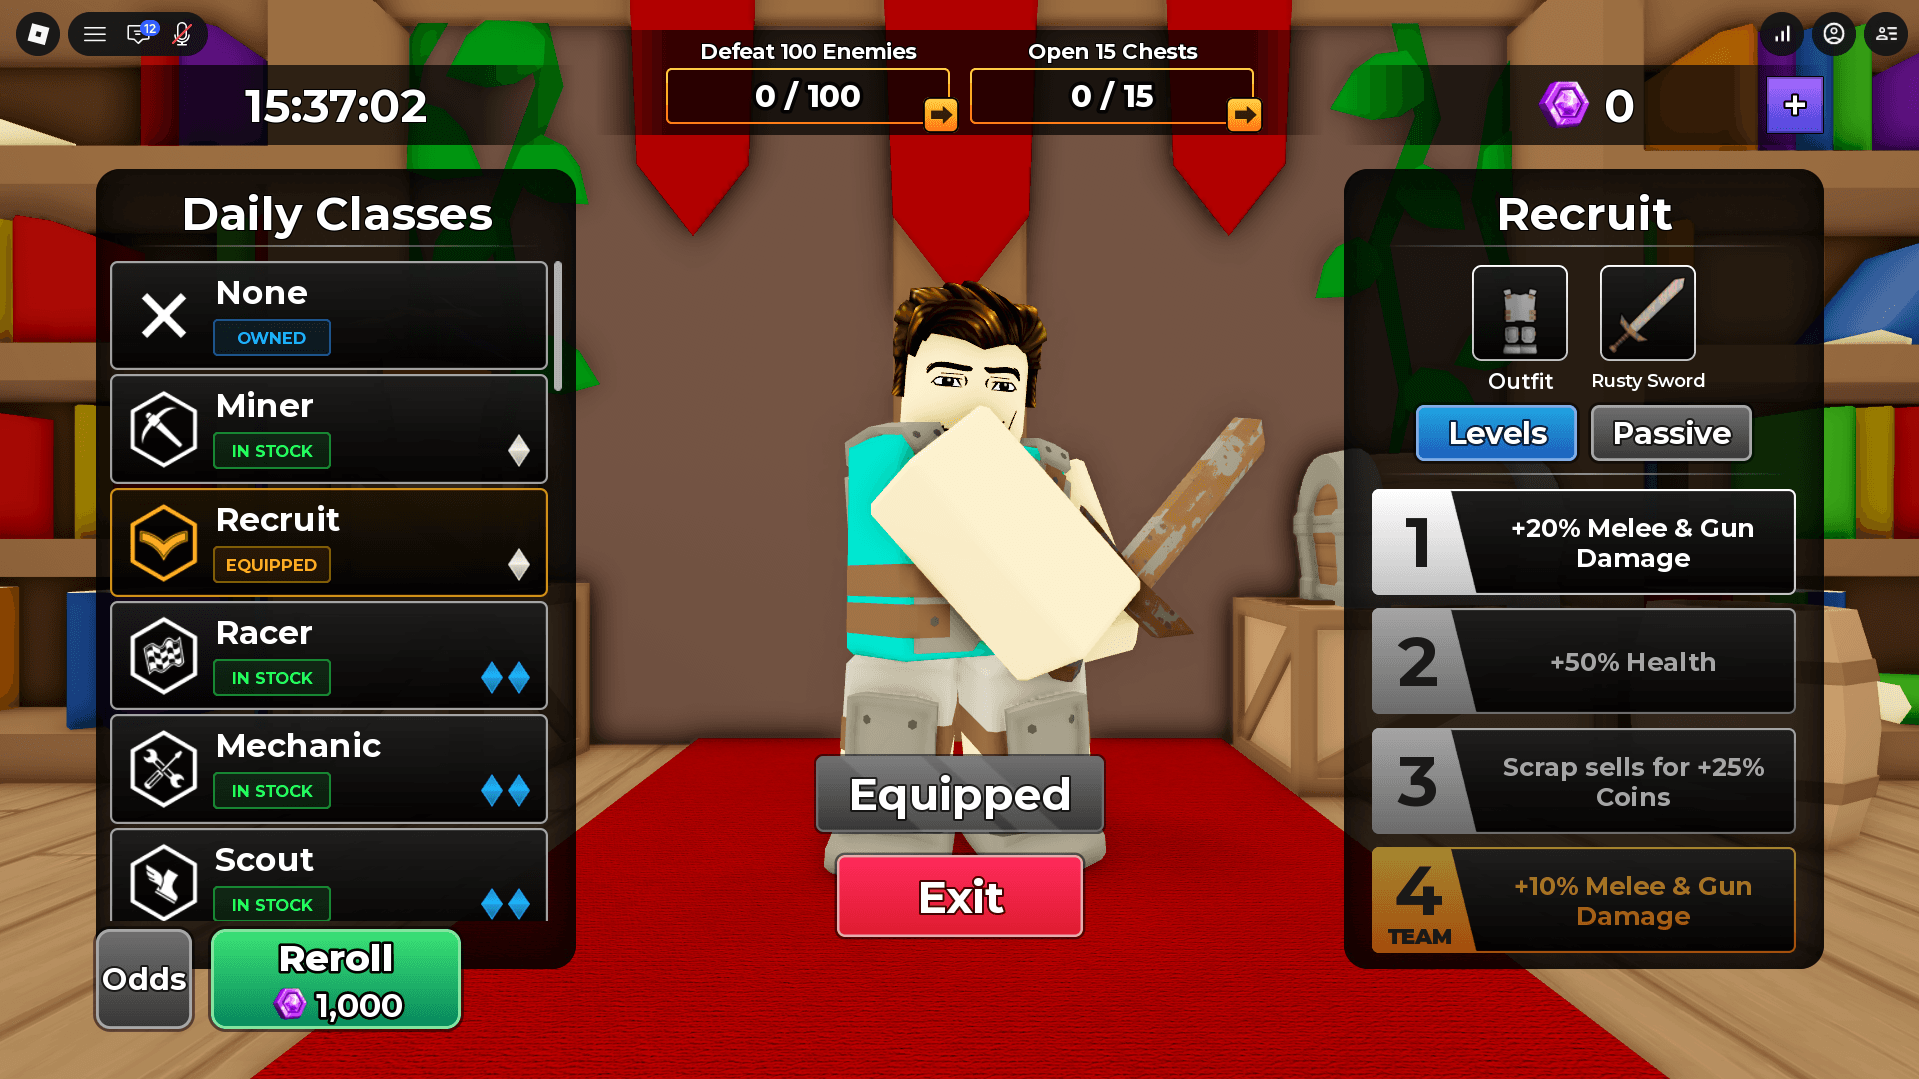
Drill to Earth's Core Class Tier List: All Classes Ranked
What Should You Buy First?
If you are just starting out, the Recruit (100 Cores) holds you over until you can afford something better. The Witch (3,000 Cores) or Scout (3,000 Cores) are the best early upgrades given their price-to-performance ratio. From there, Tank (5,000 Cores) or Bruiser (5,000 Cores) give you a solid foundation before you can reach the 30,000 Core tier.
For end-game investment, Prospector and Goblin King both cost 30,000 Cores and sit firmly in S-tier. Gunsmith costs the same but lands in B-tier, so prioritize the other two unless you have a specific gun-focused team build in mind.
For more Roblox class tier lists and strategy guides across the platform's biggest games, the Roblox guides collection covers everything from drilling games to dungeon crawlers. If you enjoy class-based rankings, the Drain the Lake class tier list and the Dungeon Lootr class tier list for Update 2 both follow a similar format and are worth checking out. For something with deeper build variety, the Roblox Bake or Die class tier list ranks every class from S to D with full perk breakdowns.