Castlevania: Belmont's Curse throws 14 distinct bosses at you across 18 total encounters, since Death, Isaac, Joan, and Dracula each show up twice. Two of those meetings are built to end in defeat no matter what you do, five drop no Tarot Card, and the health figures stretch from 800 on the opening encounter to 12,000 on a fight that is really a collectible gate wearing a boss costume. This guide breaks down every encounter in the order you will likely face them, what to equip, what to watch for, and what you take home afterward.
Complete boss roster and rewards
| # | Boss | Arena | HP | Reward |
|---|---|---|---|---|
| 1 | The Fallen (Leon) | Gate to the Catacombs, Paris Streets | 800 | The Fallen, Holy Cross |
| 2 | Joan | Roof of the Tower, Paris Streets | 1,800 | The Warrior, Infernal Pyre |
| 3 | Medusa | Serpent's Lair, Holy Innocents' Cemetery | 1,500 | The Prophetess, Petrifying Gaze |
| 4 | Death (first) | Stairway to Hell, Catacombs | — | None (scripted loss) |
| 5 | Isaac (first) | Main Hall | — | None (illusion) |
| 6 | Talos | Throne of the Builder, Clock Tower | 5,000 | The Builder, Fist of Talos |
| 7 | Carmilla | Observatory, Library | 4,500 | The Occultist, Blood Spikes |
| 8 | Brauner | Brauner's Atelier, Main Hall | 4,250 | The Artist, Masterpiece |
| 9 | Mammon | Mammon's Lair, Catacombs | 8,000 | The Miser, Wheel of Chaos |
| 10 | Joan (second) | Courage Bell, Notre-Dame | — | Blessing of Courage |
| 11 | Death (second) | Transept, Notre-Dame | 8,444 | The Shadow, Soul Harvest |
| 12 | Saint Louis | Palace of Justice, Paris Streets | 12,000 | The Judge, Valmanway |
| 13 | Isaac (second) | Heart of the Clock, Clock Tower | 2,500 | The Zealot, Chronomantic Dive |
| 14 | Dracula (first) | Court of the Night, Master's Quarters | 7,666 | Trophy only |
| 15 | Succubus | Hall of Mirrors, Belmont Manor | 8,000 | The Temptress, Life Drain |
| 16 | Doppelganger | Gallery of the Four Virtues, Notre-Dame | 8,778 | The Self, Absolution |
| 17 | Arthur | Chapel, Notre-Dame | 11,000 | The Brittle King, Stained-Glass Shield |
| 18 | Dracula (second) | Court of the Night, Master's Quarters | 7,666 | Trophy only |
Stop at a Mirror of Life before every boss door without exception. It restores health and tops up your Potions for free, and skipping it before Carmilla or the Succubus will hurt.

Tarot Card reward after boss

How to beat The Fallen
The Fallen sits at 800 health and functions as the game's combat tutorial whether you treat it that way or not. His Holy Cross arcs back through his own body on the return trip, so jumping once clears nothing. Swing through it with a weapon strike instead. His three-hit claw sequence leaves his back exposed the moment it ends; the right move is to dash through him mid-combo and punish from behind rather than standing in front and absorbing hits.
Once his health drops to roughly a third, he grabs the overhead Anchor and begins swinging. Push toward the arena edges and crouch or slide to avoid the shockwave when he lands. His whip grab covers most of the room but the windup is obvious, so relocate as soon as the strand appears.
How to beat Joan
Joan has 1,800 health on the roof of the Prison Tower and tends to give players more trouble than the two bosses that come after her. Her greatsword commands the space in front of her throughout the entire fight, so trying to trade blows from that angle is a reliable way to lose health fast. Pass through her and work the back; her only response from that position is a short backwards jab.
The Cestus pays off here because each clean punch builds on the last, and her turned back gives you the time to chain them. When fireballs collect overhead and her arm comes up, they fall as columns of flame with clear gaps between them. Pick a gap and hold it rather than running. Midway through she jumps and sends fire waves rolling along both sides of the arena; grabbing an Anchor to hang at the centre is the cleanest way through, though each Anchor needs a moment to recharge after use.
How to beat Medusa
Medusa holds 1,500 health and never shares a platform with Rose, which immediately cuts off a chunk of your options. Infernal Pyre only spreads along surfaces she is not standing on, so it contributes nothing. Swap to Holy Cross and use the Lance for pokes instead.
Avoid the lower platforms throughout, with one specific exception. When she leans back to charge the petrifying ray sweep, a boulder crashes onto the bottom platform on the opposite side of the arena. That boulder is your only cover from the sweep; get behind it before the beams fire. The boulder spawns on the right if she is positioned left, and vice versa. In the later phase she calls in Medusa Heads and starts hammering the upper platforms, at which point crossing to the opposite side and maintaining your cross throws is the answer.
How to survive the first Death encounter
The first time Death appears, in a ritual chamber off the Stairway to Hell, the fight is not winnable. The sequence closes on a cutscene no matter how the combat plays out. Holding onto your Potions here is the only correct decision.
His low horizontal slash can be ducked and his glowing outstretched hand can be avoided with a slide or air dash, but landing those dodges does not change the outcome. Treat this as a story beat and move on.
How to beat Isaac (both encounters)
The Main Hall confrontation is a phantom and rewards nothing. Keep your distance, avoid his direct attacks, and counter after his combinations end.
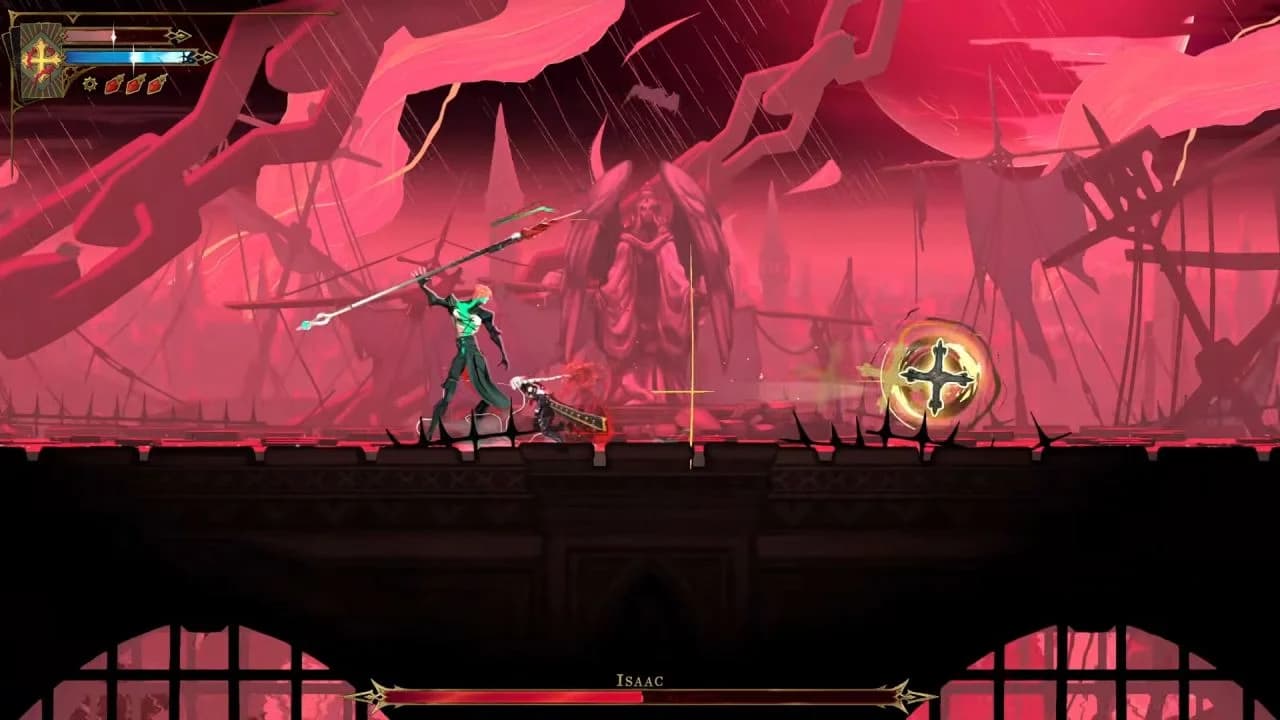
The fight that counts is at the Heart of the Clock with 2,500 health. Getting there requires equipping The Shadow Arcana and interacting with the clock on the Clock Tower Bridge to destroy the Cursed Horologium, then ascending through the Clockmaker's Atrium by activating the red clock switches. Inside the arena, the move to avoid is his spear dash; jump or step behind it. When the clock face turns black, green beams are about to cross the upper level, and dropping to the lower floor clears them cleanly. Ghost copies appear during the fight and look threatening but deal no damage and serve no mechanical purpose. His spear strings always end with a pause, and that pause is your window every single time. Chauve-Souris is available in the arena once he goes down.
Isaac's real fight at the Clock
How to beat Talos
Talos guards the Throne of the Builder at the base of the Clock Tower with 5,000 health, reached through the Builder's Secret Elevator, the Foundry Apex, and the Final Trap. The false throne room off the Clock Tower Bridge is a trap that locks you into the bad ending, so skip it entirely.
Fire and bleed both bounce off him, making Blood Spikes and Infernal Pyre useless here. Chains of Justice is the crowd-control option that connects. Platform around the arena hazards to stay mobile. At roughly half health the encounter shifts west into a second foundry chamber before returning to the original arena for the finish. After winning, use Smash on the cracked golden floor near the arena to drop into the room holding the Fists of Talos chest.
How to beat Carmilla
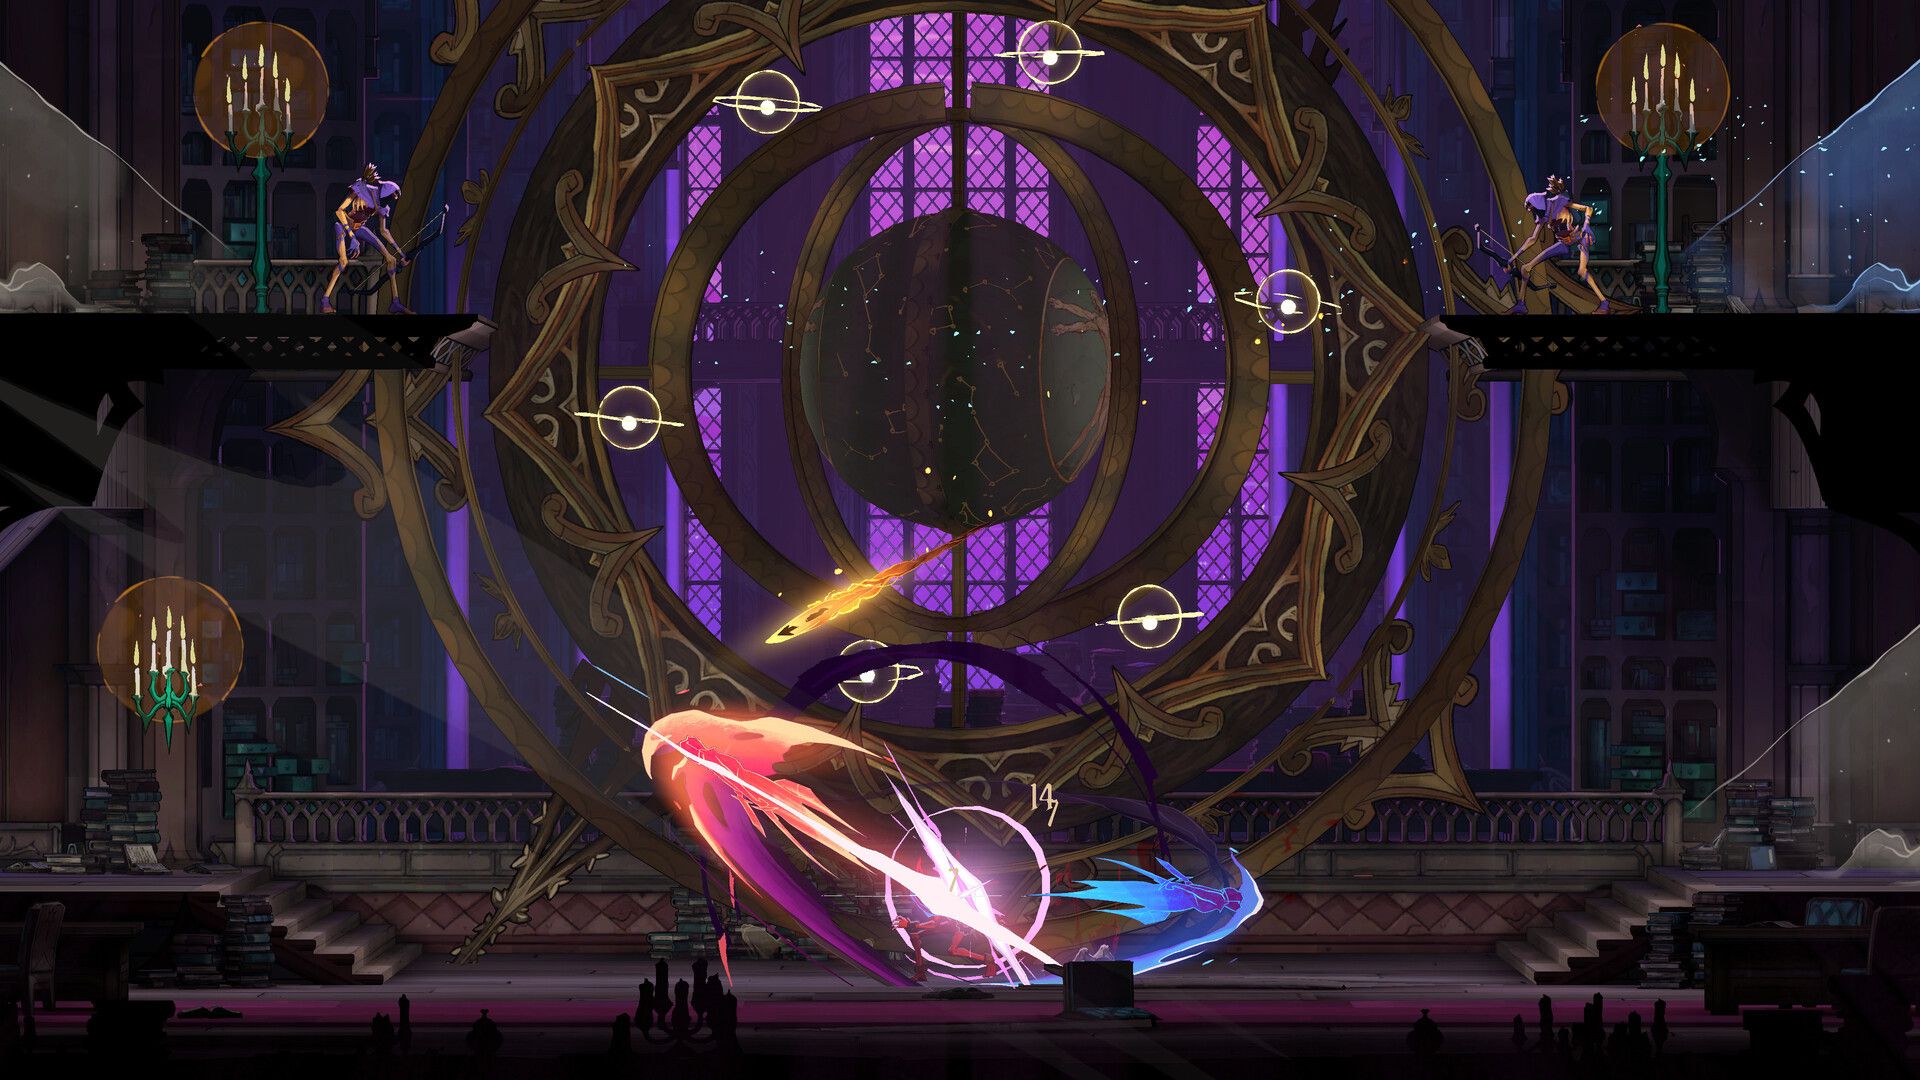
Carmilla waits in the Observatory above the Library with 4,500 health. Getting to her means reading the Star Chart in the Planetarium and then adjusting the rings in the Observation Tower until the nodes match the constellation it shows.
The fight opens with a curse that places an 8 above Rose's head automatically. Each blood hit she lands reduces that number, and reaching zero triggers an instant-kill grab. She also takes zero damage while two skull shields orbit her. Breaking those shields is the first task, not dealing damage; jump the apex of each blood wave while you chip them down, then attack freely once both are gone. The second half of the fight introduces blood pillars in patterns you can read, and the final phase traps you in the centre with converging rows of pillars and paired waves coming from both sides.
How to beat Brauner
Brauner has 4,250 health in his Atelier, west of the Servants' Hall. The fight does not begin until you grapple above the stone block suspended in the centre of the room and Smash down onto it, which is why The Builder Arcana has to come first.
He summons creatures from his paintings and repositions between fixed spots around the room. Clearing each wave quickly matters because a glowing summon is about to detonate; back off the moment you see that glow. He also fires a Vampiric Drain projectile that bleeds health over time on contact. Attack between waves rather than through them. The Masterpiece Arcana he drops is the item that unlocks access to Notre-Dame.
How to beat Mammon
Mammon is entirely optional and sits behind the flesh-and-eyes door in the Circle of Greed with 8,000 health. The door only opens when you have all three Eye Relics equipped at the same time. For exact relic locations and the full door sequence, the Gate of Flesh and Eye Relics guide covers it completely.
His arena is a gold-filled chamber where floor slams and energy beams cover large portions of the ground. The overhead Anchors are your escape route from the slam attacks; stay airborne when the floor lights up. Thread through gaps in the beams rather than trying to attack through them, and commit to hits while he hovers or finishes a recovery animation. His treasure pile contains the Ferryman's Obol, which the Ferryman exchanges for The Whisperer Arcana.

Mammon's Chamber of Greed
How to beat Death (the real fight)
The actual Death fight, worth 8,444 health, takes place in the Transept at Notre-Dame. Reaching it requires The Builder, The Artist, and The Occultist, then clearing the organ corruption by performing three melodies. If you need the organ sequences, the Notre Dame piano puzzle guide has all three solutions.
His low horizontal slash is ducked cleanly, and standing back up immediately after gives you a free punish. When a dark aura builds around him and his hand begins glowing, treat that as an emergency: slide or air-dash away before he closes the distance, then whip back in once he misses. When he voice-lines and teleports, tracking beams are coming. Get low, let them follow you upward, then drop back down quickly since the beams cover a wider band than their visuals suggest.
After the final beam, he reappears close to you for a scythe swing. The counterintuitive move is dashing toward him rather than away; it passes under the arc and leaves him open. At half health, destroyable sickles start orbiting the arena, and his horizontal slash gains a giant spinning sickle throw followed by a second, lower slash. Move upward to avoid that second slash rather than ducking. The soul barrage in the second phase comes in three waves instead of one and requires more patience to navigate. Chains of Justice roots him and is the only reliable control option in this fight.
Clearing Death rewards Soul Harvest, the Vampire Killer, and Double Jump. For a full breakdown of what Double Jump unlocks across the map and where to find every other movement ability, the movement abilities guide covers all of them.
How to beat Saint Louis
Saint Louis carries 12,000 health, the biggest pool in the game, but never attacks Rose directly. The encounter at the Tree of Justice inside the Palace of Justice works by balancing the Scales of Justice, and the gate into it is a collectible check.
You need five complete maximum health upgrades and five complete maximum mana upgrades before the scales will balance, which means collecting 20 Brave Heart Fragments and 20 Wise Heart Fragments total. Stand on the left side of the scales and interact. Rose's health and mana drain continuously while skeletons and fliers attack from the sides, so arrive fully stocked. Clearing the encounter gives The Judge Arcana and the Valmanway sword, and The Judge is a hard requirement for the true ending.
How to beat the Succubus
The Succubus appears at the end of the Descent into Memory sequence inside Belmont Manor, deep in the Hall of Mirrors, with 8,000 health. The difficulty jump from the bosses before her is real, so a full Potion stock is not optional here. She takes the face of Rose's mother and shelters behind a barrier that only drops when her illusory copies are destroyed. Avoid her low-sweeping attacks, eliminate the copies as fast as possible, and pour everything into the stun window that opens once the barrier falls.
How to beat Arthur
Arthur is optional across all three endings and brings 11,000 health to the Chapel south of the Notre-Dame forest entrance. The fight begins once you attempt to pull the sword from the altar and he rises as a giant knight of stained glass. Fire and bleed do nothing to him; Chains of Justice is the control answer again. He sweeps glass shards along the floor and fires wide light beams across the arena. Jump the floor sweeps, find the gaps between beams, and attack during the slow recovery frames at the end of each animation.
Excalibur drops here with 100 attack power, which is reason enough to do this fight regardless of whether you want the Stained-Glass Shield. The full two-phase breakdown is in our Arthur and Excalibur guide.
How to beat the Doppelganger
The Doppelganger only materialises after Rose collects all four virtue blessings from the stained-glass trials, at the altar inside the Gallery of the Four Virtues. Its health bar displays ??? before settling into Rose's own shadow at 8,778 health.
It mirrors Rose's complete moveset, including weapon dashes and aerial strings. The correct response to every combo is to dodge behind it and punish after the final hit lands. A purple mirror flash signals an incoming teleport. When IMMUNE appears on screen, it absorbs everything; hold your mana, clear the ground waves with jumps, and stay off the floor through the dark pillar sequences until the immunity drops.
How to beat Dracula
Dracula runs two phases across two separate rooms and carries 7,666 health. The first phase in the Court of the Night is built around teleportation and flame pillar summons; wait for him to finish casting before closing in, and thread through the column gaps when they appear. Taking enough damage triggers a transition that pulls Rose into a void and deposits the fight on the Castle Rooftops, where Dracula transforms into a winged demon. Meteors fall in visible impact patterns and his claw sweeps have readable wind-ups; reposition before each strike and attack during the recovery.
Grappling, fire, and bleed all fail on him. Neither Dracula encounter drops a Tarot Card. The route you take to reach him determines which ending plays out; for the true ending, The Self Arcana must be equipped when his second form collapses so Absolution can be activated in the brief window that follows. Every ending condition is laid out in our all endings guide.

Dracula's demon form, phase two
What resists what: the full boss immunity breakdown
Every boss in the game shrugs off freeze, petrify, launch, slam-down effects, the Chronomantic Dive slow, the Freezing Path link, and the Infernal Pyre launch. Saint Louis is the sole exception, resisting only petrify rather than the full list.
Chains of Justice is the one control spell with real coverage, connecting against Arthur, Death, Dracula, Medusa, Talos, and Saint Louis while every other crowd-control option bounces off the roster. Bleed stops working on Arthur, Death, Talos, and Dracula. Fire is blocked by Arthur, Talos, and Dracula. Medusa cannot be knocked off a platform to her death. Dracula is the only boss that cannot be hooked with the Arcane Whip.
The practical takeaway is to build around what the specific arena allows rather than defaulting to whatever the tier list ranks highest. Half the deck is decorative in boss rooms.
What should you bring into every boss room?
Here's the short answer: Chains of Justice is the only control effect that does anything meaningful against the bosses that matter, so it belongs in your loadout from the moment you unlock it. Two encounters require no combat preparation at all: the Catacombs Death resolves in a cutscene regardless, and Saint Louis demands Fragment counts rather than fighting skill. Save your Potions for the real fights.
Weapon selection matters per arena more than it does overall. The Cestus on Joan, the Lance for reach on Medusa, and Excalibur on everything after Arthur falls. Both Arthur and Saint Louis sit off the critical path but reward you disproportionately: 100 attack power and a functioning control spell compress every subsequent fight.
For passive bonuses that stack on top of your weapon and Arcana setup, the full relics locations guide covers all 36 relics and flags which passive effects are worth prioritising for boss encounters specifically. The full collection of strategies and secrets for the game lives in our Castlevania: Belmont's Curse strategy guides.
Frequently asked questions
Can you actually win the first Death fight in the Catacombs?
No. The encounter is scripted to end in a cutscene regardless of how much damage you deal. Save your Potions.
Which boss has the most health?
Saint Louis at 12,000, though his encounter is a Fragment collection check rather than a combat test. The highest-health boss you actually fight is Death at 8,444.
Do optional bosses affect which ending you get?
Arthur and Mammon are both optional for all three endings. The Doppelganger and the second Dracula fight are required for the true ending. Saint Louis is also required for the true ending because The Judge Arcana is mandatory for the Four Virtues trials.
Which Tarot Card covers the most boss rooms?
Chains of Justice lands on six bosses and is the only control effect that works at all in these arenas. Equip it whenever you are unsure what a specific fight demands.