
The best stamina-focused build in Queen's Domain pairs a short-recovery melee weapon with throwing daggers, measured charged attacks, and a protected stamina reserve.
Build around one safe hit at a time. Your main weapon needs to finish its attack quickly enough for you to move clear before the enemy responds. Character levels, weapon proficiency, upgrades, and food support that rhythm. The trade-off is lower immediate burst damage: you skip extra swings when they would leave you exposed during the next enemy attack.
Stamina-focused build overview
Stamina does not refill while you attack. Sprinting continuously drains it, while jumping and dash attacks also spend it. A sustained-combat setup needs recovery gaps between offensive actions, not an uninterrupted attack chain.
Treat roughly the last quarter of the bar as your movement reserve. This is a recommended stopping point, not a threshold that activates a bonus. Stop earlier if your weapon's recovery or the enemy's reach makes disengaging difficult.
| Build component | Recommended setup | Role |
|---|---|---|
| Main melee weapon | A blade with manageable stamina use and short recovery | Land a repeatable hit without exhausting the bar |
| Secondary weapon | Throwing daggers | Separate enemies and attack while repositioning |
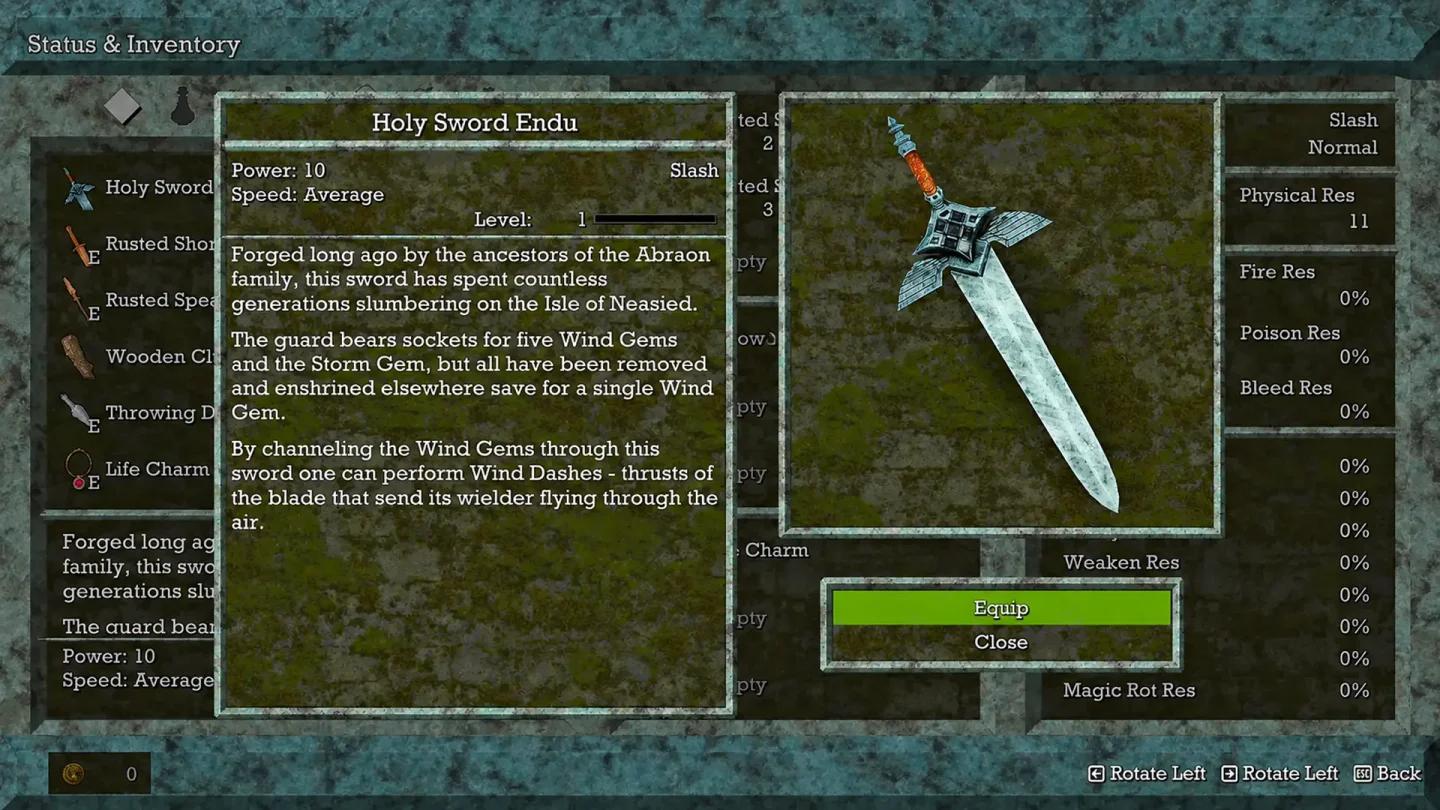
| Traversal tool | Holy Sword Endu | Cross gaps and reach exploration routes |
| Default attack | One light attack per brief opening | Keep unfamiliar encounters manageable |
| Heavy attack | One charged attack during a long recovery | Deal stronger damage when the timing allows it |
| Weapon special | A special whose cost leaves a movement reserve | Exploit an opening without spending the entire bar |
| Healing supplies | Dried herbs or elixirs | Restore health during a safe pause |
| Cleansing supplies | Panacea or another cleansing item | Respond to harmful status effects |
Endu's traversal upgrades extend its flight distance. Revisit previously unreachable ledges as its range improves, but judge your main combat weapon by its attack timing and damage coverage.
Check Endu's traversal role
Choosing a manageable melee weapon
Compare recovery before raw damage
Evaluate a candidate against an enemy whose attacks you recognize. Start with full stamina, wait for an enemy attack to miss, and land one ordinary hit. Watch how much stamina remains and whether you can move clear before the next swing.
Reject a weapon for this setup if that basic attack repeatedly leaves you exposed. Compare damage per safe opening, not damage from a combo the enemy will interrupt. A stronger hit is useful only when its start-up and recovery fit the encounter.
Compare the best Queen's Domain melee weapons when deciding which discovered weapon deserves upgrade resources. Include each weapon's special attack in that decision, because similar damage numbers can hide different stamina costs and recovery times.
Match the attack to the opening
Light attacks have a smaller stamina cost and shorter recovery, but a quick tap deals relatively little damage. Use them while learning an enemy's timing or when its recovery is too brief for a charge.
Charged attacks offer stronger damage with a longer wind-up, greater stamina use, and longer recovery. Favor them after a committed enemy attack misses or strikes the environment. Starting a charge against an unfamiliar enemy's opening move risks taking a hit before your attack finishes.
| Attack | Stamina commitment | Suitable opening | Main weakness |
|---|---|---|---|
| Light attack | Small | Brief enemy recovery | Low damage from a quick tap |
| Charged attack | Large | Long, readable recovery | Slow start-up and recovery |
| Weapon special | Weapon-dependent | An opening that fits its reach and timing | Some specials can empty the bar |
Judge specials by start-up, recovery, and stamina cost. If your preferred weapon struggles against one enemy type, compare damage coverage in the Queen's Domain melee damage build before switching to a heavier weapon.
Keeping throwing daggers in the rotation
Throwing weapons work while you move and recharge on cooldown instead of consuming ammunition. Use them during an enemy's approach or reset when another melee animation would be unsafe. Do not treat a ready projectile as a reason to attack through every recovery window.
Check ceilings and elevated positions before entering unfamiliar rooms. Enemies can attack from above, and an equipped throwable lets you respond without immediately entering melee range.
Use a dagger to draw an enemy away from a group, then check that it has separated before closing. Compare other secondary options in the Queen's Domain throwing weapons guide if you want a different ranged tool.
Leveling priorities for sustained combat
Establish the early setup
Prioritize stamina in early stat decisions until your normal attack leaves a comfortable reserve. After that, give more attention to damage and survivability. Judge progress through your attack-and-reset routine instead of chasing an arbitrary stat total.
Develop the early setup in this order:
- Choose your main weapon. Compare the weapons you own before committing upgrade resources.
- Train weapon proficiency. Weapon power improves through combat practice, separately from character XP.
- Upgrade the chosen weapon. Develop its damage alongside character levels.
- Use food for stat gains. Read each item's stated effect before choosing it for an encounter.
Backtrack when a new area is too dangerous for useful practice. Familiar enemies let you earn XP and train your weapon without learning an unfamiliar attack pattern at the same time. Save your progress before returning to the difficult encounter.
Develop the later setup
Use the bestiary to guide later weapon changes. Defeating an enemy reveals information about its weaknesses and resistances. A resistant target may need a different damage type, not a longer attack sequence.
Maintain a faster alternative if your main weapon becomes difficult to use against mobile enemies. Practice with that alternative before taking it into a demanding fight so its proficiency can develop too.
Keep the later setup focused on the enemies blocking your route. Upgrade weapons you regularly use, choose food for the encounter ahead, and change damage coverage when the bestiary gives you a reason to switch.
Sustained combat against bosses
Read the attack before committing
Enter a boss attempt with a full bar and identify which attacks leave a usable recovery. Move laterally where space allows. Enemies often advance with their swings, so straight backpedaling can leave you against an arena edge or corridor wall.
| Enemy tell | Recommended response | Follow-up decision |
|---|---|---|
| Long wind-up | Move around the attack | Judge whether its recovery supports a light or charged hit |
| Forward step | Circle instead of retreating straight backward | Let the attack finish before closing |
| Hop backward | Throw during the reset | Avoid sprinting after the enemy |
| Shield raised | Wait for a commitment or use suitable impact damage | Avoid repeated attacks into its guarded front |
| Projectile wind-up | Strafe clear | Save sprinting for an attack that requires it |
Pillars, doorways, and statues can break an attack's line. Use nearby geometry when an enemy's reach makes open-space circling difficult. Jump over low sweeps when necessary, accounting for the stamina cost before attempting a follow-up attack.
Skip an opening if too little recovery remains for your chosen move. Beginning a charge as the enemy resets commits you during its next attack. Waiting costs time; attacking late can cost health and force a heal.
Heal and reset safely
Drink an elixir behind cover, after a long enemy recovery, or once a boss commits to a projectile pattern. Healing in the open leaves you vulnerable during the action.
Crystals separate saving from recovery. Choose the action that matches what you need before continuing through the area.
| Crystal action | Restores health | Clears status effects | Respawns enemies |
|---|---|---|---|
| Save | No | No | No |
| Rest | Yes | Yes | Yes |
Save after clearing a route you still need to travel. Rest when you need recovery, then plan the return journey around the enemies it brings back.