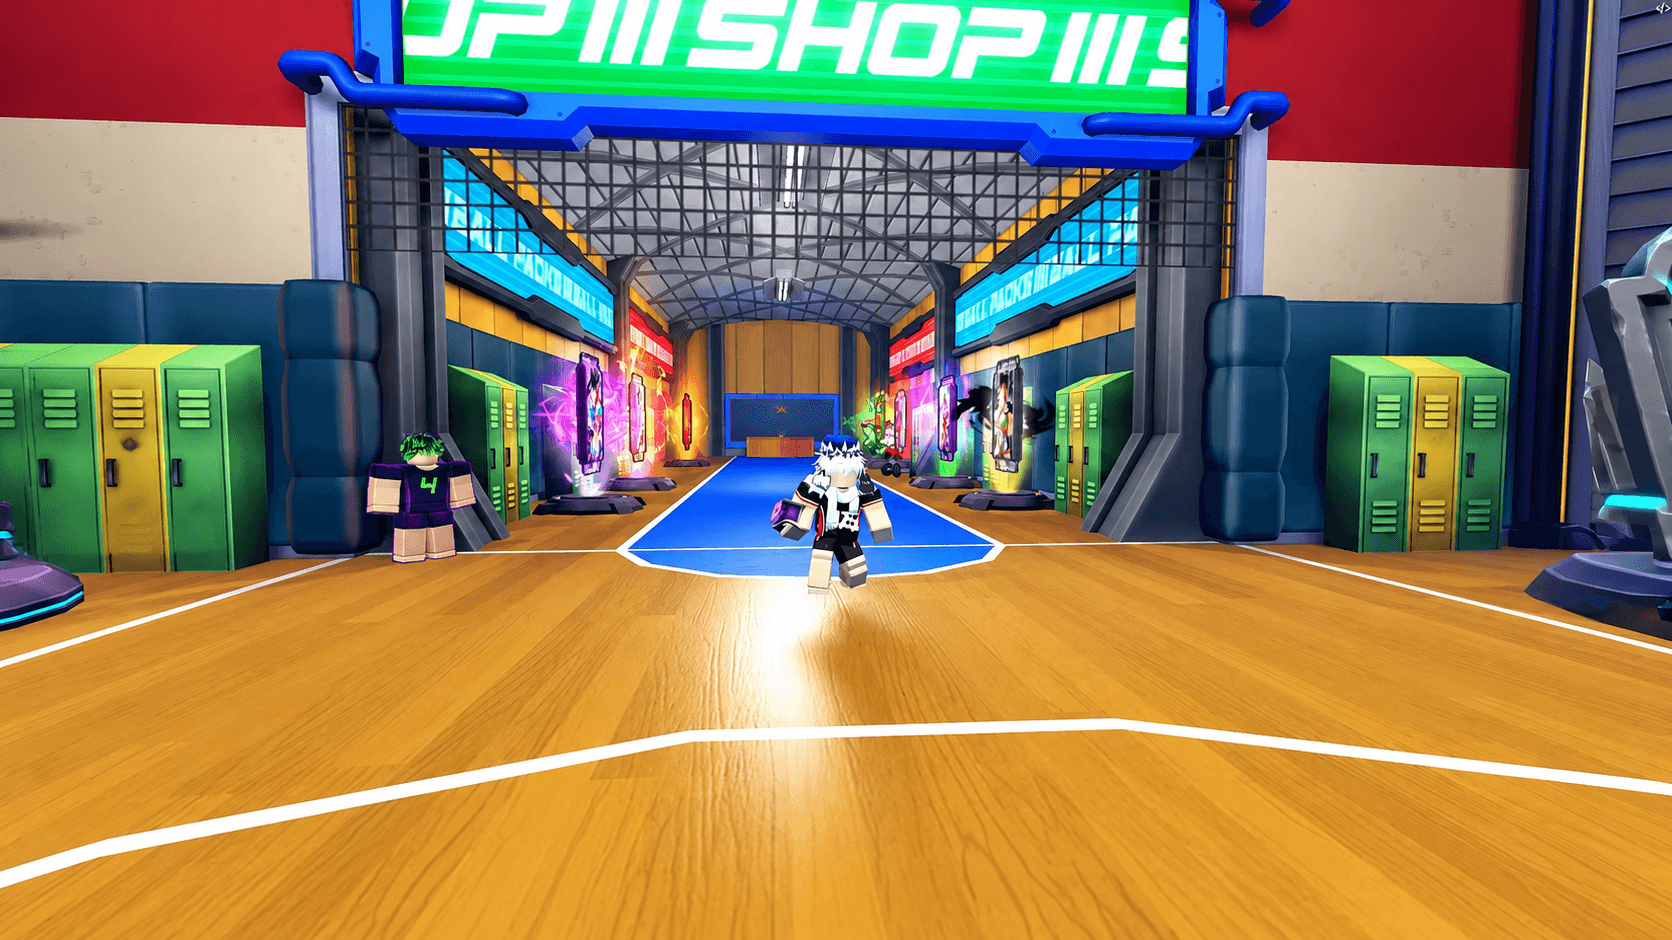

The Mamori Style is one of the most distinctive unlocks in Volleyball Legends right now. Where most defensive styles ask you to stand tall and block hard, Mamori asks you to read the court, time your receives, and flip the opponent's aggression against them. It is not the easiest style to master, but when it clicks, it turns every incoming spike into a potential counter-attack.
What makes the Mamori Style different from other defensive styles?
Most defensive kits in Volleyball Legends compete on Block Power or Receive Radius. Mamori trades raw blocking height for reactive mobility, which means you will lose direct block contests against a maxed Dondred Style user, but you will recover faster and convert more second-ball opportunities.
The defining mechanic is the Counter Window, a tight roughly 0.4-second frame that activates when you time a receive correctly after an opponent's spike animation begins. Hit it cleanly and you do not just stop the ball, you send it back with force. Miss it and you eat the full hit. That tension is what separates Mamori players from everyone else on the back line.


Mamori Style full ability and stat
The Mamori kit has three active abilities, each scaling with specific attributes. Reflex and Defense are the two stats that reshape how the style plays in extended rallies, so your attribute point allocation matters from the moment you equip it.
Volleyball Legends Guide: How to Get Mamori Style
Core ability stats
| Ability | Base Value | Scaling Stat | Cooldown | Special Effect |
|---|---|---|---|---|
| Iron Receive | 85% damage reduction | Defense | 6s | Negates knockback on perfect timing |
| Counter Spike | 120% return power | Reflex | 9s | Converts received spike into attack |
| Anchor Stance | +40% stability | Defense | 12s | Prevents stagger during multi-hit rallies |
| Read Step | +25% movement speed | Reflex | 5s | Brief burst after successful read |
Iron Receive is the standout ability here because it removes the knockback penalty that normally pushes defenders out of position after absorbing a heavy spike. Pair it with Anchor Stance and you can hold the back line through consecutive attacks without drifting toward the sideline, which is one of the most common ways less specialized defensive styles fall apart in ranked.
Base style stats
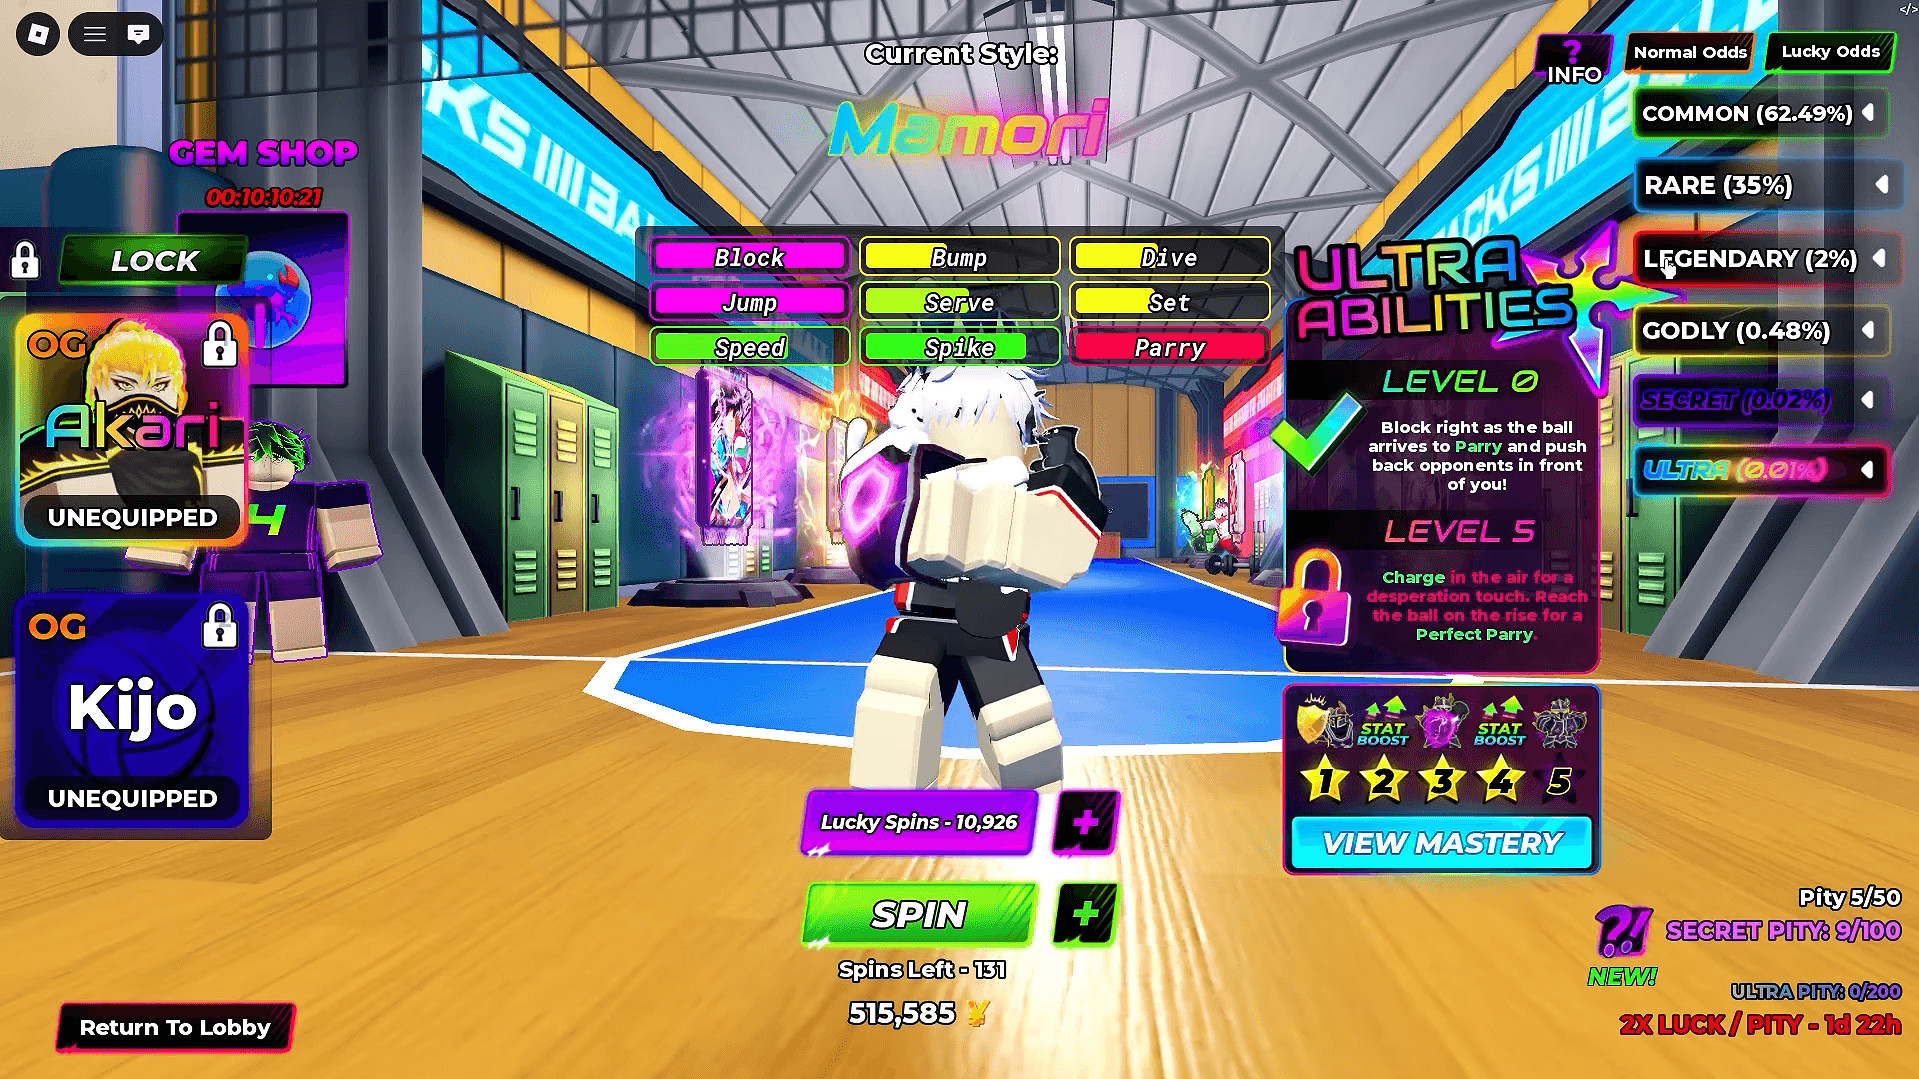
These are Mamori's raw stats before any mastery upgrades:
- Block: 80%
- Jump: 100%
- Speed: 30%
- Bump: 35%
- Serve: 50%
- Spike: 80%
- Dive: 35%
- Set: 30%
- Parry: 100%
The 100% Parry stat is the headline number, but notice that Speed and Bump sit low. Mamori is not designed to chase down off-speed shots without Read Step active, and the low Bump means you want to be triggering the Counter Window rather than relying on standard receives.
How to unlock the Mamori Style
Mamori is an Ultra Style (also called a Secret Style), which means it does not appear in the standard banner. You can only pull it during its featured Secret Style Banner rotation. If that banner is not active, saving your tokens is the only sensible play.
- Open the Style Menu from the main menu.
- Locate Mamori under the Ultra Style list and select it to activate the preference system.
- Confirm the selection by checking for the circular green button next to its name.
- Spin using Lucky Spins rather than the Default option for better odds on high-rarity styles.
- After every 5 Lucky Spins, mix in a few Default spins. Community reports suggest this rotation has helped players land Mythic and other high-rarity styles faster.
- If you reach 100 spins without a hit, the pity system activates and significantly raises your chances.
Drop rates and pity counter
| Rarity Tier | Drop Rate | Pity Guarantee | Notes |
|---|---|---|---|
| Common Style | 68% | None | Base roster styles |
| Rare Style | 24% | 10 spins | Kazana, Mikage, Jinko pool |
| Epic Style | 6% | 50 spins | Dondred and similar advanced kits |
| Secret Style | 2% | 100 spins | Mamori and other limited styles |
The 2% base rate means most players will rely on the pity system. Because Mamori shares its rarity pool with other limited Secret Styles, you may pull a different style before hitting Mamori specifically, which extends the effective cost. Most players report landing it somewhere between 80 and 120 spins during a featured window.
How to farm Style Tokens efficiently
Spins cost Style Tokens, earned through daily missions, ranked rewards, and event participation. Completing the Daily Defense Drill and Ranked Placement matches together yields roughly 15 spins worth of tokens per week without spending premium currency. Save everything until the Secret Style Banner returns rather than pulling on the standard pool.
If you need free spins right now, check the Build A Volleyball Squad Codes for October 2026 page for active codes that can top up your Lucky Spin count.
Mamori Mastery upgrades
Mastery is where Mamori goes from solid to genuinely threatening. Each rank either improves a stat or adds a new mechanic to your kit.
| Mastery Rank | Unlock | Effect |
|---|---|---|
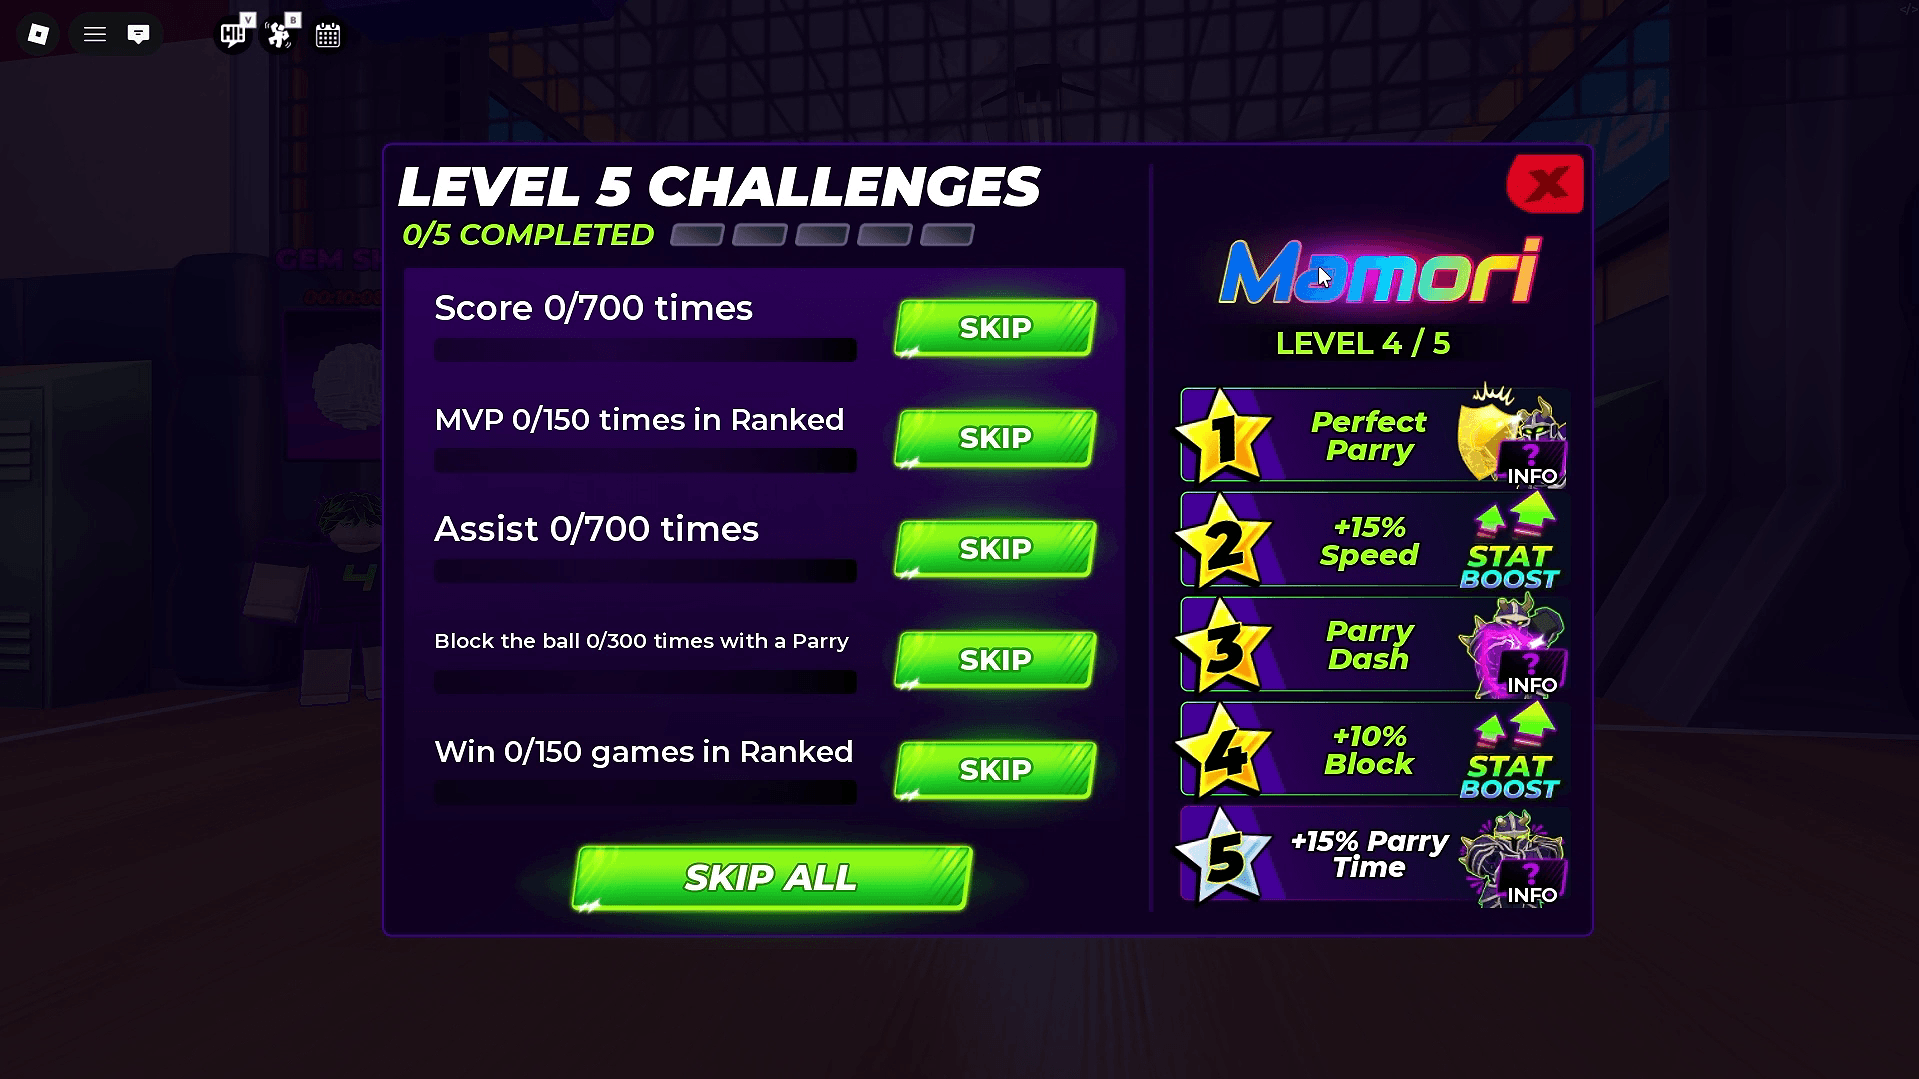
| Mastery 1 | Perfect Parry | Tighter timing window returns the ball harder, blasting opponents further |
| Mastery 2 | Speed boost | +15% Speed |
| Mastery 3 | Parry Dash | Hold W on your team's ball during a Charge for a guaranteed perfect parry |
| Mastery 4 | Block boost | +10% Block |
| Mastery 5 | Iron Parry | 15% longer parry and perfect parry windows |
Mastery 5 is the one to target. A 15% extension on your parry and perfect parry windows directly addresses Mamori's biggest weakness: the unforgiving timing on the Counter Window. Most players need several hours of practice before they can consistently trigger it at base, so anything that widens that window has real competitive value.
Mastery 3 is the other standout. The Parry Dash gives you a guaranteed perfect parry during a Charge as long as you hold W on your own team's ball, which essentially removes the timing risk from one of Mamori's most important offensive transitions.
Volleyball Legends Guide: How to Get Mamori Style
How does Mamori compare to Kazana, Mikage, Jinko, and Dondred?
Mamori does not replace the other defensive styles. It fills a specific role, and understanding where it fits relative to the rest of the roster will stop you from making redundant unlocks.
| Style | Primary Role | Best Stat | Main Weakness | Best Team Fit |
|---|---|---|---|---|
| Mamori | Reactive Defender | Parry / Reflex | Low block height | Paired with tall blocker |
| Kazana | Zone Blocker | Block Power | Slow recovery | Needs fast libero |
| Mikage | Balanced Support | Versatility | No standout stat | Any composition |
| Jinko | Spike Specialist | Attack Power | Poor defense | Aggressive rotations |
| Dondred | Wall Anchor | Stability | Low mobility | Defensive setups |
Kazana remains the strongest pure blocker because its Zone Block covers a wider horizontal area than any other defensive kit. The problem is that Kazana users get punished hard by feint attacks that bypass the block entirely. That is exactly the scenario where Mamori's Read Step and Counter Spike are at their best.
Mikage is the safest investment for players who fill multiple roles because its balanced kit works in almost any rotation. If you are not sure what your team needs, Mikage is the answer. Mamori requires a more deliberate team setup to pay off.
Dondred and Mamori are actually complementary rather than competitive. Dondred's high Stability holds the front line against repeated spikes, while Mamori's Read Step chases down the off-speed shots that Dondred cannot reach. Running them together covers most of the defensive gaps that aggressive teams try to exploit.
Jinko is a completely different conversation. It sacrifices nearly all defensive utility for raw spike damage. If your team already has a reliable blocker and needs a secondary attacker, Jinko outperforms Mamori in kill potential, but it leaves your back line exposed.
How to execute the Read-Counter Loop in ranked matches
Unlocking Mamori is only half the work. The style's full value comes from chaining its abilities into a consistent loop that turns defensive stops into immediate offensive pressure.
The sequence works like this:
- Position slightly behind the block line before the opponent commits to a spike.
- Activate Read Step to close the gap toward the predicted landing zone.
- Trigger Iron Receive to absorb the spike without knockback.
- Immediately follow with Counter Spike to convert the receive into a fast return targeting the gap left by the opponent's committed spiker.
This loop punishes teams that overcommit to first-tempo attacks. The timing is strict, and the Counter Window will feel impossible at first. Start every practice session with Anchor Stance active so mistimed receives do not put you out of position while you are learning the rhythm.
For team composition, pair Mamori with a Kazana Style user on the front line. Kazana's Zone Block forces opponents to hit around the block rather than through it, which creates predictable spike trajectories for the Mamori player to read. Predictable trajectories are where this style thrives.
Should you unlock the Mamori Style?
Yes, if your team lacks a reactive defender who can convert receives into counter-attacks. No other current style replicates the Counter Window mechanic, which makes Mamori genuinely unique in ranked compositions that face spike-heavy opponents.
The caveats are real though. The 2% drop rate and Secret Style Banner requirement mean you need patience and a full token reserve before you start spinning. The style also demands practice time that more forgiving kits like Mikage do not. If you are newer to Volleyball Legends, getting comfortable with the base mechanics before committing to Mamori's timing-based play will save you a lot of frustration.
For more Roblox guides covering styles, unlocks, and ranked strategies across the platform's best games, the full guide collection has you covered.