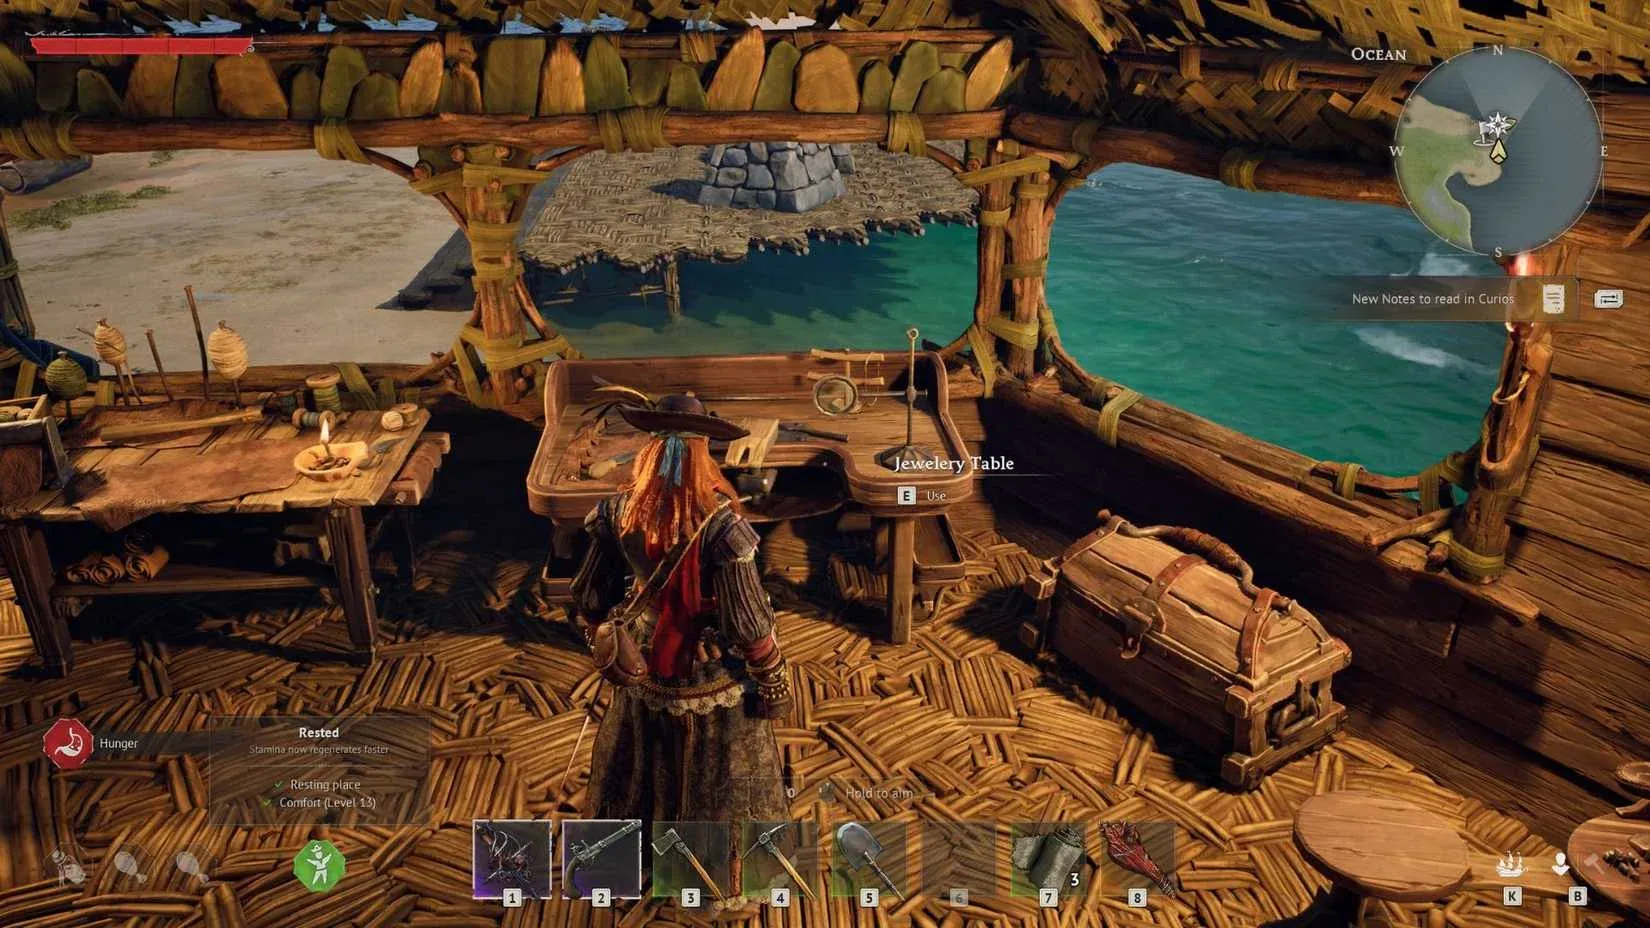

The best Windrose weapons are Rapier of a Thousand Cuts early, Reliable Musket for range, and Rapier of Devastation or Plague Halberd later.
Your next upgrade should match both your damage stat and your progression. A powerful late-game weapon does not help you clear the Coastal Jungle now, and an Epic healing effect does nothing until you meet its activation condition. Start with a compatible melee-and-gun pairing, then spend your crafting materials on named weapons whose effects support the way you fight.
Best Windrose weapons at a glance
These picks cover early progression, ranged support, Agility combat, and late-game melee. Search the listed regions and points of interest (POIs) for exploration unlocks.
| Weapon | Best reason to choose it | Where to find it |
|---|---|---|
| Rapier of a Thousand Cuts | Early-to-mid-game melee built around Bleeding | Coastal Jungle and Foothills POIs |
| Reliable Musket | A main firearm with faster reloads | Coastal Jungle and Foothills POIs |
| Drake’s Double-Barreled Pistol | A support pistol that gains a damage-amplifying Epic effect | Coastal Jungle and Foothills POIs |
| Reliable Pistol | A straightforward sidearm with several shots per reload | Coastal Jungle and Foothills POIs |
| Razor | An Agility melee weapon focused on critical hits | Coastal Jungle and Foothills POIs |
| Dragon’s Breath | An Agility firearm with fire effects | Crypts and Ruins in the Cursed Swamps |
| Rapier of Devastation | Late-game melee with a conditional Epic heal | Crypts and Ruins in the Cursed Swamps |
| Plague Halberd | Strength-based group damage and an Epic healing special attack | Crypts and Ruins in the Cursed Swamps |

Match your weapons to one damage stat
Precision supports Rapier of a Thousand Cuts, Reliable Musket, Reliable Pistol, and Drake’s Double-Barreled Pistol. You can switch between these melee and ranged options without dividing your offensive investment between different scaling stats.
Agility supports Razor and Dragon’s Breath. Strength supports Plague Halberd and Arboris Saber, despite the latter being a saber. Check the individual named weapon’s scaling before committing your points. Mastery increases critical hit chance across weapon types; it is not a weapon-specific damage-scaling stat.
Best early and mid-game weapons
Before finding named gear, a basic Rapier and Pistol give you a Precision pairing. After unlocking their recipes, the Rapier costs 7 Copper Ingots and 2 Rough Hide, while the Pistol costs 10 Wood and 5 Copper Ingots. Use them as stepping stones toward the named options below.
Rapier of a Thousand Cuts: the first melee weapon to prioritize
Rapier of a Thousand Cuts applies Bleeding when you deal damage. It stacks up to 5 times, with each stack dealing 25 damage per second. Its fast attacks let you build pressure during short openings without relying on one long, committed attack.
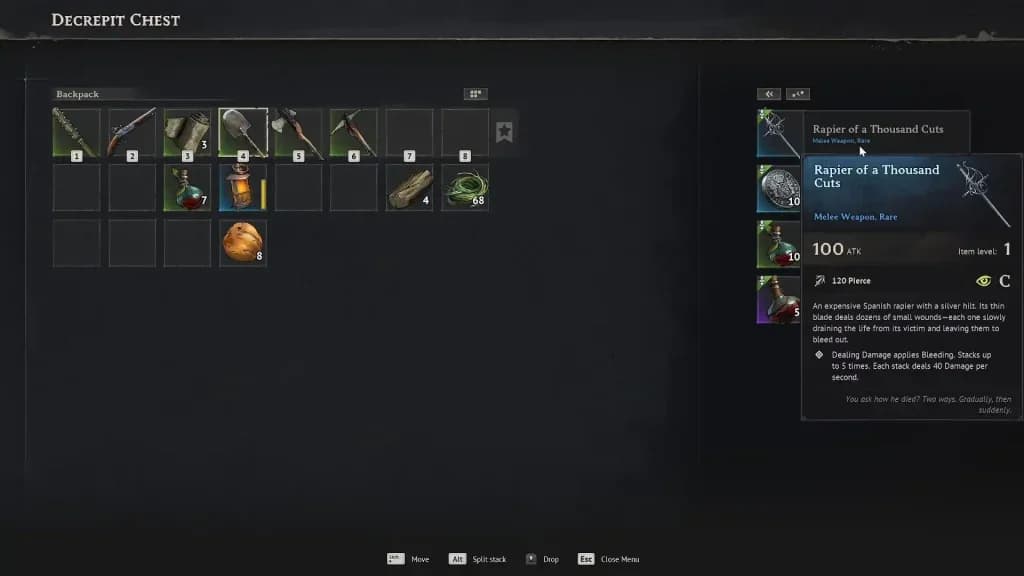
Rapier of a Thousand Cuts
Use short attack strings, leave enough stamina to respond, and reposition while Bleeding continues dealing damage. Pair it with a Precision gun to cover enemies you cannot safely approach.
Its Epic effect makes bleed damage restore Temporal Health while you are holding the weapon. Keep that condition in mind when swapping to a firearm: this is not an unconditional heal that works regardless of what you have drawn.
Reliable Musket or a pistol: choose your ranged role
Reliable Musket is the strongest first choice when you want your firearm to carry more of the fight. The two pistols offer different benefits when your melee weapon remains the main source of pressure.
| Firearm | Rare effect | Added Epic effect |
|---|---|---|
| Reliable Musket | Reloads faster than other muskets | Increases critical damage by 20% |
| Reliable Pistol | Fires 3 shots without reloading | Deals 15% bonus damage to pirates, outlaws, and other cutthroats |
| Drake’s Double-Barreled Pistol | Fires two quick shots in succession | Shots apply Vulnerability, increasing all damage dealt to the target by 15% |
Choose Reliable Pistol when you want several shots ready before a reload. Choose Drake’s Double-Barreled Pistol when you intend to ascend it and use its shots to prepare a target for follow-up damage. Its Epic effect supports the rest of your attacks, not just the pistol itself.
The Buccaneer’s Friend musket in Windrose offers a quest-based alternative: complete Glorious Hunters to unlock it. Its stationary-aiming benefit and Epic bonus against animals make it a more specialized choice than Reliable Musket.
Razor and Dragon’s Breath: the Agility pairing
Razor increases base critical hit chance by 10%. Ascending it also increases the Perfect Block opportunity window. Pick it when you want a fast melee weapon with a dependable passive bonus, without maintaining a separate stack-based damage effect.
Dragon’s Breath provides a compatible firearm. Its bullets have a 40% chance to deal bonus Fire damage, and its Epic effect gives dealing damage a 60% chance to trigger a fire explosion around the target. Use it for close-range punishment and clustered enemies, where an explosion can reach more than one target.
Cutlass is another Agility option if you prefer building toward a stronger shot. Melee hits grant up to 9 Take Aim! stacks, and your next shot gains 10% bonus damage per stack. Its Epic effect reduces attack stamina consumption by 10%.
Best late-game melee weapons
The Cursed Swamps introduce weapons whose Epic effects combine damage with substantial healing. Their strength depends on using the correct attack sequence, so choose the one whose trigger you can maintain during a difficult fight.
Rapier of Devastation: build marks, then spend them
Rapier of Devastation applies up to 8 Plague marks through light attacks. A heavy attack consumes the accumulated marks and deals bonus damage for each one. Its attack pattern is a setup followed by a finisher, not the sustained Bleeding approach of Rapier of a Thousand Cuts.
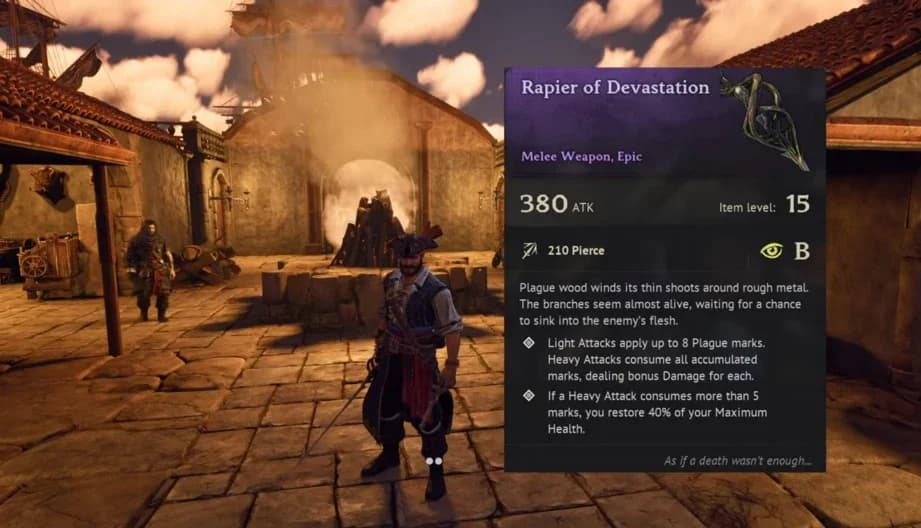
Rapier of Devastation
At Epic rarity, a heavy attack that consumes more than 5 marks restores 40% of your maximum Health. Build your marks through safe openings, then commit to the heavy attack when you can finish it without taking an avoidable hit.
If you’re struggling with staying alive during extended melee fights, this combination of damage and direct healing is a strong reason to prioritize the weapon’s ascension.
Plague Halberd: the Strength pick for groups
Dealing damage with Plague Halberd grants Plague Echoes stacks. At 5 stacks, its special attack becomes available on F. The special attack deals area damage, while the weapon’s heavy attack can cleave through groups.

Plague Halberd in Windrose
Its Epic effect makes the special attack instantly restore 35% of your maximum Health. Choose it when you want to commit to Strength and combine group clearing with a repeatable healing trigger.
Strength does not have a matching ranged weapon family. Plan around the halberd as your main damage source instead of splitting offensive points simply to strengthen a backup gun.
How to unlock and craft your chosen weapons
Exploration weapons generally become craftable after you loot their first copy. Finding the weapon and crafting a replacement are separate steps: collecting the materials alone does not replace the recipe unlock.
Build the Weaponsmith Workshop
Your first Copper Ingot unlocks the discovery for the Weaponsmith Workshop in the Coastal Jungle. Building it costs 10 Wood and 5 Copper Ingots. Place it under a roof and within Bonfire range so you can use it.
Once you have unlocked a recipe, return to the workshop to craft that weapon. The table below lists the Rare crafting costs for the eight main picks, not the cost of ascending them to Epic.
| Rare weapon | Crafting materials |
|---|---|
| Rapier of a Thousand Cuts | 7 Copper Ingots, 2 Rough Hide |
| Reliable Musket | 10 Wood, 7 Copper Ingots |
| Drake’s Double-Barreled Pistol | 10 Wood, 5 Copper Ingots |
| Reliable Pistol | 10 Wood, 5 Copper Ingots |
| Razor | 7 Copper Ingots, 2 Rough Hide |
| Dragon’s Breath | 10 Wood, 7 Copper Ingots |
| Rapier of Devastation | 3 Copper Ingots, 2 Rough Hide, 5 Ingot Arborum |
| Plague Halberd | 10 Wood, 3 Copper Ingots, 3 Ingot Arborum |
Raise weapon levels as your workshop improves
Plan your Windrose weapon upgrades around the station’s level limits. Later upgrades require metals from later regions, so a stockpile of Copper Ingots will not carry a weapon through every level.
| Weaponsmith Workshop tier | Weapon levels supported | Main upgrade metal |
|---|---|---|
| Tier 1 | Crafting and upgrades through level 5 | Copper Ingots |
| Tier 2 | Levels 6–10 | Foothills Iron Ingots |
| Tier 3 | Levels 11–15 | Mire Metal Ingots |
The Anvil and Bellows are nearby station upgrade pieces, not separate crafting stations. Keep these pieces within Bonfire range when expanding your workshop.
Tumbaga Ingots serve a different purpose from those leveling metals. You find them in Ruins throughout the game, mostly from the Foothills onward, and spend them at the Weaponsmith Workshop for ascension.
Ascend the weapon whose Epic effect you need
To unlock Windrose weapon special abilities, ascend an eligible Rare weapon to Epic. Prioritize your main weapon when its added effect directly supports your fights. A healing effect you can trigger consistently is a better first investment than an unused bonus on a spare weapon.