
Search games, articles, guides...CtrlK
Sign InGet Started
Learn exactly which ability breaks each barrier type in Control Resonant, from Ground Slam roof panels to mold and boarded storefronts.
See more GAMES.GG stories on Google
Enjoyed this guide?
Add GAMES.GG as a preferred source and Google will show you more of our guides and news when you search.
updated
September 30th 2026
posted
September 30th 2026
Ability Barriers are one of the first things that will stop you cold in CONTROL Resonant. The mini-map flags them with an icon that reads "An obstacle that can be cleared with a Combat Ability to open the way," but that description does almost nothing to tell you which ability you actually need. Each barrier type responds to something different, and trying the wrong power just wastes time.
The good news: there are only four barrier types in the game, and two of them don't require any special ability at all.
Before spending ability charges on every sealed door you find, identify what you're actually looking at. The visual design of each barrier is distinct once you know what to look for, and guessing wrong just burns resources.
| Barrier Type | What Removes It | Ability Required? |
|---|---|---|
| Square metal roof panels | Ground Slam or charged Crush | Yes (or secondary form) |
| Mold-covered openings | Inferno or Ignite (any fire ability) | Yes |
| Electrical panels (garage doors) | Any normal weapon attack | No |
| Boarded wooden storefronts | Any normal weapon attack | No |
Only the first two types actually gate you behind progression. The other two can be cleared the moment you reach them.
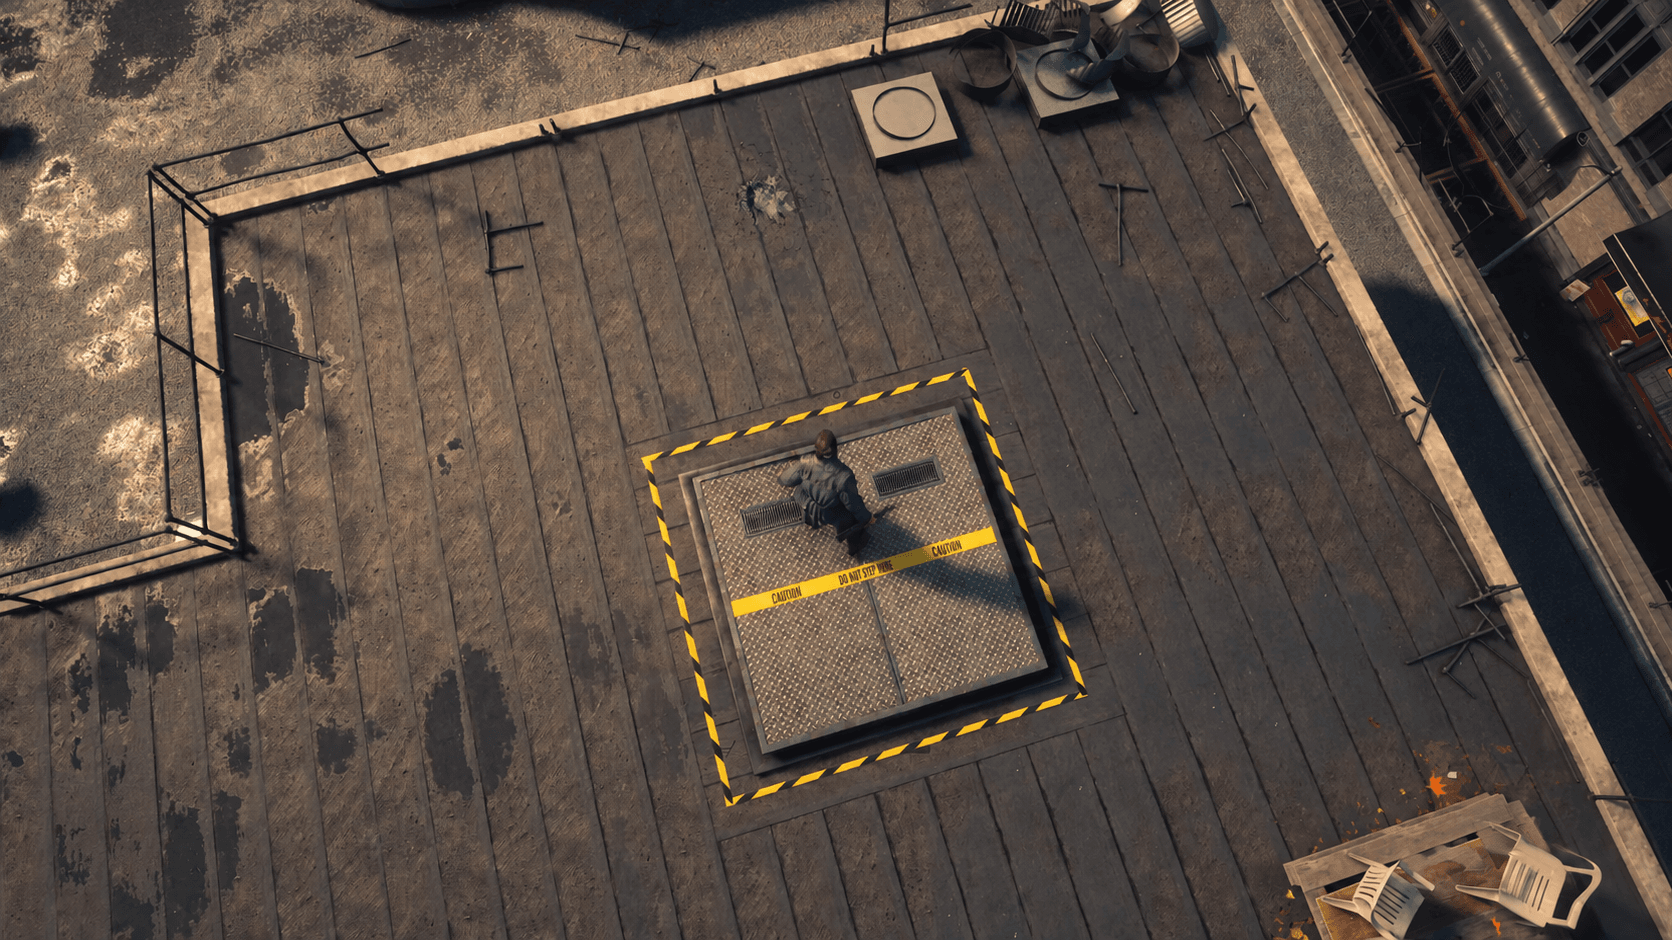
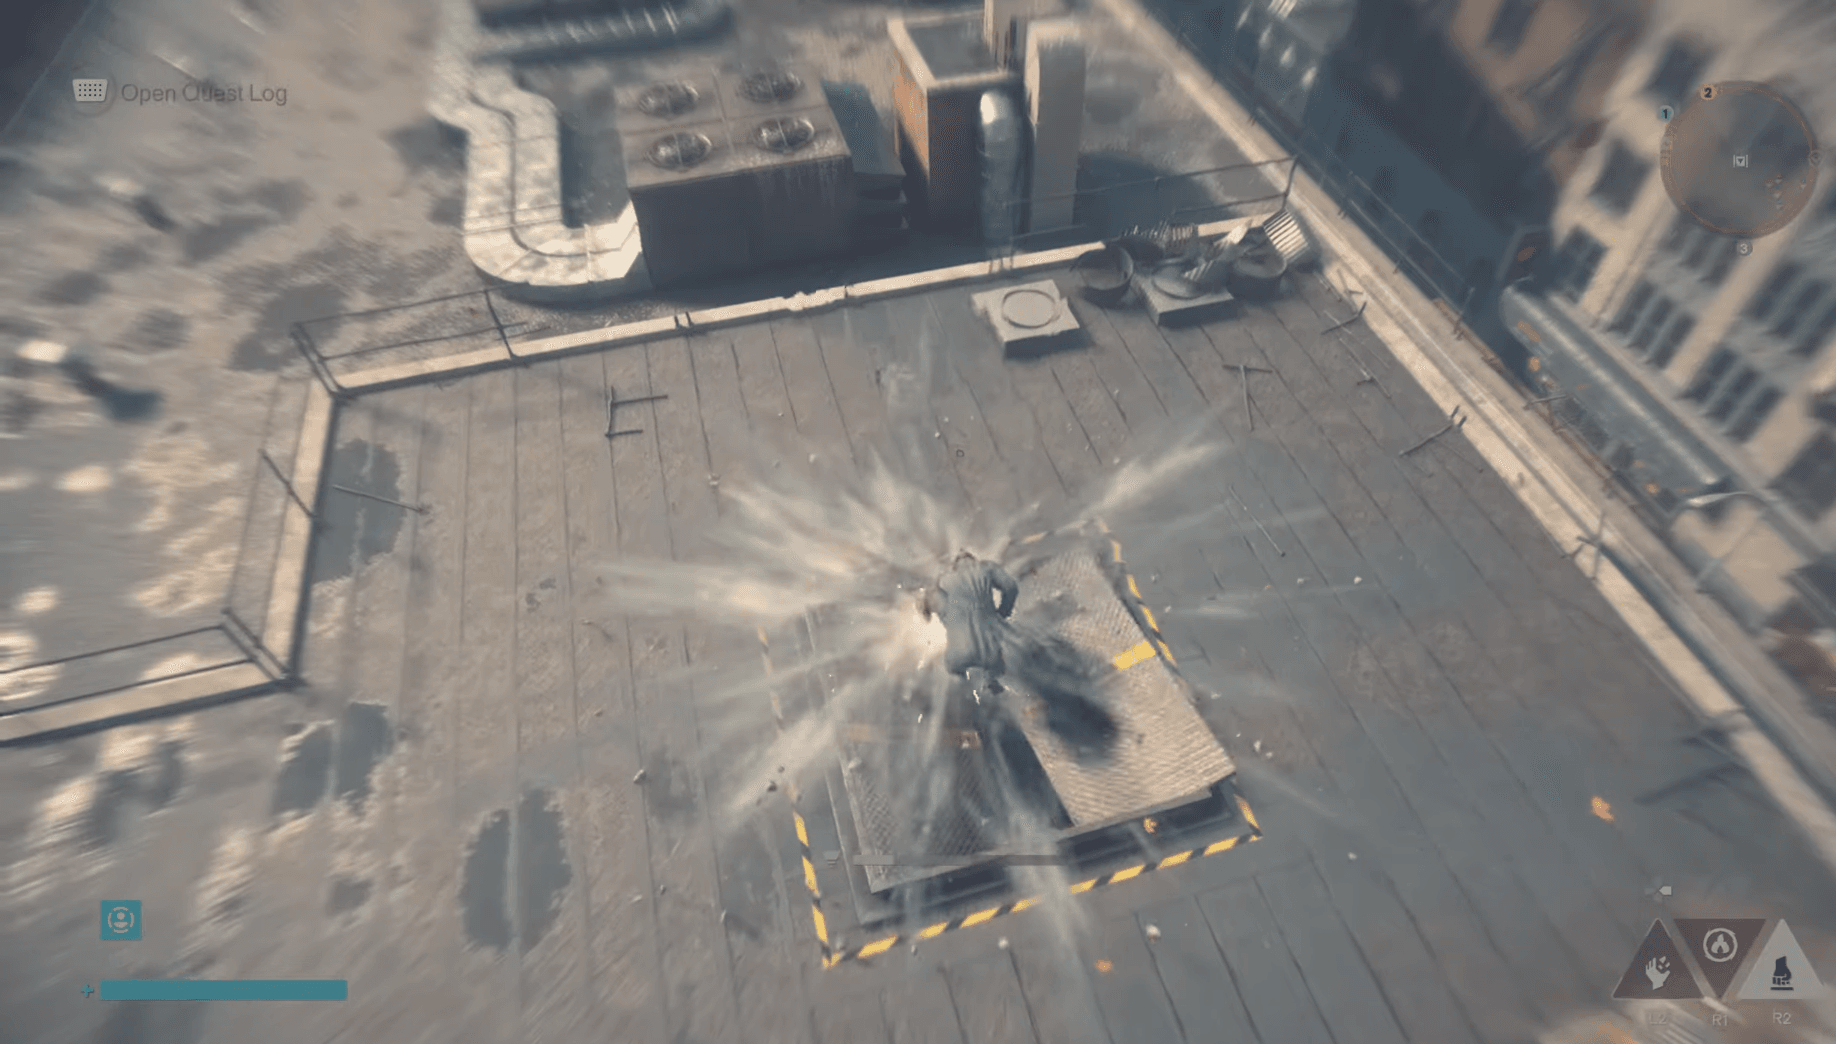
The square reinforced panels on rooftops are the most common ability barrier you'll run into while exploring Manhattan's districts. They sit flush with the surface and drop Dylan into a sealed room underneath when broken.
Control Resonant Guide: All Ability Barriers & How to Break Them
Ground Slam is the intended solution. Head to the West Incursion Zone and defeat The Dancer Resonant boss. This fight gets logged in your quest journal early in the game during target scouting at the Watchtower when you meet Zoe.
After the fight, you're offered a choice of reward. Pick Ground Slam over Push. Choosing Push locks you out of the panel-breaking ability and forces you to rely on the alternative method below.
Once you have Ground Slam, position yourself directly above a metal panel, jump, and trigger the ability mid-air. Dylan punches straight through and lands in the room below.
Running the Crush secondary Aberrant form? The charged Hammer attack produces enough blunt force to break through metal panels without Ground Slam. Equip the hammer, hold the heavy attack input (Triangle on PlayStation, Y on Xbox, or right-click on PC), and let the charge release directly onto the panel.
This works as a genuine alternative, not just a stopgap. If your build already leans into Crush, you may not need Ground Slam for exploration at all.
If you want a deeper look at which boss fights unlock which Combat Abilities, the Control Resonant all bosses locations and combat ability rewards guide maps out every Resonant and what each one drops.
Mold barriers look completely different from roof panels. These are organic, web-like coverings that seal doorways and passages in mold-infected sections of Manhattan. A single fire ability clears them immediately.
Travel to the Patterned Factory in the Central district and defeat The Deserter Resonant. This unlocks Inferno, an ability that emits waves of fire and applies Burn. One quick blast at a mold barrier removes the growth entirely.
Ignite also works if that's already in your kit. Ignite adds fire and burn damage to Dylan's attacks, so a fire-empowered melee strike against the barrier clears it just as effectively as Inferno.
If you hit a mold barrier before unlocking either fire ability, mark it on the map and take a different route. Backtracking is built into how Control Resonant handles exploration, and the mold isn't going anywhere.
These two barrier types can look more significant than they are.
Some sealed FBC-style doors have a red switch or control panel mounted nearby rather than requiring a Combat Ability. The Central Manhattan example in the back alley southwest of the Field Office works exactly this way. Hit the switch with a normal weapon attack and the door opens. No paranatural power needed.
Always scan the wall beside a locked-looking door before assuming you're missing an ability. The switch is usually visible once you're standing close to the entrance.
Wooden boards over shop entrances break with ordinary weapon attacks. They don't always shatter on the first hit, so keep swinging before writing off the entrance as locked. Control Resonant hides enough routes behind breakable scenery that testing the environment for a few seconds is almost always worth it.
If you're applying what seems like the right approach and the barrier still won't budge, run through this checklist:
The rewards behind cleared barriers lean toward higher-tier crafting materials and Living Shards, which feed directly into Artifact crafting. Spending time on them pays off more once you have the right abilities ready, since you can clear multiple barriers in a single district sweep rather than making individual trips. Speaking of Artifacts, the Control Resonant best combo finishers to unlock first guide covers exactly how to spend those Living Shards once you start accumulating them.
Rather than stopping mid-mission every time a barrier icon appears on the map, the more efficient approach is to flag them as you go and then revisit entire zones once you have a full toolkit. After defeating The Dancer Resonant and The Deserter Resonant, a large portion of the barrier map clears in one or two sweeps.
Manhattan stays fully open after the credits roll, so nothing is permanently missable. Any barrier you skipped during the main story can be revisited at any point.
For everything else you'll encounter while exploring, the full Control Resonant strategy guides collection covers combat systems, keycards, side stories, and the rest of the game's progression mechanics.
