

Combo Finishers are the most powerful moves available through Dylan's Aberrant in CONTROL Resonant. They attach to the end of your standard three-hit primary weapon combo, triggering a distinct attack that can launch enemies, clear crowds, or shatter Falter meters depending on which one you have equipped. There are six total, each costs one Living Shard to unlock, and each comes with five upgrade tiers that push its utility further. Spending those shards carelessly early on is an easy mistake to make.
How to unlock Combo Finishers
You cannot access the finisher system from the start of the campaign. Remedy gates it behind Aberrant Strength Level 15, which you build by investing in nodes across the Primary and Secondary Aberrant skill trees. You do not need to specialize in one form exclusively; progress across any combination of those trees counts toward the total.
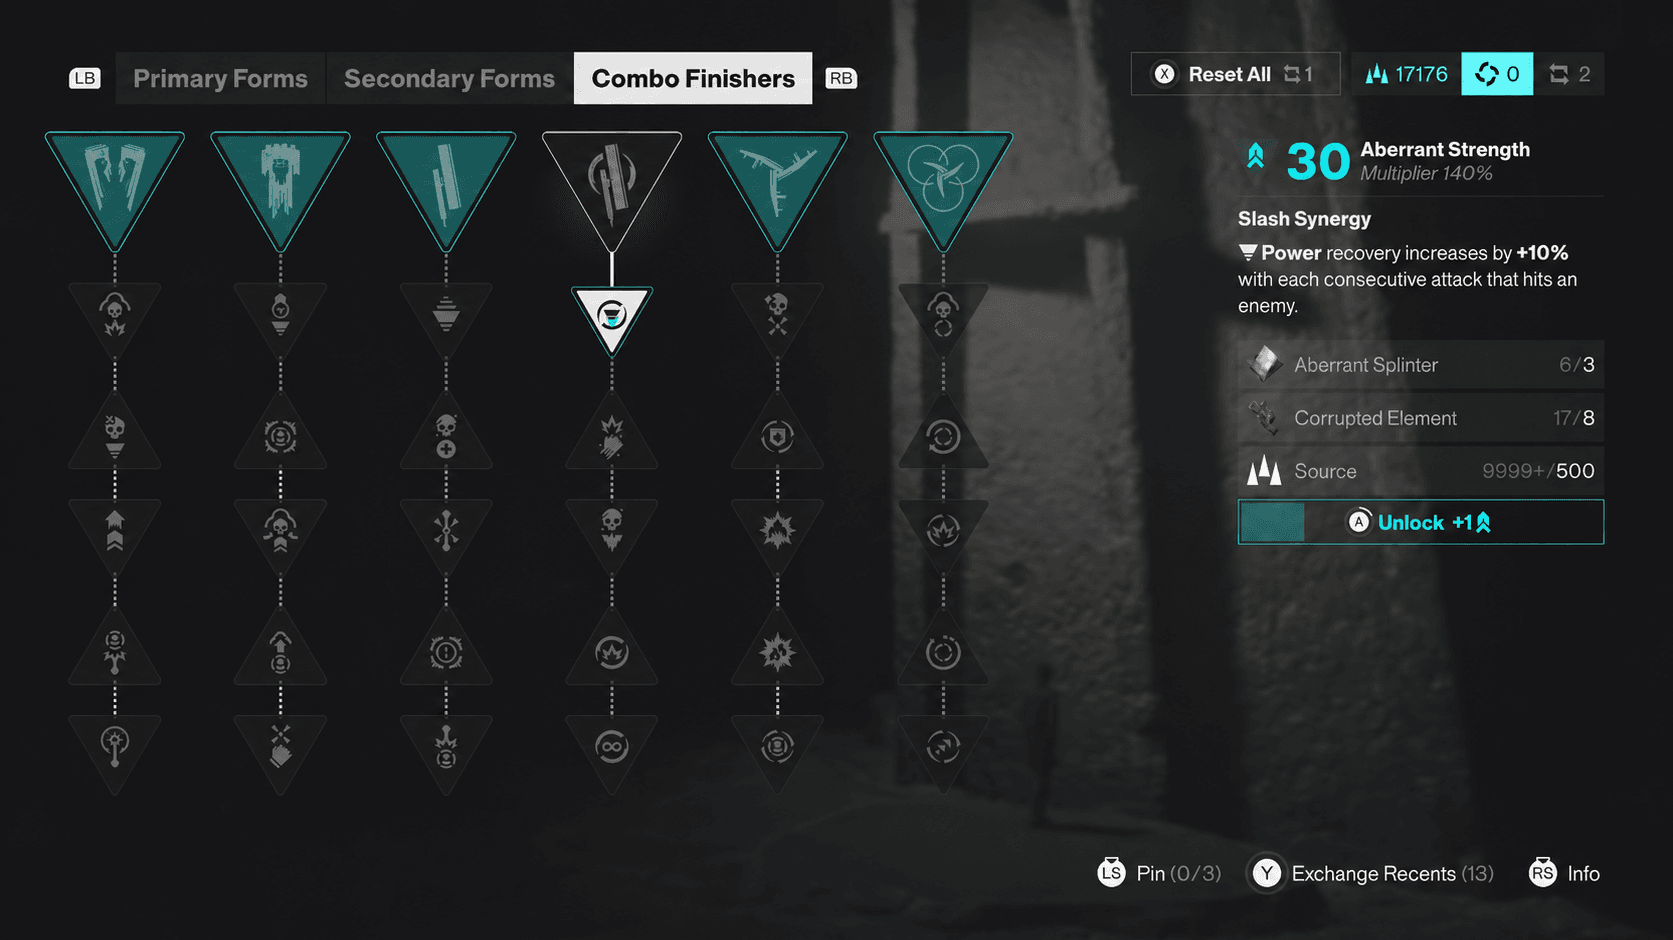
Once you hit Level 15, here is how to unlock a finisher:
- Hold the down button on the D-pad to enter The Gap.
- Approach the towering monolith and interact with it.
- Select the Combo Finishers tab from the menu.
- Spend 1 Living Shard to unlock your chosen finisher.
Living Shards drop from level bosses and can also be purchased from zone vendors for 4,000 Source each. They are not abundant, so treat each one as a deliberate investment rather than a throwaway spend.


How to perform finishers in Control Resonant
After unlocking a finisher, you still need to assign it before it will activate in combat. The steps are straightforward:
- Open the pause menu and navigate to the Loadout section.
- Select the Combo option.
- Choose the finisher you want from the right-side menu.
- In combat, complete your standard primary melee combo and then press Square (PS5) or X (Xbox) to trigger the finisher at the end of the string.
The finisher fires regardless of which Aberrant Form you are using, so your Primary Form choice does not restrict which finisher you can attach to it.

Control Resonant Guide: Best Combo Finishers to Unlock First
All six Combo Finishers and their upgrades
Here is the full breakdown of every Combo Finisher and what each upgrade level adds:
| Finisher | Lvl 1 Effect | Lvl 2 | Lvl 3 | Lvl 4 | Lvl 5 |
|---|---|---|---|---|---|
| Concussive Beatdown | Quick strikes, high Damage and Falter | +20% Damage/Falter vs airborne (Drive Mauler) | Recover Power on kills (One-On-One) | Follow-up knockback attack (Strong Counter) | +20% Falter on last hit (Falter Jab) |
| Uppercut Surge | Launches target, applies Lifted; Power restored from hitting Lifted enemies | +30% Power from charged attacks (Reclaiming Strike) | +30% Falter (Uppercut Stagger) | Lifted applied to nearby Drones on hit (Hover Break) | Significant Falter vs Lifted enemies (Prizefighter) |
| Wide Edge | Wide sweep, massive Damage, pushes enemies back | +30% bonus Power (Power Slice) | +10% Health Element drop chance (A Healthy Approach) | +5% Crit Chance per enemy hit in lead-up combo (Precise Delivery) | +10% instant Falter chance vs Drones (Brutal Edge) |
| Spin Edge | Continuous spin dealing Damage to all nearby enemies | +10% Power per consecutive hit (Slash Synergy) | +25% Damage/Falter during Dominance (Forceful Authority) | Empowered status on enemy hit: +25% Damage/Falter from Abilities (Rousing Sabotage) | +10% Damage per consecutive spin hit, up to 50% (Ravage Blade) |
| Split Pivot | Circular blade dealing Damage and Falter briefly | Very high Crit Chance on first hit (Keen Opening) | Builds Weakened on enemies (Shatter Spin) | Blades explode dealing Fire Damage (Explosive Concept) | Explosion applies two Burn stacks (Double Burn) |
| Split Orbit | Short-range attack becomes a blade orbiting Dylan | +20% Damage/Falter vs Airborne (Clear the Air) | Doubles orbit lifetime (Double Recursion) | +5% Damage/Falter per hit, resets each lifetime (Ambitious Blade) | Doubles rotation speed (Hyper Orbit) |
Which Combo Finisher should you unlock first?
This is where the Living Shard scarcity actually matters. After testing all six finishers against the early-game enemy roster, Uppercut Surge is the strongest first pick for most players.
The reason is not raw damage output. It is what the finisher does to the fight's structure. Uppercut Surge launches the target into the air and applies the Lifted status, which immediately removes that enemy from the ground-level threat equation. Airborne enemies cannot execute their normal attack patterns, which buys breathing room in fights that can otherwise spiral into chaos fast.
The secondary benefit is Power economy. Hitting a Lifted enemy restores significantly more Power than standard attacks, which feeds directly back into Dylan's paranormal abilities and repositioning tools. The loop becomes self-sustaining: launch, attack the airborne target, recover Power, use that resource to keep the pressure going.
Control Resonant Guide: Best Combo Finishers to Unlock First
Concussive Beatdown is the legitimate alternative for players who prefer a grounded, boss-focused style. It deals heavy Falter damage quickly, which sets up execution opportunities on single tough targets without requiring any juggling. If aerial combat does not appeal to you, Concussive Beatdown is a completely viable first choice.
Wide Edge is not a bad finisher, but its strengths overlap with tools the Aberrant already provides through forms like Glaive, which also handles groups well. Spending a shard on Wide Edge first means delaying access to finishers that change how you handle elite enemies, which is the situation where a finisher matters most.
| Finisher | Best Against | Early-Game Priority | Core Strength |
|---|---|---|---|
| Uppercut Surge | Elites and dangerous singles | Excellent | Aerial control, Power recovery, Falter |
| Concussive Beatdown | Bosses and armored enemies | Very Good | Rapid Falter, execution setup |
| Wide Edge | Groups of weak enemies | Situational | Area sweep, knockback |
| Spin Edge | Clustered enemies | Later game | Sustained AoE spin damage |
| Split Pivot | Mixed groups | Later game | Fire damage, Weakened build-up |
| Split Orbit | Airborne-heavy encounters | Later game | Persistent orbital damage |
What is the recommended early-game build around finishers?
After working through the opening hours with different configurations, the setup that clicks most reliably is:
- Primary Form: Strike (fast combo, 30% Critical Chance)
- Secondary Form: Crush (heavy Falter, armor damage)
- Combo Finisher: Uppercut Surge
The rhythm is deliberate: open with Crush to pressure armor and defense, switch to Strike to build the combo string quickly, then fire Uppercut Surge to launch the target. From there, keep attacking the airborne enemy to recover Power while they cannot fight back effectively. It feels much more considered than button-mashing through a weapon string, which is exactly what Remedy seems to have designed it for.
For players who want to understand how the Aberrant forms feed into this system at a deeper level, the best Aberrant forms guide covers which forms are worth prioritizing from the start.
How do you get more Living Shards?
Since every finisher costs one Living Shard, knowing where to find them matters. Shards drop from level bosses as progression rewards, and zone vendors stock them for 4,000 Source each. For a complete breakdown of every farming method, the Living Shards guide covers vendors, quest rewards, and the fastest routes to stockpile them.
The Combo Finisher system is one of the more satisfying parts of Control Resonant's combat once it clicks. Uppercut Surge in particular stops feeling like a combo ender and starts feeling like the move that decides what the next ten seconds of a fight look like. For more tips, walkthroughs, and system breakdowns, the full CONTROL Resonant strategy guide collection has everything you need to work through the game efficiently.