

Control Resonant: Best Talent Upgrades to Unlock First
CONTROL Resonant gives Dylan Faden a skill tree that works nothing like a traditional RPG. Talents don't add new moves. They reshape how your existing abilities interact, adding passive effects, new combat states, and stat multipliers that can make the difference between a fight feeling chaotic and feeling completely under control. The problem is that Talent Points are scarce early on, and spending them wrong means grinding to fix mistakes with limited reset items. This guide breaks down the best Talents to grab first and explains exactly why each one earns its slot.
How do Talent Points work in Control Resonant?
Talent Points come from leveling up your Zone Level, which increases by earning Zone XP through combat, completing World Feats, opening resource crates, solving Secrets, and finishing Story Quests. Every time your Zone Level goes up, you earn a Talent Point. The catch is that you cannot unlock every Talent in a single playthrough, so specialization is the correct approach from the start.
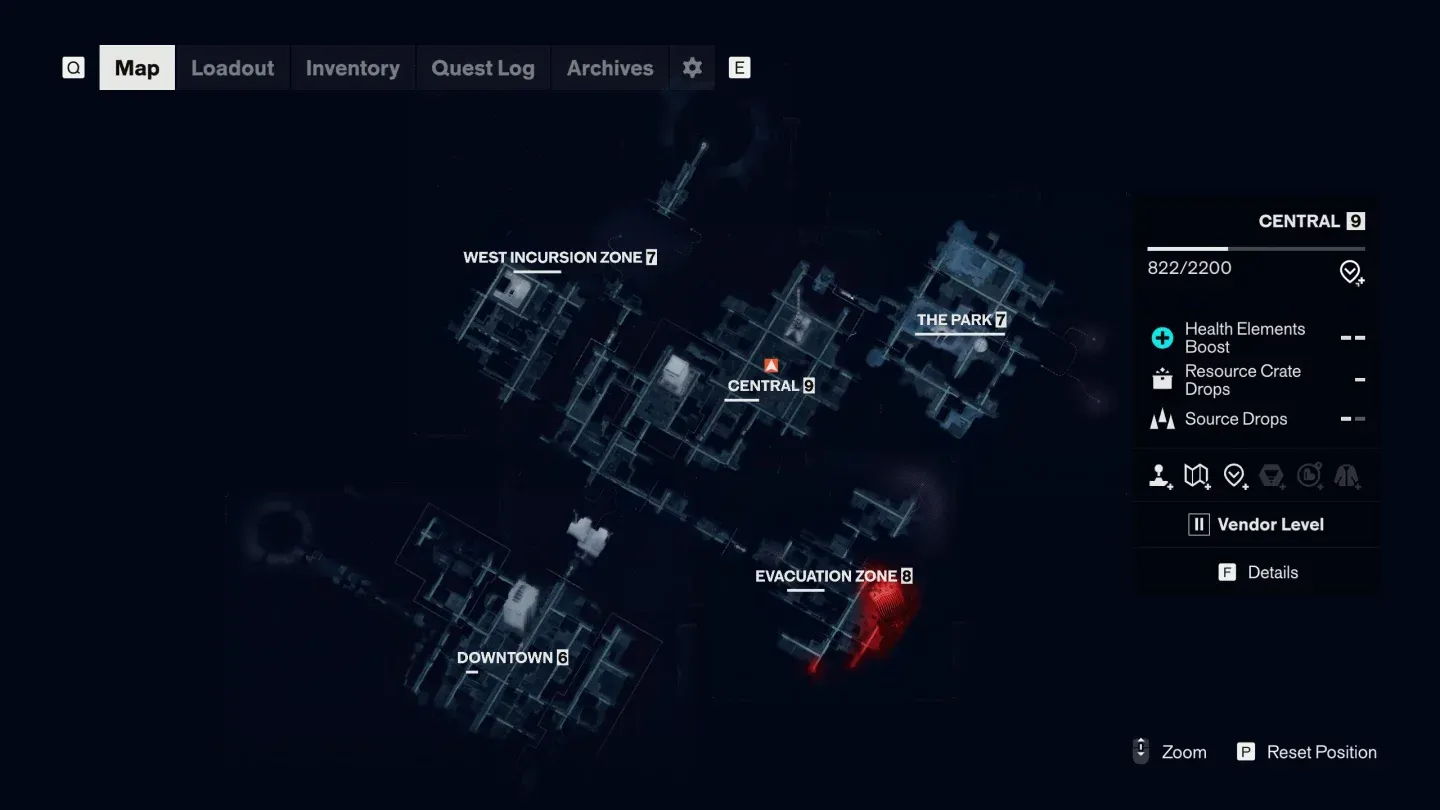
Before spending a single point, open the Map menu, press the Details button on your current zone, and check what rewards sit at each level. Talent Points aren't always listed there explicitly, but they arrive with every level-up regardless. Knowing this helps you plan around which upgrades to chase.
The best early-game Talents
Retribution
Effect: Retaliation deals +25% more Falter.
Retaliation is the combat state you enter after landing a Perfect Dodge. It temporarily boosts your Falter output and raw damage. Retribution amplifies the Falter portion of that bonus by 25%, which sounds modest until you understand what Falter actually does.
A big portion of Control Resonant's combat loop revolves around pushing enemies into a Falter state so you can execute them and enter Dominance. More Falter from every Perfect Dodge means faster executions, more Dominance uptime, and fights that end sooner. Retribution is one of the most consistently valuable early purchases available.
Sanctioned Retaliation
Effect: Retaliation recovers +50% more Power.
Combat Abilities cost Power, and you generate it by attacking with your Aberrant. Sanctioned Retaliation adds a significant Power burst on top of every Perfect Dodge, which means your supernatural abilities stay available more often during the moments when you need them most. If you use abilities frequently, this Talent makes the whole combat loop feel substantially smoother.
Cleansing Rush
Effect: Rush removes status ailments twice as fast.
This one feels low-priority until you start fighting Mold enemies. These creatures apply a status ailment that drains your health continuously until you use Rush to clear it. Cleansing Rush halves the time that process takes, which translates directly into less health lost per encounter. It's not glamorous, but after testing it against Mold-heavy sections, the difference in survivability is real.

The best mid-game Talents
Decisive Step-Up
Effect: Activates Keen after an Execution. Keen grants +20% Critical Chance to all Melee attacks for a short duration.
Once your Falter output is solid enough that you're executing enemies regularly, Decisive Step-Up starts paying dividends on every kill. The +20% Critical Chance applies to all melee attacks during the Keen window, which pairs particularly well with Aberrant Forms that attack quickly or hit multiple times in a sequence. Flurry builds benefit from this more than slower forms like Crush, but it's worth grabbing once executions are a reliable part of your rhythm.
Extended Retaliation
Effect: Adds an extra charge to Retaliation, boosting the next two attacks within 5 seconds after a Perfect Dodge.
The base Retaliation effect covers one attack. Extended Retaliation doubles that to two attacks within a 5-second window. Given that Retribution and Sanctioned Retaliation both scale off Retaliation, this upgrade multiplies the value of everything you've already invested in that chain. Grab it once you have both earlier Retaliation Talents in place.
Restorative Dominance
Effect: Hitting enemies while Dominance is active causes them to drop a Health Element.
Even the weakest Hiss enemies are aggressive, and fights get messier as you progress through Manhattan. Restorative Dominance turns every hit during Dominance into a potential health pickup, giving you a reliable way to recover between executions. Pairing this with Extended Dominance later creates a loop where staying in Dominance actively sustains you through prolonged fights.
The best late-game Talents
Enduring Ally
Effect: Increases the lifetime of all Summons by +50%.
Skip this entirely if you haven't invested in summon-based Combat Abilities. But if your build leans on summoned units, this is the best Summon Talent available. More time alive means more damage dealt, more effects applied, and more aggression pulled away from Dylan. For builds using Volatile Anomaly or similar summon abilities, the 50% duration increase has a meaningful impact on how much pressure your summon creates before it expires.
Command I
Effect: Adds +1 Command Charge.
The Commanded status becomes available late in the game after defeating the final optional Resonant and selecting one of its Combat Abilities. Command Charges determine how often you can trigger that ability. Grabbing Command I gives you an additional use per encounter, which matters more as those abilities become central to how you approach endgame fights.
Crowd Conversion
Effect: Drone enemies killed by Commanded enemies revive as allies.
This Talent turns Commanded abilities into a force multiplier. After triggering Commanded on an enemy group, any Drone enemies they kill come back as your allies. Drone enemies are the weakest type, but having additional bodies drawing aggression from tougher targets gives Dylan breathing room to focus on priority threats. The snowball potential here is genuinely useful in the game's most enemy-dense encounters.
Extended Dominance
Effect: Increases Dominance duration to 15 seconds.
Dylan's Talent tree begins with Dominance as its foundation, so it makes sense to close out with the upgrade that extends it furthest. Dominance after an execution boosts your melee damage and, combined with Restorative Dominance, causes enemies to drop Health Elements on hit. Pushing that window to 15 seconds means more attacks at boosted damage, more health recovery, and more time to chain into the next execution before the buff expires.
Zone Map
Talent priority table
What about Dominance and Perfect Dodge?
These two upgrades aren't covered in this list because you'll unlock them naturally as you expand the Talent tree. They sit at the base of the tree for a reason. Treat them as mandatory infrastructure rather than choices you're making. Everything above builds on top of them.
How to earn Talent Points faster
Zone XP is the bottleneck. The most efficient sources are Story Quests and Side Stories, which give a large XP burst for the zone where they take place. World Feats (marked with a downward arrow on your map) and Fast Travel Doors also contribute. Opening large resource crates and defeating enemy groups works early on, but as your Zone Level climbs, those smaller sources give diminishing returns. At that point, focus exclusively on quests and World Feats to keep pace.
One thing players miss: defeating Heavy Enemies in a group is required before any Zone XP registers from that encounter. Drone enemies respawn continuously until every Heavy Enemy in the area is down. Clear the Heavies first, collect the XP, then move on.
For a deeper look at how your Aberrant Forms interact with these Talents, check out our guide on the best Aberrant Forms in Control Resonant to make sure your weapon choices are reinforcing your Talent investments. You can also see how Combo Finishers fit into the same combat loop in our best Combo Finishers guide.
Building around your Talents
The Talent tree rewards focus. Spreading points across every branch early produces a build that does several things adequately and nothing particularly well. The Retaliation chain (Retribution, Sanctioned Retaliation, Extended Retaliation) forms a natural early spine because Perfect Dodge is something you're already trying to do, and these Talents make every successful dodge pay off across three separate dimensions: Falter, Power, and attack count.
From there, Restorative Dominance and Extended Dominance form a second spine around the execution loop. Once both are in place, staying in Dominance becomes self-sustaining through health recovery and long enough to chain into the next execution before the buff drops.
Late-game Talents like Command I and Crowd Conversion are build-dependent. If you're not investing in Commanded abilities, skip them entirely and redirect those points toward anything that strengthens your existing execution loop.
For everything else you need before and after launch, the full Control Resonant strategy guide collection covers weapons, traversal, zone progression, and more.