
Check treasure chests in FINAL FANTASY RESONANCE by destination, and keep locked rooms on a separate return list. Black Garb in Grandshelt requires a hidden passage after Hell's Rider, while Calm Armlet in Water Shrine needs a crate and water-level puzzle.
The checklists below separate settlement loot from dungeon chests, with rewards and landmarks beside each entry. Start with your current destination, then check its story requirements before searching every wall. The Master Key, an airship, and several boss encounters determine when you can reach particular rewards.
How to use the treasure chest checklist
Each reward row represents a chest to check. Two Ether rows in Town of Mitra mean two separate chests, not alternate directions to the same one. Quantities such as Potion ×3 describe the contents of one chest.
- Find your destination under the settlement or dungeon headings.
- Follow directions within that named area. Earth Shrine's northeast area is separate from its entrance.
- Check story conditions before following a route, especially in Grandshelt and Zoldaad Castle.
- Keep blocked cells and airship destinations on your return list.

Which chests have access requirements?
| Chest reward | Destination | Requirement or alternate route |
|---|---|---|
| Black Garb | Grandshelt | Defeat Hell's Rider, then use the hidden wall near the knight statue. |
| Cape of the Raiju | Mt. Thunderclap | Pay Lid 1,000 Gil for the entrance ladder, or approach through the back entrance. |
| Pulse Cannon | Dungeon | Obtain the Master Key and open the second cell on the right in the southwest cell room. |
| Ancient Accessory | Quarry Cave | Use an airship to reach the cave southeast of the Imperial Capital. |
| Ancient Katana | Crystal Tower | Check west of the save point during Chapter 8. |
Treasure chests by region
Use the settlement names to find your current stop, including Dilmagia, the Machinopolis, and Olderion, the Aquapolis. Dungeon routes have their own section below so you can finish shopping streets and houses without mixing them with elevator or water puzzles.
Arcane Library
| Reward | Route to the chest |
|---|---|
| Mist Ether ×3 | Climb the spiral stairs to the elevator floor. Ride II upward, then III downward to reach the chest room on the previous floor. |
| Knife of Blind ×2 | Take elevator I after climbing the spiral stairs. Descend the stairs to the left, use elevator V, and continue left. |
| Genmato | Reach the top of the staircase and follow the left branch to its end. |
| Book of Strength | At the second save point area, climb the eastern ladder and circle east onto the balcony. |
Dilmagia, the Machinopolis
| Reward | Route to the chest |
|---|---|
| 500 Gil | Climb the ladder near the city entrance. |
| Anti-Magic Gear | At the shipyard's central Mechabo area, descend the left stairs. Follow the left hallway to the chest behind the ladder. |
| 500 Gil | At the central Mechabo area, take the right stairs upward. Follow the right hallway to the chest near the ladder. |
| Insulated Gloves | Enter the concealed hallway behind the weapon and armor shop. |
Dwarven Forge
| Reward | Route to the chest |
|---|---|
| Phoenix Down ×3 | Ride the elevator down, then go south. |
| Sledgehammer | Take the path right of Borin, the dwarf wearing green armor and a green helmet. The hidden passage reaches a chest above the lava. |
| Headband | After defeating Mom Bomb, go south, turn right, and cross the wooden bridge. |
Grandport Harbor
| Reward | Route to the chest |
|---|---|
| Lightning Scroll I ×2 | Search beneath the bridge at the northern edge of the area. |
Grandshelt, the Royal Capital
| Reward | Route to the chest |
|---|---|
| 400 Gil | Take the concealed western path beside the save point near the castle entrance. |
| Phoenix Down ×3 | Take the concealed eastern path beside that castle-entrance save point. |
| Flame Scroll I ×3 | Once Charlotte joins, explore east. |
| Flame Scroll I ×2 | Once Charlotte joins, climb the western stairs and enter the first room. |
| Antidote Herb ×4 | Once Charlotte joins, climb the western stairs and work down toward the opposite side of the area. |
| Phoenix Down | After Hell's Rider, go west toward the stairs and enter the first room on the right. |
| Phoenix Down ×2 | After Hell's Rider, descend the stairs and follow the southeast hallway to its end. |
| Black Garb | After Hell's Rider, enter the hidden room through the wall near the knight statue. |
| 300 Gil | Follow the path north of the weapon shop to the house. |
| 300 Gil | Search inside the house beside the accessory shop. |
| Healing Spring | Check the northeastern part of the area. |
Mysidia, the Magiapolis
| Reward | Route to the chest |
|---|---|
| Thunder God's Earrings | After Sakura joins, check behind the counter on the right side of her house. |
| Knife of Silence ×3 | After Sakura joins, leave her house, follow the narrow path south, and check its left side. |
| Knight's Sword | In the Potion Factory area, use the blue teleporter at the shop's right corner, then head west. |
Olderion: Aquapolis and Old Town
| Area | Reward | Route to the chest |
|---|---|---|
| Olderion, the Aquapolis | Mirage Robe | Reach the two statues north of the entrance. Take the northeast stone bridge to the lone tree and search behind it. |
| Olderion, the Aquapolis | Rock Piercer | Go north of the two statues. Check right of the tree beside the brown bench. |
| Old Town, Olderion | Ether | After defeating Gigas Worm and rescuing the boy, search beside the brown bench. |
| Old Town, Olderion | Mist Hi-Potion | Follow the path south of the save point. Defeat Ribosome, rescue the cat, and cross the southern stone bridge. |
Rebel Hideout
| Reward | Route to the chest |
|---|---|
| Robe of Roses | Go behind Jake's room, climb the ladder, and cross the platform. |
| Phoenix Pinion | Head west of Jake's room to the bookcase corner. Walk east through the concealed corner passage to reach the chest. |
Town of Amore
| Reward | Route to the chest |
|---|---|
| Water Scroll I | Check the right side of the equipment shop. |
| Morning Star | Find the small house northwest of the item shop. Go behind it and descend the brown wooden stairs into the underground passage. |
| Aegis Robe | Enter the leftmost room on the inn's second floor. |
Town of Felicitas
| Reward | Route to the chest |
|---|---|
| Unicorn Horn ×2 | Climb the ladder beside the armory and enter the room above. |
| Ice Scroll I ×2 | Follow the path alongside the armory ladder. |
| Tent | Take the hidden path left of Rolan's house in western town. Climb the ladder, then head east across the wooden bridge to the chest. |
Town of Mitra
| Reward | Route to the chest |
|---|---|
| Ether | Go beyond the house east of the accessory shop. |
| Phoenix Down ×3 | Search beside the dock. |
| Phoenix Down | Go past the northeastern house beside the Chocobo. |
| Ether | Follow the western path beside the weapon and armor shop. |
| Tent | Enter the obscured door behind the inn. The chest is left of the innkeeper in the staff area. |
Village of Kol
| Reward | Route to the chest |
|---|---|
| Tent | Enter the house beside the Chocobos. |
| Antidote Herb ×3 | Enter the house near the western exit. |
Village of Sunioo
| Reward | Route to the chest |
|---|---|
| Resonate Staff | Enter the large eastern igloo with a snowman outside. |
| Arcane Coat | Search behind the trees northeast of the item shop. |
| Fuma Shuriken ×2 | Go southeast of the entrance onto the slippery ice. Check the southeastern corner beneath the inn roof's obstruction. |
| Phoenix Pinion ×2 | Enter the large eastern house and look between the chimney and shelves. |
Zoldaad, the Imperial Capital
| Reward | Route to the chest |
|---|---|
| Healing Spring ×2 | Inside the inn, pass through the counter door. The chest is right of the innkeeper. |
| Phoenix Pinion | In the Residential District, enter the open doorway on the left. Search the southern part of the house beside two pots. |
Dungeon treasure chest locations
Use the dungeon name rather than the reward to track progress. Magicite Shard appears in several destinations, including Siren's Tower, Wind Shrine, Cave of Waters, Water Shrine, and Underground Tunnel.
Cave of Waters
| Reward | Route to the chest |
|---|---|
| Magicite Shard | In the boat-maze area, board the boat and travel north. |
| Total Calisthenics | Ride to the boat maze's northeastern corner, then move south and east into the cave opening on the right. |
| Shuriken ×3 | In the second boat maze, raise the water and ride north. |
| Ice Scroll I ×2 | In the second boat maze, take the western branch at the fork. |
| Ninja Gear | In the third boat maze, reach the northwestern disembarkation point. Lower the water to access the chest on the right. |
| Phoenix Pinion | In the large-waterfall area with stone platforms, climb to the second level and cross the wooden bridges. |
Crystal Tower
| Reward | Route to the chest |
|---|---|
| Ancient Katana | During Chapter 8, search west of the save point. |
Dungeon
The Master Key is the starting point for this cell sweep. Keep the southwest cell room separate from the earlier prison areas so you can distinguish the Pulse Cannon chest from the Phoenix Pinion rewards.
| Reward | Route to the chest |
|---|---|
| Pulse Cannon | With the Master Key, go southwest into the other cell room and open the second cell on the right. |
| Phoenix Pinion ×2 | With the Master Key, open the first cell to the north. |
| Turbo Ether | With the Master Key, backtrack east to the soldier's cell. Take the hidden passage west of him. |
| Phoenix Pinion | With the Master Key, revisit the earlier cells and open the one holding a Young Woman and an Old Woman. The chest is on the left. |
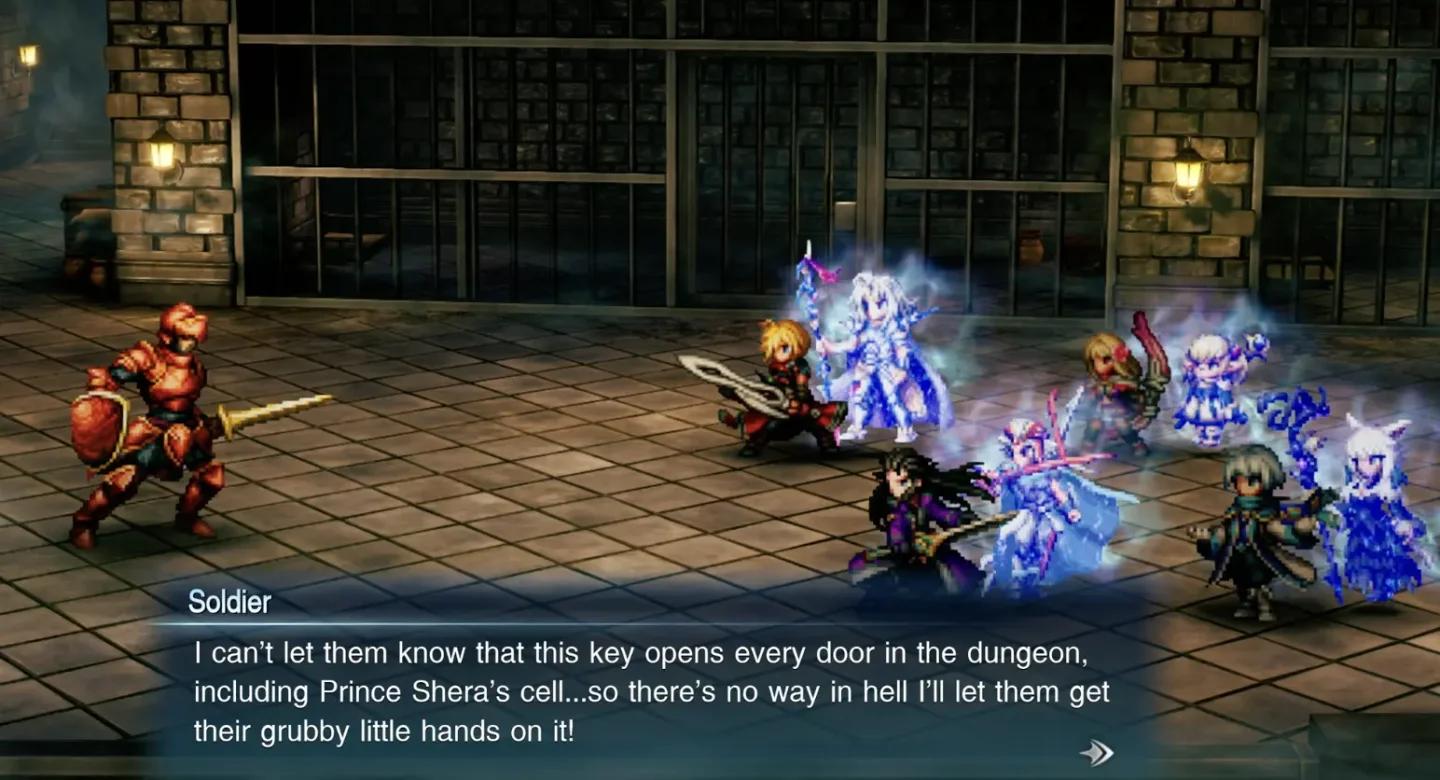
Unlock the Pulse Cannon cell
Earth Shrine
| Reward | Route to the chest |
|---|---|
| Potion | Check directly outside the shrine entrance. |
| Ether | Open the separate chest directly outside the shrine entrance. |
| Phoenix Down | After entering, descend the eastern stairs. |
| Nodachi | Descend the southwestern stairs. The staircase above conceals the approach. |
| Flame Scroll I ×2 | Search below the broken walkway on the shrine's western side. |
| 400 Gil | Move into the next area northeast of the entrance. |
| Bulletproof Vest | Search the next area northeast of the entrance. |
| Potion ×3 | Check the same northeastern area for a separate chest. |
Fina's Psyche
| Reward | Route to the chest |
|---|---|
| Mist Hi-Potion ×2 | In the second tent-filled area, enter the tent above the Hessian Soldier. |
| Lunar Whip | On the route toward the Hessian base, take the southern path, then turn west to its end. |
Gronoa Shrine
| Reward | Route to the chest |
|---|---|
| Rod of Focus | During Chapter 6, descend the first ladder, climb the ladder at the far end, and continue east. |
| Hermes Sandals | During Chapter 6, check the eastern end of the area immediately before the stone elevator. |
Kolobos Ruins
| Reward | Route to the chest |
|---|---|
| Knife of Poison ×2 | Find the stairs behind the northeastern pillars. |
| Prickly Straitjacket | After descending through the first area, continue beyond the laboratory equipment. |
| Antidote Herb ×3 | In the second area, climb the stairs beside the fallen pillar. |
| Ether ×2 | Search the northeastern part of the second area. |
Mobliz Shipyard
| Reward | Route to the chest |
|---|---|
| Protective Overcoat | Go east of the first elevator to the fenced generator area. Slip through its lower-right gap, descend the ladder, and head northeast. |
| Chocobo Down Charm | Take the left-side elevator, then follow the northern route to the small room containing Citrine Pot. Search the room's upper-right corner. |
| Eye Drops ×3 | Search southwest of the second save point, before the boss elevator. A green container below obscures the chest. |
| Lightning Scroll I ×2 | Activate the third elevator in the area's upper corner and ride it down. |
Mt. Reizan
| Reward | Route to the chest |
|---|---|
| Resonance Stone | During Chapter 7, check near the bridge on the path farther into the mountain. |
Mt. Thunderclap
| Reward | Route to the chest |
|---|---|
| Cape of the Raiju | Pay Lid 1,000 Gil to place a ladder on the cliff left of the main entrance, then follow the upper path. The back entrance also reaches this area. |
| 800 Gil | Reach the west entrance using the repaired bridge east of the main entrance. Inside, go right, then take the southern branch. |
| Moon Saber | Enter through the west entrance, turn left, and follow the southern path to the chest against the cliff. |
| Power Wristbands | Enter through the west entrance and go left to the north/south fork. Take the northern path, then turn right into the dead end. |
Nameless Ruins
| Reward | Route to the chest |
|---|---|
| Magi-Blaster | To get behind the ground-floor obstruction, climb to the second floor and descend the stairs at its western end. |
| Impact Wand | After defeating Tellus, reach the end of the large hall on the top floor. |
| Tyr's Armor | Open the chest beside the entrance statue after completing the three-statue sequence detailed below. |
| Magicite | Follow the southeastern path away from the second save point to its end. |
Quarry Cave
| Reward | Route to the chest |
|---|---|
| Ancient Accessory | Use an airship to reach Quarry Cave southeast of the Imperial Capital, then collect the chest inside. |
Research Center Ruins
| Reward | Route to the chest |
|---|---|
| Fortress Gear | During Chapter 6, search the level 2 laboratory. |
Sanctissimus Shrine
| Reward | Route to the chest |
|---|---|
| Hero's Blade | On the fourth floor, check the western side of the room immediately before the final trial. |
Siren's Tower
| Reward | Route to the chest |
|---|---|
| Ether | Search before the stairway. |
| Ether ×2 | Check beside the eastern staircase on the third floor. |
| Monk's Prayer Beads | Descend the staircase on the third floor to reach the chest on the second floor. |
| Magicite Shard | Beyond the Gilgamesh encounter, follow the curved western path. |
| Sakura-Fubuki | At the top-floor save point, head east and ride the elevator. |
Tower of Mysidia
| Reward | Route to the chest |
|---|---|
| Smelling Salts ×3 | Climb the stairs at the entrance, turn left, and follow the path to its end. |
| Bullseye Mace | Search the second-floor balcony. |
Underground Tunnel
| Reward | Route to the chest |
|---|---|
| Lucky Bell | On the route toward Rebel Hideout, pass the ramp and ladder, then enter the hidden western passage. |
| Ether ×2 | Go east of the entrance to the wooden bridge, then turn south. |
| Magicite Shard | Look beneath the bridge, northeast of the yellow pot enemy. |
| Mist Turbo Ether | After Weapons Factory, return along the western route. At the second save point, climb the ladder, head east, and open the cell. |
| Mist Turbo Ether | After obtaining the Master Key, leave Dungeon toward the east and open the cell along that route. |
Water Shrine
| Reward | Route to the chest |
|---|---|
| Magicite Shard | Board the boat at the large waterfall and enter the concealed opening behind its right side. |
| Scale Mail | Use the boat to enter the concealed opening behind the middle of the large waterfall. |
| R'lyeh Text | In the submerged-crate area, lower the water using the small crystal. Push the lone crate forward, enter the right-hand path, and use Open at the hidden chest. |
| Lightning Scroll I ×3 | Lower the water in the submerged-crate area, then go north of the crate. |
| Piercing Mace | Enter the northern room of the cross-shaped junction. Go north, then west across the submerged crate bridge. |
| Calm Armlet | In that northern room, lower the water, use the boat to reach and move the lone crate, then raise the water and cross northeast. Full steps follow below. |
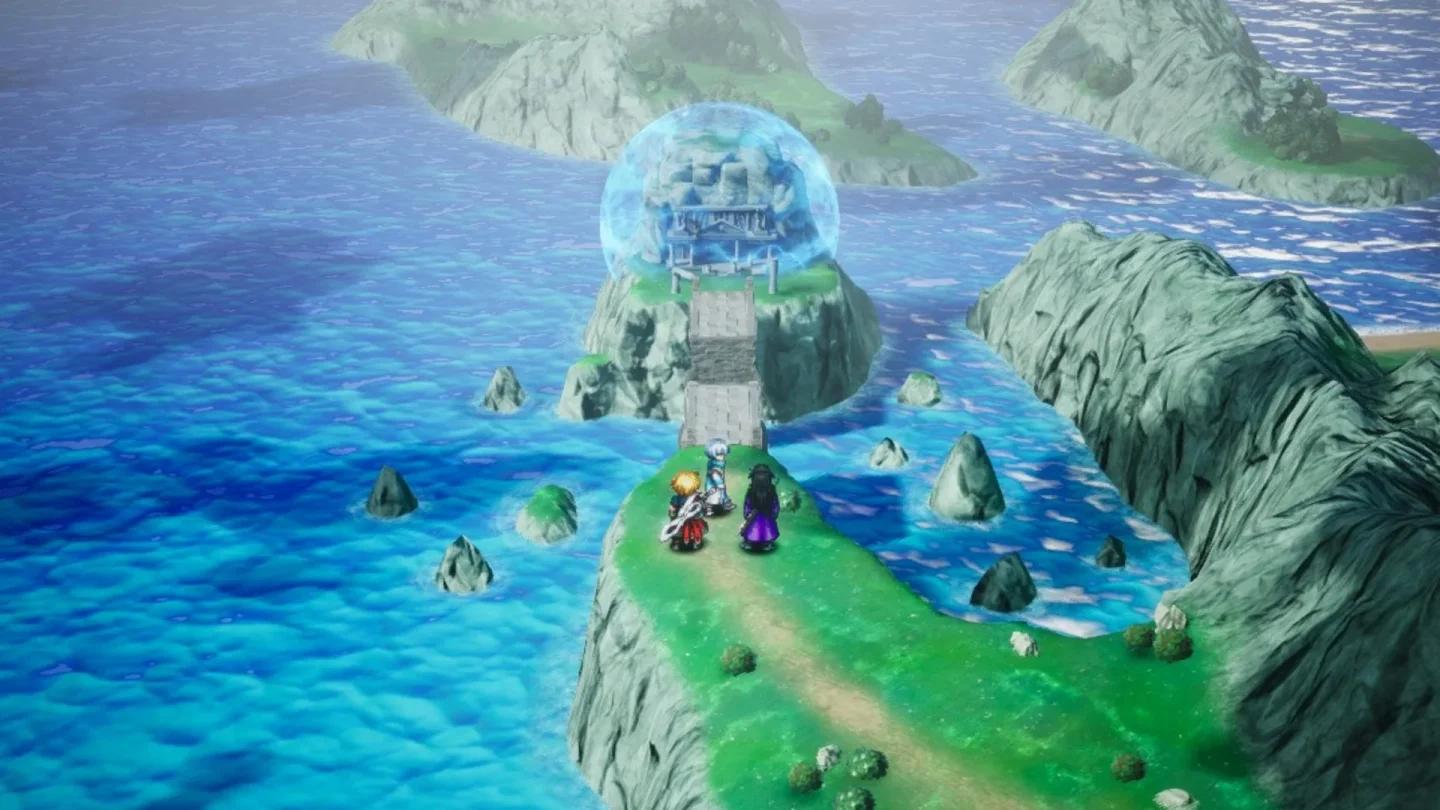
Rebuild the Calm Armlet route
Waterfall Way
| Reward | Route to the chest |
|---|---|
| Eye Drops ×2 | In the second area after the cutscene, go right through the waterfall and follow the passage to its end. |
| Devout's Armor | After interacting with Gilgamesh, go left and descend the ladder. |
Weapons Factory
| Reward | Route to the chest |
|---|---|
| Lightning Scroll I | In the first area, ride the eastern conveyor belts to the chest in their center. |
| Hoodwink Garb | Rotate the moving platforms using the switches in the multi-switch room until you have a route to the chest. |
| Knife of Blind ×3 | In the first area, climb the western platforms and the ladder toward the upper lava area, then continue west. |
| Magicite | Climb to the first area's ceiling scaffolding. Use the three crystal switches to rotate platforms toward the upper-left chest. |
Wind Shrine
Wind Shrine is in Dirnado, the Continent of Wind, and you first enter it during Chapter 2. Its three chest routes split around elevators, stairs, and a lower ladder.
| Reward | Route to the chest |
|---|---|
| Magicite Shard | After descending by elevator, take the southeastern route to a brown ladder. Climb down and go west. |
| Tsukiyo no Tachi | Descend using the elevator in the upper-left area, then go west to another elevator above a staircase. Ride it and check on the left. |
| Armor of Gales | After the upper-left elevator descent, go west and south to the area with a floating platform on the left. Take the lower-right path, then turn west. |
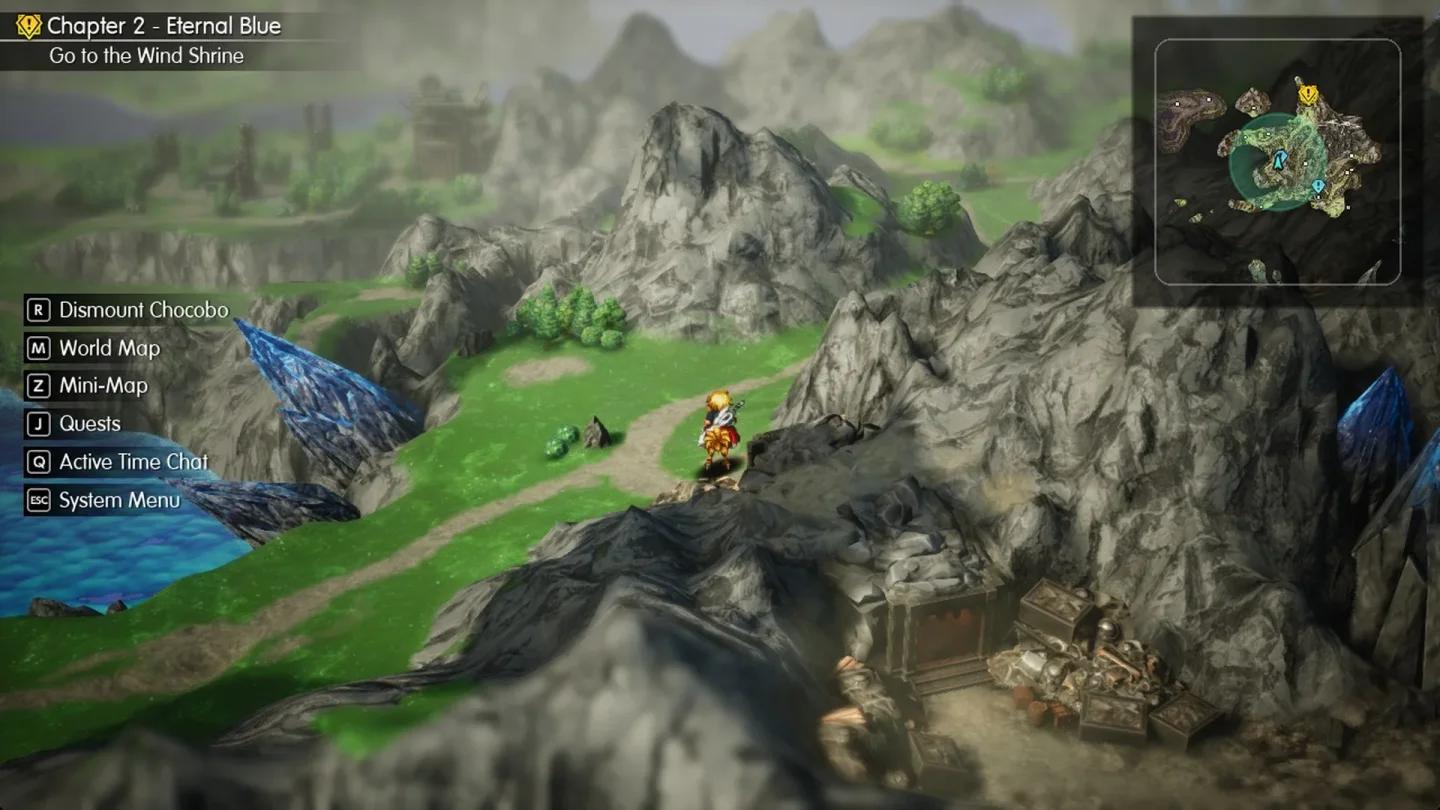
Take the elevator for Tsukiyo
For a separate collectible sweep, use the Tablet Shard locations and rewards guide. Wind Shrine's Tablet Shards 25, 26, and 27 are separate pickups from the three chest rewards above.
Zoldaad Castle
| Reward | Route to the chest |
|---|---|
| X-Potion | Climb the left stairs and enter the first second-floor room. Search its upper-right corner near the soldier. |
| Kikokusenga | Climb the right stairs and enter the first room with a soldier in the middle. After receiving the Throne Room Key from the Captain during the cutscene, check the upper-left corner. |
| Kaiser Sword | After defeating the throne-room boss, search behind the hedge west of the throne. |
| Mist Turbo Ether | After the throne-room boss, follow the western path and search below the staircase. |
Hidden and easily overlooked chests
Some FF Resonance chest routes hide the approach rather than the chest itself. Nodachi sits below an obscuring staircase in Earth Shrine, while Protective Overcoat requires a gap behind Mobliz Shipyard's generators.
How do you find Black Garb in Grandshelt?
Defeat Hell's Rider, then locate the knight statue in Grandshelt. Walk through the nearby hidden wall to enter the concealed room containing Black Garb.
The statue is the useful landmark here. The other post-boss chests contain Phoenix Down and Phoenix Down ×2, reached through a room and the southeastern hallway instead.
How do you reach Calm Armlet in Water Shrine?
For Calm Armlet, moving the crate is only part of the route. You need the water raised again so the crates form the crossing toward the northeastern chest.
- At the cross-shaped junction, enter the northern room.
- Reach the room's lower-left corner and lower the water.
- Board the boat and travel to the small area containing a lone crate.
- Push that crate.
- Return to the small crystal and raise the water.
- Cross the crate bridges toward the northeast and open the chest.
What is the Tyr's Armor statue order?
The Tyr's Armor chest is beside the statue near the entrance of Nameless Ruins. Activate the statues in this order before returning to open it:
- The statue on the top floor.
- The first-floor statue beyond the fallen pillar.
- The statue beside the chest near the entrance.
Common mistakes
- Stopping at the inn counter in Mitra: The Tent chest is reached through an obscured entrance behind the inn.
- Searching only the visible floor in Earth Shrine: Nodachi's approach is concealed by the stairs above it.
- Taking only one waterfall opening in Water Shrine: The right opening holds Magicite Shard, while the middle opening holds Scale Mail.
- Searching Siren's Tower's second floor directly: Monk's Prayer Beads requires descending a staircase on the third floor.
- Missing the container obstruction in Mobliz Shipyard: Eye Drops ×3 is southwest of the second save point, hidden by the green container below it.
Chests requiring a return visit
Treat the Master Key cells and Quarry Cave as return targets if you reach their access restrictions first. Grandshelt and Zoldaad Castle also have chests tied to events within those locations, so check those conditions before leaving.
| Trigger | Chests to check | Next action |
|---|---|---|
| Charlotte joins | Grandshelt's Flame Scroll I ×3, Flame Scroll I ×2, and Antidote Herb ×4 | Explore east, then sweep the western stairs and connected rooms. |
| Hell's Rider defeated | Grandshelt's Phoenix Down, Phoenix Down ×2, and Black Garb | Check the western room, southeastern hallway, and knight-statue passage. |
| Mom Bomb defeated | Dwarven Forge's Headband | Go south, then right across the wooden bridge. |
| Weapons Factory completed | Underground Tunnel's western-route Mist Turbo Ether | Return to the second save point, climb the ladder, and head east to the cell. |
| Master Key obtained | Dungeon's four chest routes and the Underground Tunnel cell east of Dungeon | Revisit the prison rooms and open the relevant cells. |
| Throne Room Key obtained | Zoldaad Castle's Kikokusenga | Check the upper-left corner of the first room reached using the right stairs. |
| Throne-room boss defeated | Zoldaad Castle's Kaiser Sword and Mist Turbo Ether | Search west of the throne and beneath the staircase along the western route. |
| Tellus defeated | Nameless Ruins' Impact Wand | Search the end of the large top-floor hall. |
| Airship available | Quarry Cave's Ancient Accessory | Travel southeast of the Imperial Capital to reach the cave. |
Does Cape of the Raiju require paying Lid?
You can reach Cape of the Raiju without paying Lid 1,000 Gil. Paying creates the ladder on the cliff left of Mt. Thunderclap's main entrance, but the back entrance reaches the same chest area.
For the mountain's other chests, use the west entrance reached across the repaired bridge east of the main entrance. That route leads to 800 Gil, Moon Saber, and Power Wristbands, rather than replacing the Cape of the Raiju approach.
Final treasure cleanup checklist
Before closing out your chest search, check the routes that are easiest to confuse: Water Shrine's waterfall openings, Siren's Tower's descending staircase, and Dungeon's separate cell rooms.
- Check both entrance chests and all three northeastern-area chests in Earth Shrine.
- Search behind Mitra's inn and below Rolan's house route in Felicitas.
- Check both hidden paths beside Grandshelt's castle-entrance save point.
- Complete the post-Hell's Rider rooms and Black Garb passage.
- Distinguish Mt. Thunderclap's back-entrance route from its west-entrance branches.
- Inspect Mobliz Shipyard's generator gap and green-container obstruction.
- Finish all three Wind Shrine chest routes.
- Check both waterfall openings and the crate puzzles in Water Shrine.
- Revisit Dungeon and Underground Tunnel cells after obtaining the Master Key.
- Complete the Nameless Ruins statue sequence for Tyr's Armor.
- Reach Quarry Cave by airship for Ancient Accessory.
- Check west of Crystal Tower's save point for Ancient Katana during Chapter 8.
Pro tips
Best for Lasswell before Aether: Make the Tsukiyo no Tachi detour in Wind Shrine. Its reduction to damage taken from Aether's Wind attacks gives that chest an immediate use before the dungeon boss.
Best for avoiding a repeated prison search: Record the chest reward beside each blocked cell. Dungeon has separate Phoenix Pinion and Phoenix Pinion ×2 chests, while Underground Tunnel has two Mist Turbo Ether entries with different route descriptions.
If you are tracking Magicite rewards alongside chest loot, keep quest rewards on their own list. Arise, Mechabo! and Lyrical Riddles award Magicite Shard, while Mechabo Evolved awards Magicite; use the sub quest locations and rewards guide for those objectives.
Frequently asked questions
Where is the Tent chest in Town of Mitra?
Enter the obscured doorway behind Mitra's inn. It leads to the innkeeper's area, where the Tent chest sits to the innkeeper's left.
Where is Ancient Katana?
During Chapter 8, search west of the save point in Crystal Tower for the Ancient Katana chest.
Can you collect Ancient Accessory before getting an airship?
Quarry Cave requires an airship to access. Once you have one, travel southeast of the Imperial Capital and collect Ancient Accessory from the chest inside.
Where can you track Legendary Arms next?
Use the Legendary Arms locations guide to plan that weapon search separately from your town and dungeon chest checklist.