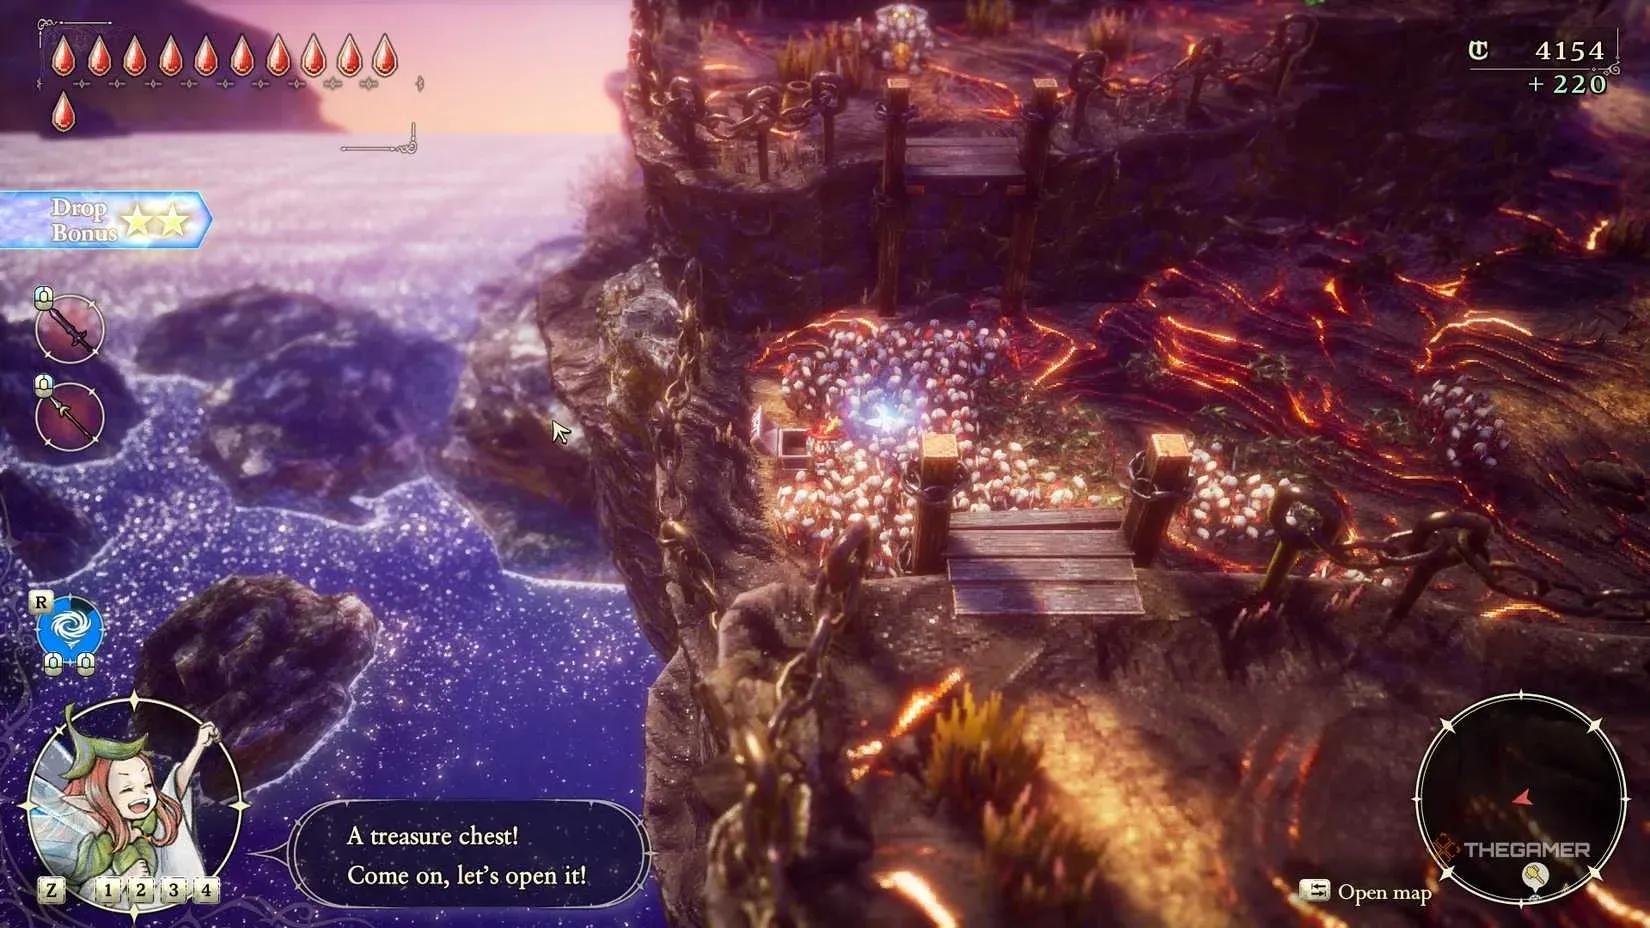
The Adventures of Elliot: The Millennium Tales handles health upgrades the same way classic action adventure games have for decades: collect four small pieces to form one complete unit. Here, those pieces are Shards of Life, small red gems scattered across every region and age. Each group of 4 shards converts into one tear, which represents a single unit of Elliot's health. The cap sits at 20 tears, meaning you need all 60 shards to hit max HP. This guide covers every location across all four ages, split by how you get them.

Blue chests hold most shards
What are Shards of Life and how do they work?
Shards of Life are the primary way to increase Elliot's maximum health. Unlike most RPGs, there is no traditional level-up system that boosts your HP automatically. Collecting shards is one of the only reliable ways to make Elliot more durable, which makes hunting them down a genuine priority rather than optional busywork.
Shards come from two sources: blue chests hidden throughout the overworld and dungeons, and Shrines of Life, dedicated challenge rooms that ask you to complete either a combat trial or a puzzle before handing over the reward. Shrine puzzles frequently revolve around one of Faie's spells, so expect to revisit some shrines after unlocking abilities you did not have on your first pass.
One naming note worth flagging: the locations called Eastern and Western Fields of Flon in some parts of the game are the same areas referred to as Eastern and Western Hucarea before you complete a specific side quest. Both names refer to the same physical regions.


All Age of Safekeeping Shard of Life locations
There are 16 Shards of Life in the Age of Safekeeping. A few require bombs or Secret Shortcuts that you unlock during the Age of Reconstruction, so plan to backtrack.
| Location | How to Get | Notes |
|---|---|---|
| Eastern Fields of Flon | Shrine of Life 1 | Southwest side of the area |
| Western Fields of Flon | Blue chest | Past the ruined house, follow the upper path to a chest behind a tree |
| Eddartrayl | Blue chest | Use the Southern Caves Desert Exit, head west to a small area with a guidepost |
| Mist Ruins (Neverwither) | Blue chest | Eastern side of sublevel two, past arrow traps on a narrow path |
| Western Fields of Flon | Blue chest | Requires Secret Shortcut 1, which needs bombs to open (unlock in Age of Reconstruction) |
| Forest Ruins (Neverwither) | Blue chest | Second level, west side; use moving platforms and plant trampolines to reach the upper floor |
| Westerea | Shrine of Life 9 | Southwest of the Rainbow Lotus dungeon |
| Westerea | Blue chest | North of Rainbow Lotus via the west ladder, enter Monster Trail 3, then use Secret Shortcut 6 |
| Westerea | Shrine of Life 10 | Entrance hidden in poisonous vegetation northeast of Rainbow Lotus; use Monster Trail 2 |
| Geared Ruins | Blue chest | Second level, east side; jump across the gear bridge to reach the chest |
| Garretbelt | Shrine of Life 18 | From the Mount Phoenix Approach guidepost, head south and drop off the edge |
| Westerea | Blue chest | East of the Northern Westerea guidepost |
| Whiterea | Blue chest | Use Secret Shortcut 3 near the river |
| Whiterea | Shrine of Life 5 | North of Whiterea, also reached via Secret Shortcut 3 |
| Neverwither | Shrine of Life 16 | Southeastern part of Neverwither |
| Westerea | Blue chest | Falls Caves, south of the Northern Tower; swim north from the river beside the Northern Westerea guidepost |

Shrines require combat or puzzles
All Age of Reconstruction Shard of Life locations
The Age of Reconstruction contains 18 shards, the most of any single age. Several require the bomb item, the hammer, or the dive ability, which you pick up during this age's campaign progression.
| Location | How to Get | Notes |
|---|---|---|
| Neverwither | Shrine of Life 3 | Secret Shortcut 2, southeast of Neverwither; bomb required to open the entrance |
| Neverwither | Blue chest | West of the Littlehope Village Northern Entrance guidepost; bomb the boulders blocking the ladder |
| Whiterea | Shrine of Life 4 | Secret Shortcut 3, northwest entrance |
| Whiterea (Northern Caves) | Blue chest | Northwestern entrance of Whiterea; use the spear to break vases, then jump to the chest on the east side |
| North of Western Fields of Flon | Blue chest | Small island north of the Western Fields of Flon |
| Western Fields of Flon | Shrine of Life 2 | North of the Western Fields of Flon |
| Northern Tower (Westerea) | Blue chest | Sublevel one, east room; align two pillars to bridge across to the chest platform |
| Westerea | Blue chest | Right of the Southern Westerea guidepost |
| Eddartrayl | Blue chest | From the Geared Ruins, head southwest and follow the upward path |
| Eddartrayl | Shrine of Life 8 | Northwest of Eddartrayl; bomb open Secret Shortcut 4 on the southwestern side |
| Southern Caves (Eddartrayl) | Blue chest | Passed during the campaign en route to the Shrine of Mystic Ignite; hammer required to open the platform path |
| Neverwither | Blue chest | Southeast of Neverwither; swim across the small lake south of the Eastern Cave guidepost |
| Grandtree (Neverwither) | Blue chest | First level, north side; drop from the southwest area on the second level |
| Doorway Ruins (Neverwither) | Blue chest | Sublevel two, west side; room with two moveable mirrors, chest on the south platform |
| Garretbelt | Shrine of Life 7 | Western side of Garretbelt, accessible via the Western Caves |
| Westerea | Blue chest | Southwest of the Water Ruins; unlock dive ability first, then use the ladder to reach the eastern platform |
| Water Ruins surroundings | Shrine of Life 6 | Right side of the Water Ruins |
| Dragonpillar (Whiterea) | Blue chest | Sublevel three; chest is visible as soon as you reach the level |
All Age of Magic Shard of Life locations
The Age of Magic has 13 shards. Most are straightforward, but two require Faie's Vacuum spell and the dive ability respectively, so check your toolkit before hunting these down.
| Location | How to Get | Notes |
|---|---|---|
| Eastern Fields of Flon | Blue chest | Northeastern side, right of the Secret Shortcut 1 entrance (behind a breakable wall) |
| Eastern Fields of Flon | Shrine of Life 11 | North side of the Eastern Fields of Flon |
| Eddartrayl | Shrine of Life 13 | Southeastern side of Eddartrayl |
| Westerea | Shrine of Life 12 | Northeast of the Rainbow Lotus dungeon |
| Garretbelt | Blue chest | North of Garretbelt; go through Monster Trail 5 after getting the Western Caves key |
| Garretbelt | Shrine of Life 17 | Southern Garretbelt, near the Doorway Ruins |
| Fire Ruins (Garretbelt) | Blue chest | First level, northwest side; jump across large square platforms to reach the corner chest |
| Eddartrayl | Shrine of Life 14 | Use Secret Shortcut 3 to reach the upper snowfield in Whiterea |
| Whiterea | Blue chest | Secret Shortcut 3, upper snowfield area |
| Ice Ruins (Whiterea) | Blue chest | Unlock Faie's Vacuum spell first; head to the west wing, use Vacuum to open the door, then go northeast |
| Whiterea | Shrine of Life 15 | West shore of Whiterea; unlock dive ability and enter Monster Trail 4 east of the Ice Ruins |
| Water Ruins (north of Western Fields of Flon) | Blue chest | Sublevel two; activate the eastern orbs to raise the water level, swim south, then head right |
| Rainbow Lotus (Westerea) | Blue chest | First level; go to sublevel one to find the stairs leading up to the chest area |

Vacuum unlocks the Ice Ruins shard
All Age of Budding Shard of Life locations
By the Age of Budding, you should have most abilities unlocked. All 13 shards here are accessible with a full toolkit, though two specifically require bombs and the dive ability together.
| Location | How to Get | Notes |
|---|---|---|
| North of Western Fields of Flon | Blue chest | Bomb the wall to enter the lake, swim west, dive to reach the beach, then climb the island ladder |
| Western Fields of Flon | Shrine of Life 19 | Northern side of the area; go around to find the ladder leading up to the shrine |
| Desert Caves (Eddartrayl) | Blue chest | Drop through the hole on the first level, take the stairs northwest on sublevel one, reach sublevel two |
| Eddartrayl | Shrine of Life 20 | Southwest of Eddartrayl; take the Southern Caves Desert Exit and head southwest |
| Western Fields of Flon | Blue chest | Enter the Southern Caves Desert Exit on the southwest side of Eddartrayl, head north |
| Neverwither | Shrine of Life 23 | Near the Grandtree; Monster Trail 6 entrance is on the river southeast of the shrine |
| Dragonpillar (Whiterea) | Blue chest | Sublevel three, west side; use Warp magic to reach the chest |
| Whiterea | Blue chest | Northwest of Whiterea, near the Northern Whiterea guidepost |
| Mount Phoenix (Garretbelt) | Blue chest | First level, west side; light the nearby pillar to raise the bridge, then open the chest |
| Garretbelt | Shrine of Life 24 | Northern Garretbelt; go through Monster Trail 5 |
| Westerea | Shrine of Life 22 | Northwest of Westerea via Monster Trail 3 |
| Water Ruins surroundings | Blue chest | Largest island southeast of the Water Ruins; approach from the northern side of the Western Fields of Flon |
| Garretbelt | Blue chest | Secret Shortcut 7 passage, southwest of Mount Phoenix |
Complete Shrine of Life reference table
All 24 Shrines of Life in one place, sorted by number. Shrines always offer a choice between a combat trial and a puzzle, and puzzles frequently use Faie's spells.
| Shrine # | Age | Location |
|---|---|---|
| 1 | Safekeeping | Eastern Fields of Flon (Hucarea), southwest of Huther |
| 2 | Reconstruction | Western Fields of Flon, near the Eastern Eddartrayl fast travel point |
| 3 | Reconstruction | Neverwither, through Secret Shortcut 2 |
| 4 | Reconstruction | Whiterea |
| 5 | Safekeeping | Whiterea, through Secret Shortcut 3 |
| 6 | Reconstruction | Westerea, south of Heurich's camp through the water |
| 7 | Reconstruction | Eddartrayl, north of the fast travel point |
| 8 | Reconstruction | Eddartrayl, through Secret Shortcut 4 |
| 9 | Safekeeping | Westerea, west side |
| 10 | Safekeeping | Westerea, through Monster Trail 2 |
| 11 | Magic | Eastern Fields of Flon, through Secret Shortcut 1 |
| 12 | Magic | Westerea, east side |
| 13 | Magic | Eddartrayl, southern area |
| 14 | Magic | Eddartrayl, through Secret Shortcut 5 |
| 15 | Magic | Whiterea, through Monster Trail 4 |
| 16 | Safekeeping | Neverwither, central south |
| 17 | Magic | Garretbelt, through Secret Shortcut 4 |
| 18 | Safekeeping | Garretbelt, through Monster Trail 5 and down a ledge |
| 19 | Budding | Western Fields of Flon |
| 20 | Budding | Eddartrayl, through the Southern Caves |
| 21 | Budding | Southwest of the Water Ruins (requires dive) |
| 22 | Budding | Westerea, through Monster Trail 3 |
| 23 | Budding | Neverwither, near the Grandtree via Monster Trail 6 |
| 24 | Budding | Garretbelt, eastern exit to Monster Trail 5 |
What abilities do you need to collect all shards?
Here is a quick summary of the tools required for locked shards:
- Bombs: Open cracked walls and Secret Shortcuts 1, 2, and 4; destroy boulders blocking ladders
- Hammer: Required for the Southern Caves platforming section in the Age of Reconstruction
- Dive ability: Needed for several Westerea chests and Shrine of Life 15 and 21
- Faie's Vacuum spell: Required for the Ice Ruins chest in the Age of Magic
- Faie's Warp spell: Required for the Dragonpillar chest in the Age of Budding
- Monster Trail keys: Specific trails require keys to enter (Western Caves key for Monster Trail 5 in Garretbelt)
If you want to maximize efficiency, do a clean sweep of each age for the easy open-world chests first, then return for shrine challenges and ability-gated shards once your toolkit is complete.
For players looking to build out Elliot's combat potential alongside his health pool, the best bow magicite build guide covers how to pair weapon boons with a fully upgraded health bar. If you are still working through the game and want to know how long the full collection run takes, check out the how long to beat guide for a realistic time estimate. Hunting shards goes hand in hand with other collectibles too, so the all cat locations guide is worth bookmarking if you plan a completionist run. For the full suite of guides covering weapons, builds, and more, head to the The Adventures of Elliot: The Millennium Tales guides hub.